|
What is the Pixels setting of a tracking link used for?
The Pixels setting of a tracking link allows you to fire tracking pixels or execute JavaScript code when you can’t insert pixels or JavaScript code on the page to which the tracking link redirects.
This would probably be clearer with an example ...
Suppose you have an opt-in page that leads directly to an affiliate offer. Normally, you would put an action pixel on the page after the email opt-in to record that the opt-in happened. But in this example, you can’t put a pixel on the affiliate network sales page because you can’t control that page and can’t edit it.
This is a perfect use for the Pixels setting Instead of firing the pixel once you land on the destination page, you would fire the pixel while the link redirects to the destination page.
To set this up, you would use a tracking link as the Thank You page URL from your opt-in page. You would then set up the tracking link to point to the sales page of the affiliate offer and you would insert your pixel or JavaScript code into the Pixels setting of the tracking link.
With this setup, when the opt-in page redirects through the tracking link to the sales page of the affiliate offer, the pixels will fire and the JavaScript code will execute.
You can often use this technique when you need to fire a pixel or execute a piece of JavaScript code but cannot edit the page where you would normally insert them. If you can point a tracking link at the page, you can set everything up using the Pixels setting of the tracking link.
Just follow these steps:
| 1. | Create a new tracking link and set the Primary URL to the destination page. |
| 2. | If you’re trying to fire a ClickMagick tracking pixel, create a new tracking pixel using the Pixels setting setting of the tracking link. Just click on the button that says “Add ClickMagick Tracking Pixel” and pixel options will be shown: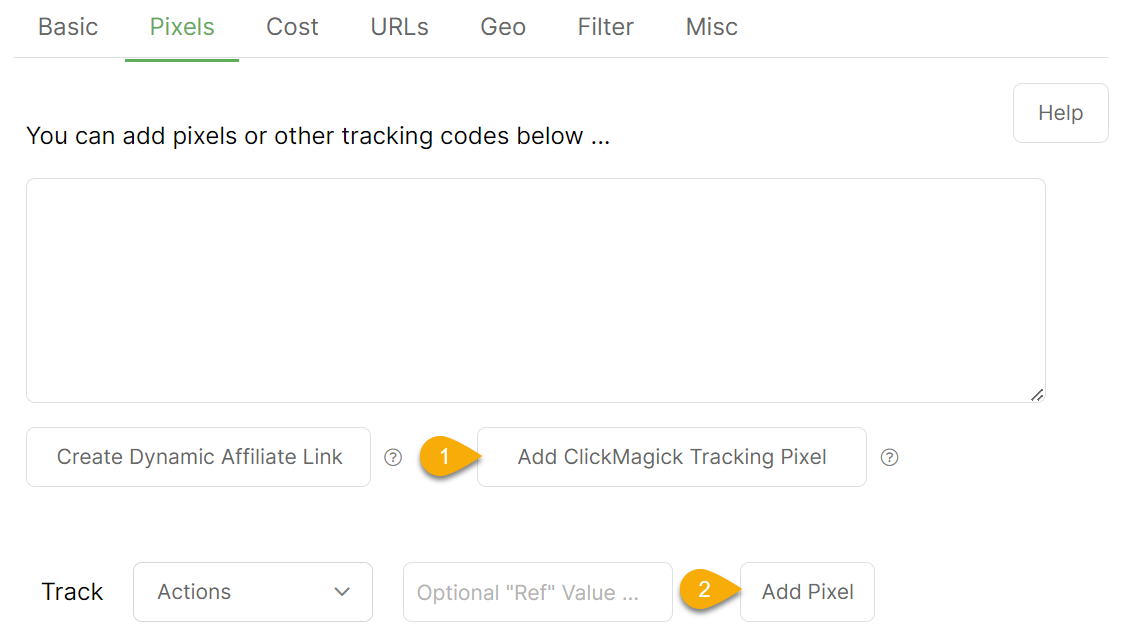
|
| 3. | Choose what type of pixel you want to use (Action or Engagement), choose a “Reference” value, and click the “Add Pixel” button to add the pixel to the tracking link. You can paste those into the pixel setting if you have non-ClickMagick pixels, such as your retargeting pixels. It’s perfectly okay to enter more than one pixel. |
| 4. | Save the tracking link. |
You can now direct clicks to the tracking link, which will fire all the pixels and tracking code in the Pixels setting and then redirect to the original destination page in your Primary URL. Nice and clean!
Caution: Tracking pixels will only fire if the click is sent to your Primary URL or a split test URL. Pixels will NOT fire if the click is sent to your Backup URL, Mobile URL, or any other re-routed URL.
Note: If you need to pass a click ID through the tracking link, pass the click ID as the first Sub-ID to the tracking link and then add the
s1=[s1] query string parameter to your Primary URL. ClickMagick will automatically replace the [s1] token in your Primary URL with the first sub-ID you passed to the tracking link (your click ID). For more information on how to pass click IDs to tracking links, see this article:Article 298 Last updated: 07/30/2023 8:32:33 AM
https://www.clickmagick.com/kb/?article=298