|
How do I track ClickBank order form impressions?
Caution: The only method ClickBank provides for tracking order form impressions relies on using a 3rd-party “Tracking Pixel”.
This is an outdated form of tracking, and it’s no longer very accurate due to changes in the industry and the phasing out of 3rd-party cookies.
Hopefully ClickBank will implement a server-to-server solution for this in the near future, but in the meantime please understand that discrepancies are to be expected, and it has nothing to do with ClickMagick.
Step 1 - Go to the Integrated Sales Reporting Section
Log in to ClickBank, click on “Vendor Settings”

Next, click on the “My Site” tab in the menu bar:

Step 2 - Add Your Engagement Pixel
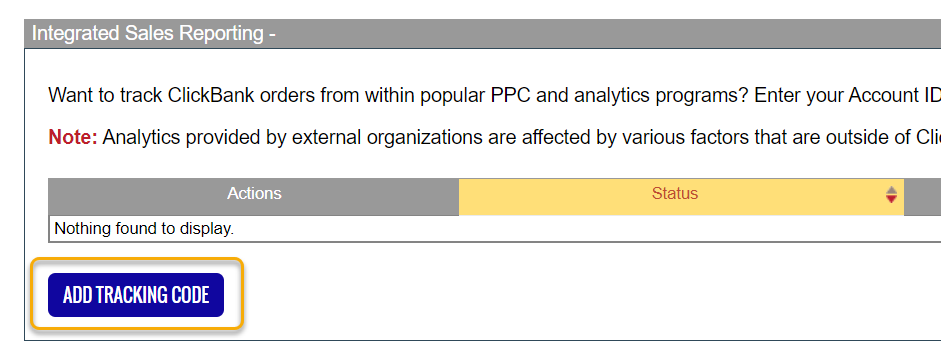
Scroll down the page and click on the “Add Tracking Code” button under Integrated Sales Reporting:
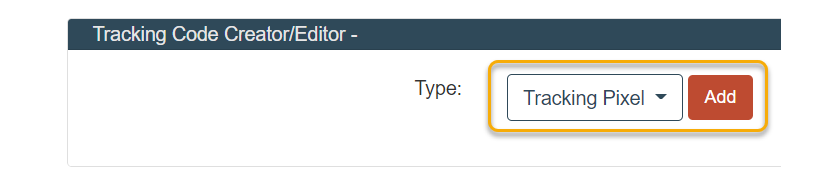
On the next screen, set your Type as Tracking Pixel, then click the “Add” button:
Next, you’ll enter your Tracking Pixel URL.
Use the engagement pixel for your account below:
https://www.clkmc.com/api/e/pixel/?uid=[USERID]&ref=checkoutTrack As: Affiliate (if you only promote products as an affiliate), Vendor (if you sell your own products on ClickBank)
Where to Fire: Order Form
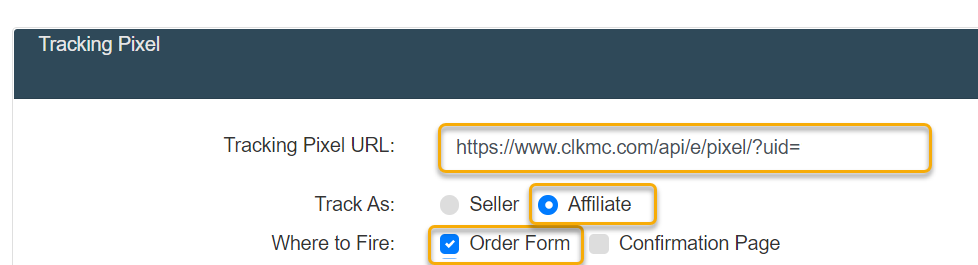
Then click the “Save” button to set up your order page.
Step 3 - Activate Your Pixels
Now that you have your pixels created, you need to enable them by clicking on the green “start” button next to the pixel:

Once you've enabled your pixels, you'll set up to start tracking ClickBank order form impressions in ClickMagick.
Step 1 - Go to the Integrated Sales Reporting Section
Log in to ClickBank, click on “Vendor Settings”
Next, click on the “My Site” tab in the menu bar:
Step 2 - Add Your Engagement Pixel
Scroll down the page and click on the “Add Tracking Code” button under Integrated Sales Reporting:
On the next screen, set your Type as Tracking Pixel, then click the “Add” button:
Next you’ll enter your Tracking Pixel URL.
Use the engagement for your account below:
https://www.clkmg.com/api/e/pixel/?uid=[USERID]&ref=checkoutTrack As: Affiliate (if you only promote products as an affiliate), Vendor (if you sell your own products on ClickBank)
Where to Fire: Order Form
Then click the “Save” button to set up your order page.
Step 3 - Activate Your Pixels
Now that you have your pixels created, you need to enable them by clicking on the green “start” button next to the pixel:

Once you've enabled your pixels, you'll set up to start tracking ClickBank order form impressions in ClickMagick.
Article 585 Last updated: 10/11/2023 7:37:32 AM
https://www.clickmagick.com/kb/?article=585