|
How do I set up Click Shield for MGID Ads?
Click Shield is a feature that’s guaranteed to reduce your Pay-Per-Click ad costs, with no change in conversions. These savings go straight to your bottom line, and if you’re doing any meaningful amount of PPC advertising this alone should more than pay for the cost of ClickMagick!
This article is a step-by-step guide for setting up Click Shield for MGID Ads.
In order for this to work, you’ll need to have your MGID Pixel set up and installed on every page in your website. You can review the steps on how to do this below if need be. Otherwise, move on to the first step to creating your custom audience.
How to create a MGID Pixel for your Website or funnel
How to Create a Custom Audience for Exclusions
1. Go to your MGID Ads dashboard, then click on “Audiences”

2. Click on the button “New Audience” to create the custom audience.

3. Give your audience a name, and then make sure the target type is set to “Page Link”.
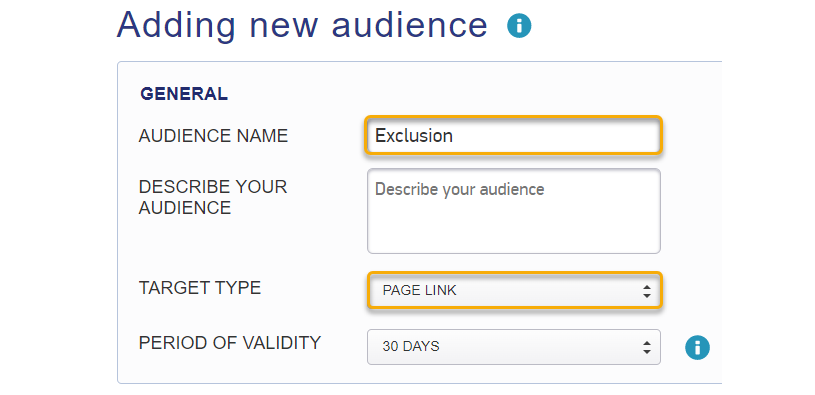
4. Set the dropdown menu to “Contains”, add the link to your exclusion page into the box, and click “Save Audience”.
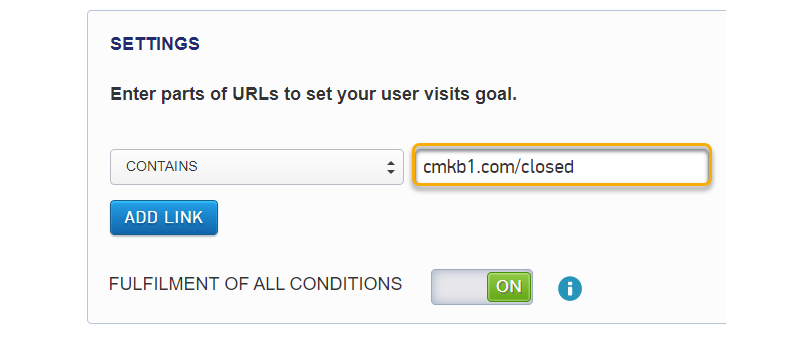
Note: You can either add in the URL like you see above, or just use the page slug like “/closed”. However, you are not able to add the protocol in the beginning (e.g. https://) per MGID guidelines.
Now it is time to add the exclusion to your campaign.
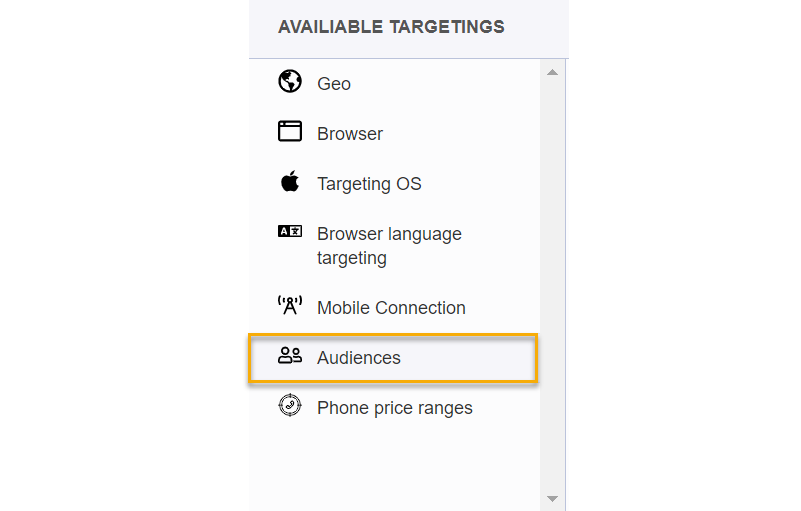
5. While editing your campaign, find the section that says “Available Targetings” and click on “Audiences”.
6. Set the audience you just created as an exclusion by clicking the red minus (-) icon next to the audience name. If dont correctly, you should see it listed in the “Selected Tagetings” box.
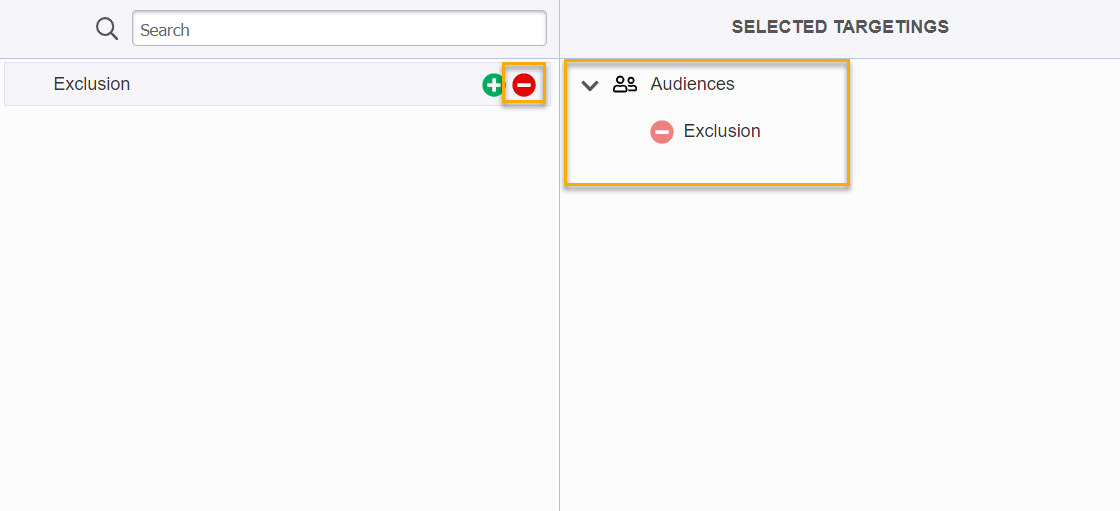
Now you’re finished with the MGID Ads portion and can move on to the setup in ClickMagick.
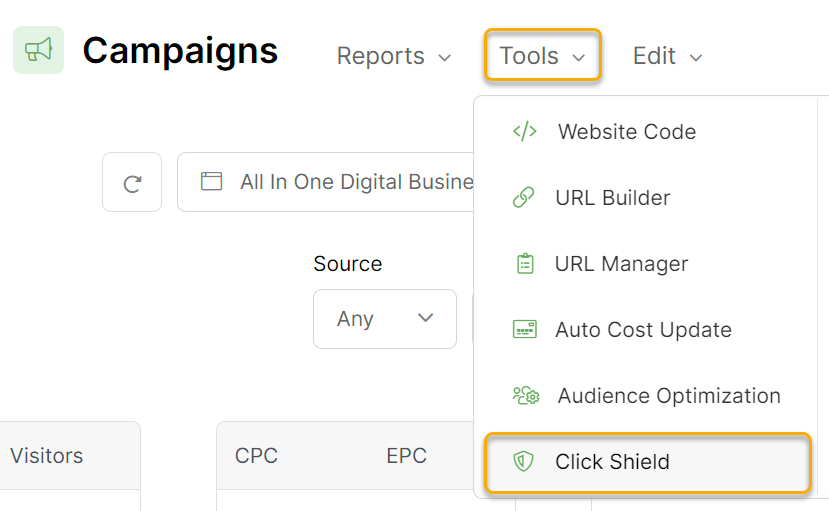
7. Go back to your ClickMagick Campaigns page, expand the Tools menu, and then click on “Click Shield”.
8. Click on the “Add Rule” button, and then fill in the details. Make sure to use the same URL in the box here as you did in your custom audience you added in MGID Ads.
For the other settings on how many clicks to allow in a specific time period, this is purely your preference. For this case, we chose 10 click every 10 minutes.
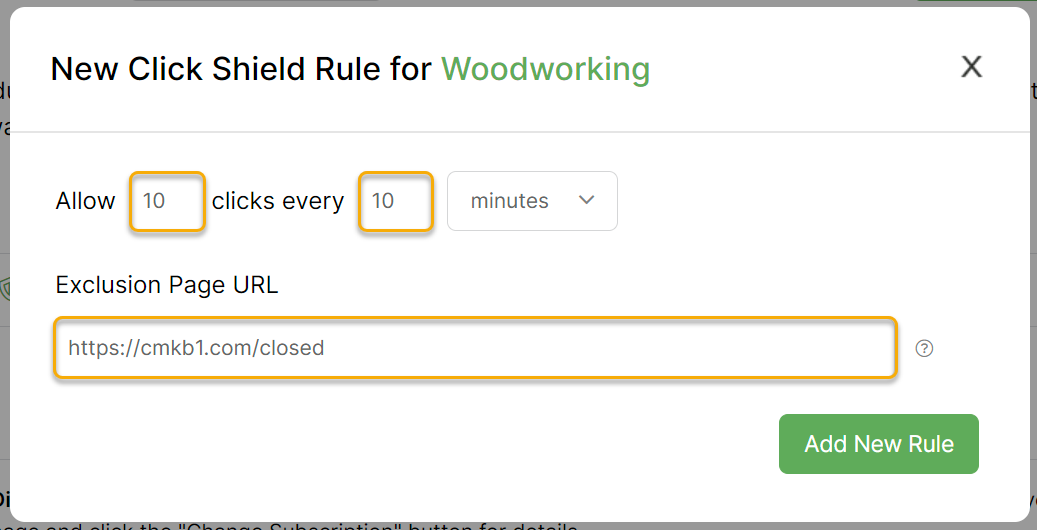
9. Click on “Add New Rule” and now you have a new rule set up with Click Shield to protect your campaign in MGID Ads!
To learn more about using Custom Audiences in MGID, visit their article below:
MGID – About custom audiences
Article 809 Last updated: 01/25/2023 1:45:47 PM
https://www.clickmagick.com/kb/?article=809
