|
How do I set up Click Shield for Pinterest Ads?
Click Shield is a feature that’s guaranteed to reduce your Pay-Per-Click ad costs, with no change in conversions. These savings go straight to your bottom line, and if you’re doing any meaningful amount of PPC advertising this alone should more than pay for the cost of ClickMagick!
This article is a step-by-step guide for setting up Click Shield for Pinterest Ads.
In order for this to work, you’ll need to have your Pinterest Pixel set up and installed on every page in your website. You can review the steps on how to do this below if need be. Otherwise, move on to the first step to creating your custom audience.
How to create a Pinterest Pixel for your Website or funnel

How to Create a Custom Audience for Exclusions
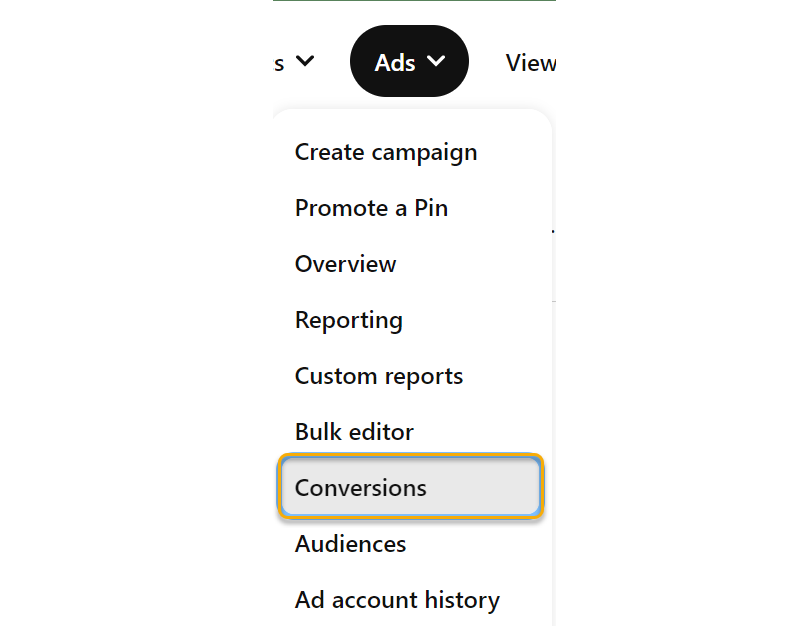
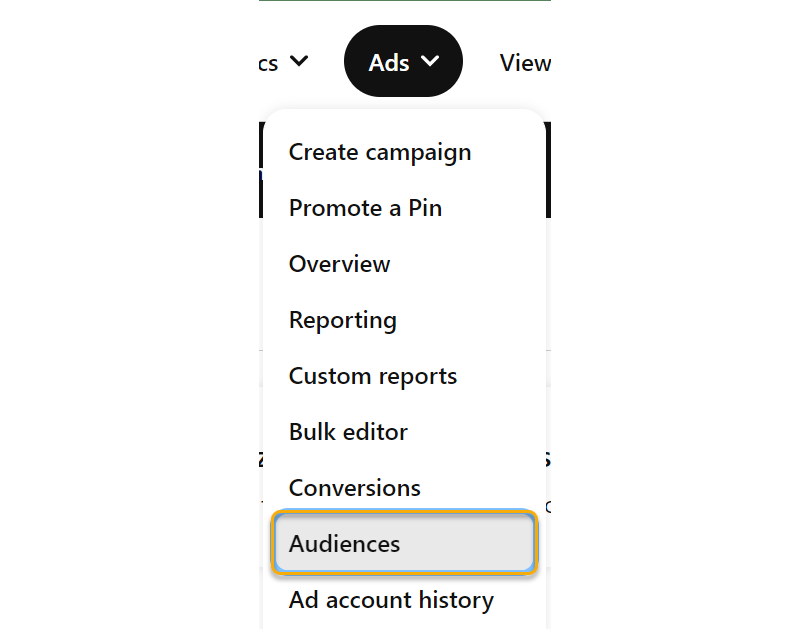
1. Go to your Pinterest Ads dashboard, expand the Ads menu and then click on “Audiences”.
2. Click on the red “Create Audience” button on the right to start the creation process.
3. Choose “Site Visitors” as the type, and then give your audience a memorable name.
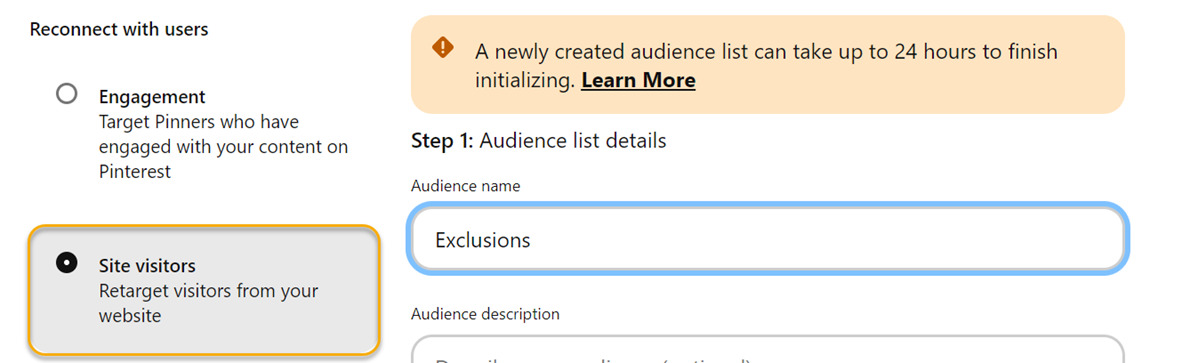
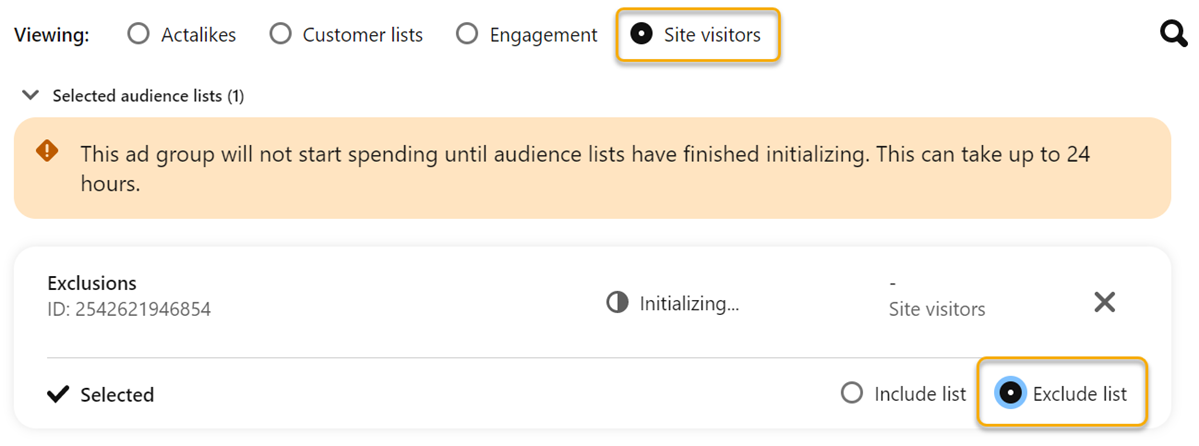
Note: You’ll notice the warning stating it can take up to 24 hours. That’s standard for new custom audiences in Pinterest Ads. You’ll see this again later in this article and it is their notice to you that it can take up to 24 hours to initialize. This is normal and not related to any missed step or anything you did wrong. If you already had a custom audience created previously, you likely will not see this warning.
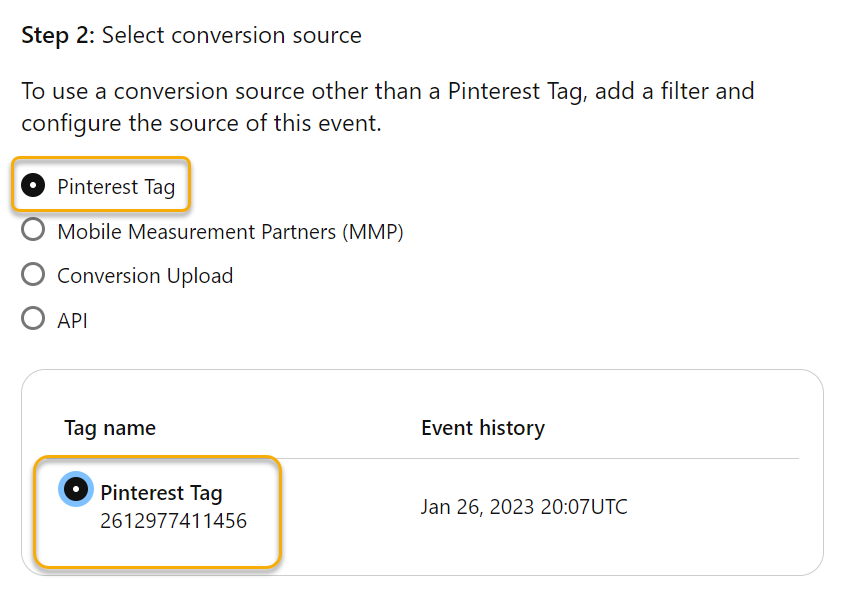
4. Pick which ever conversion source you want to use. Most likely it will be Pinterest Tag, but it depends on how you have your tracking set up for Pinterest. For this article, we’re using the Pinterest Tag.
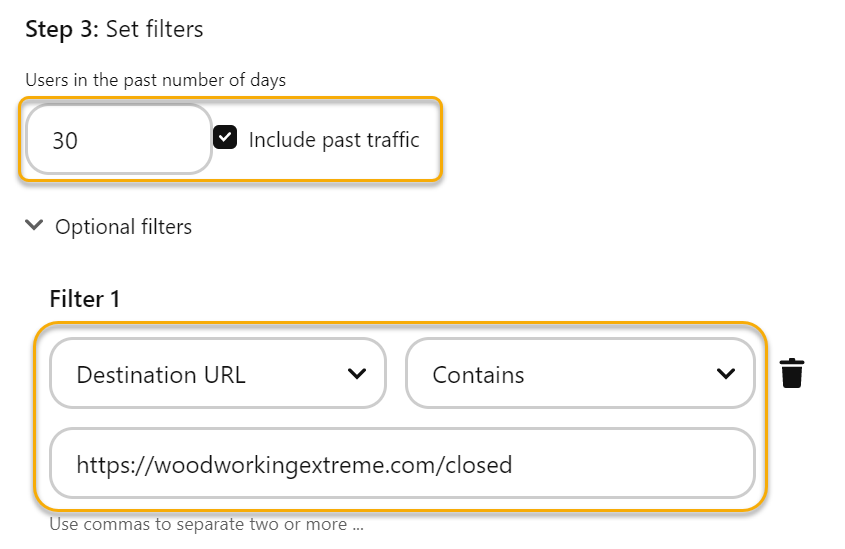
5. Choose whether or not you would like to have past data included, and give it a number of days to include data from.
Then, in the optional filters you will want to pick “Destination URL”, “Contains”, and then add your exclusion page URL in the box.
Click the create button to finish the creation of the custom audience, and now we can move on to adding the audience exclusion in the campaign.
6. When creating your campaign, you’ll be taken through some steps to go through the settings (For this article, we chose the “Manual” option for the campaign).
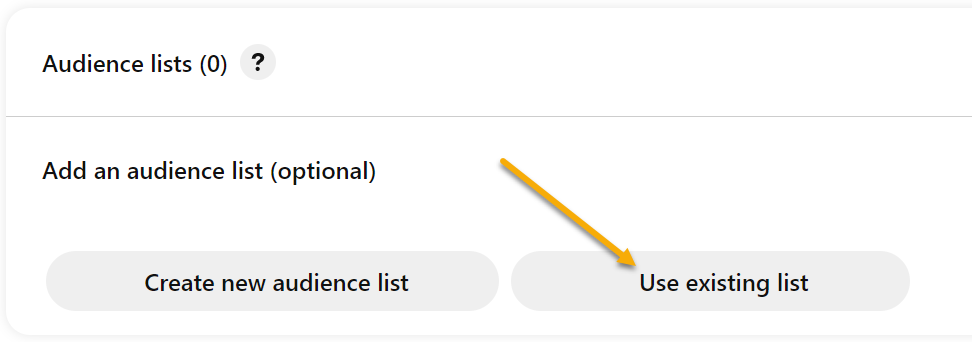
Through the steps, you’ll be brought to a page called “Targeting Details”. Find the section that says “Audience Lists” and choose “Use existing list” from that section.
7. Choose the “Site Visitors” option, and choose your custom audience that you just created. Then, choose “Exclude list” underneath that list.
Continue with the rest of the campaign creation, and now you’re finished with the Pinterest Ads portion and can move on to the setup in ClickMagick.
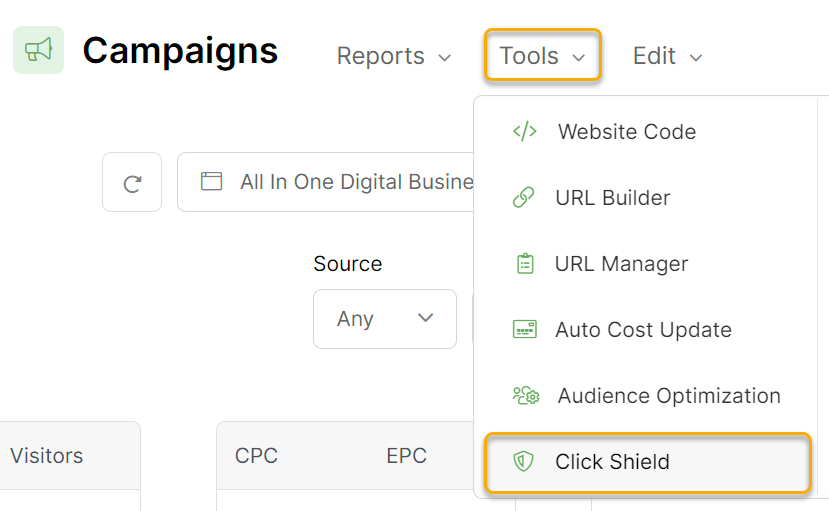
8. Go back to your ClickMagick Campaigns page, expand the Tools menu, and then click on “Click Shield”.
9. Click on the “Add Rule” button, and then fill in the details. Make sure to use the same URL in the box here as you did in your custom audience you added in Pinterest Ads.
For the other settings on how many clicks to allow in a specific time period, this is purely your preference. For this case, we chose 10 click every 10 minutes.
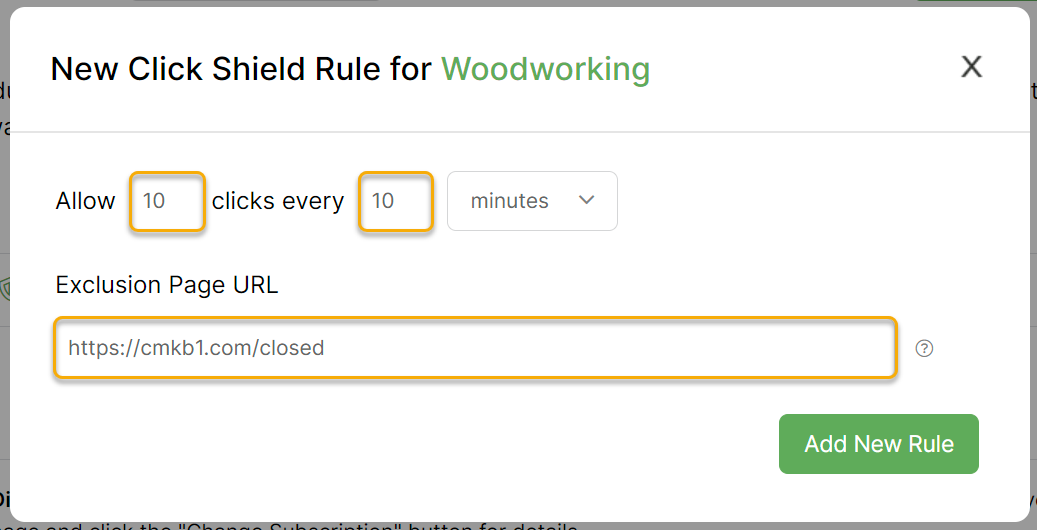
10. Click on “Add New Rule” and now you have a new rule set up with Click Shield to protect your campaign in Pinterest Ads!
To learn more about using Custom Audiences in Pinterest, visit their article below:
Pinterest – About custom audiences
Article 811 Last updated: 01/26/2023 6:10:30 PM
https://www.clickmagick.com/kb/?article=811