|
How do I set up Advanced Rules for Audience Optimization?
Advanced Rules allow you to set up almost infinitely flexible rules to determine how your conversions are sent back to your ad network based on Conversion Type, UTM Values, and even Sales Amounts.
These are completely optional, but allow you to do things like not sending sales that are under a certain minimum amount, or sending conversions from specific ad campaigns to specific pixels for example.
And if you don’t want to tell your ad network about certain conversions at all for some reason, based on specific UTM values for example, you can even send these conversions to a specific pixel that you simply don’t use.
In Campaigns, click on the Tools menu, click on Audience Optimization, then click on the Google Ads tab.
Click the “Advanced Rules” button.

Click “Add Rule” to add a new rule.
Fill in the name and choose the Conversion Action you want to use for this rule.
Fill in the criteria that you want the rule to match. The example below would match any sale greater than $100 ...

If a conversion doesn’t match the advanced rule you have set, it will use the default rule you initially set up.
Creating Multiple Advanced Rules
First, you need to create the rules you want to use and the Conversion Action you want to relate to the rule.
Then, prioritize the rules with your most important rule at the top.
In the following example, if an $80 sale came in (based on the
cmc_amt value), the first rule would not be used because it is for sales over $100. The second rule would be used because the sale was under $100:
If a conversion doesn’t match the advanced rules listed, it will use the default rule.
Note: You can only use one conversion action from Google Ads for each type. If you have a conversion action set to sale, you cannot use the same action for Action or Engagements.
To reorder a rule, click and hold the left mouse button over the cross button and drag the rule up or down.
To remove a rule, click the delete button .
And to edit a rule, click the edit button .
And that’s it. Now you know how Advanced Rules for Google Ads work and how to set them up.
In Campaigns, click on the Tools menu, click on Audience Optimization, then click on the Microsoft Ads tab.
Click the “Advanced Rules” button.

Click “Add Rule” to add a new rule.
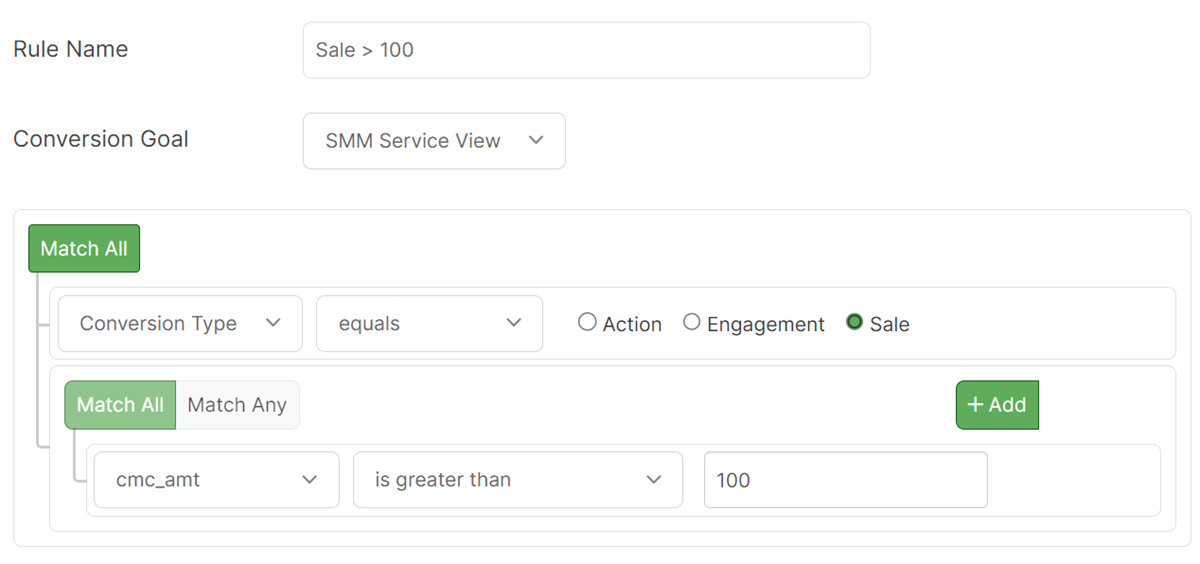
Fill in the name and choose the Conversion Goal you want to use for this rule.
Fill in the criteria that you want the rule to match. The example below would match any sale greater than $100 ...
If a conversion doesn’t match the advanced rule you have set, it will use the default rule you initially set up.
Creating Multiple Advanced Rules
First, you need to create the rules you want to use and the Conversion Goal you want to relate to the rule.
Then, prioritize the rules with your most important rule at the top.
In the following example, if an $80 sale came in (based on the
cmc_amt value), the first rule would not be used because it is for sales over $100. The second rule would be used because the sale was under $100:
If a conversion doesn’t match the advanced rules listed, it will use the default rule.
Note: You can only use one conversion goal from Microsoft Ads for each type. If you have a conversion goal set for sale, you cannot use the same conversion goal for Action or Engagements.
To reorder a rule, click and hold the left mouse button over the cross button and drag the rule up or down.
To remove a rule, click the delete button .
And to edit a rule, click the edit button .
And that’s it. Now you know how Advanced Rules for Microsoft Ads work and how to set them up.
In Campaigns, click on the Tools menu, click on Audience Optimization, and then click on the Facebook Ads tab.
Click the “Advanced Rules” button.

Click the “Add Rule” button to add a new rule.
Fill in the information in the top part of the form:
Rule Name: Enter a memorable name to understand what the rule does.
Pixel: Choose the Facebook Pixel you want to use for this rule.
Event Name: Choose the event name you want this rule to send to Facebook.
Website URL: Enter the URL of the website or specific page where this conversion occurs.
Always send the Website URL to Facebook: Enable this option if the page where the event occurs does not match your funnel’s page. This would typically happen if you have a landing page on a different domain than the rest of your funnel or if you generate affiliate sales via Postback URL and there is no website URL.
Then, set up the Conversion type and the criteria you want to match.
The example below fires the event name “Lead” if the
utm_campaign value equals “freeguide”: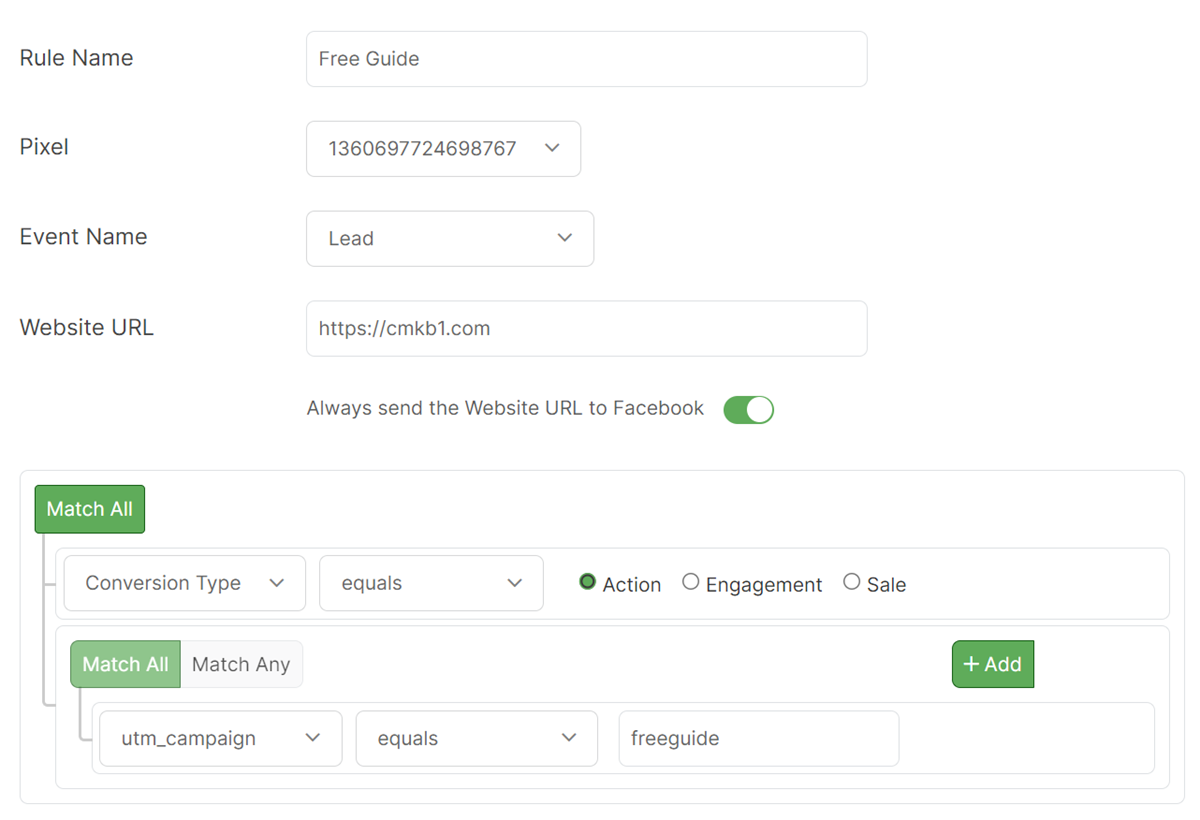
If a conversion doesn’t match the advanced rule you have set, it will use the default rule. For Facebook Ads, the default rule is what you initially set up for either Actions, Engagements, or Sales in the Audience Optimization setup.
Creating Multiple Advanced Rules
The first step is to create the rules you want to use and then put them in order of priority, with your most important rule at the top.
In the following example, if a sale came in that was $80 (based on the
cmc_amt value), the first rule would not be used because it is for sales of over $100. The second rule would be used because a sale was processed under $100. Then, the third rule would be ignored as it already matched the rule before it.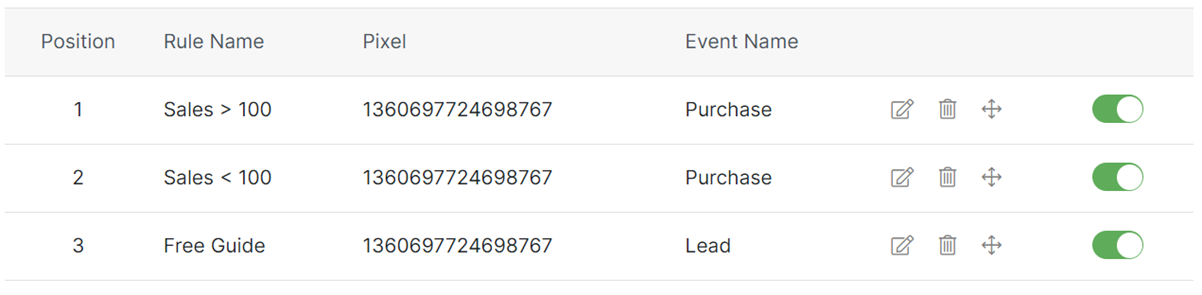
If a conversion doesn’t match the advanced rules listed, it will use the default rule.
To reorder a rule, click and hold the left mouse button over the cross button and drag the rule up or down.
To remove a rule, click the delete button .
And to edit a rule, click the edit button .
And that’s it. Now you know precisely how Advanced Rules for Facebook Ads work and how to set them up.
In Campaigns, click on the Tools menu, click on Audience Optimization, and then click on the TikTok Ads tab.
Click the “Advanced Rules” button.
Click the “Add Rule” button to add a new rule.
Fill in the information in the top part of the form:
Rule Name: Enter a memorable name to understand what the rule does.
Pixel: Choose the TikTok Pixel you want to use for this rule.
Event Name: Choose the event name you want this rule to send to TikTok.
Website URL: Enter the URL of the website or specific page where this conversion occurs.
Always send the Website URL to TikTok: Enable this option if the page where the event occurs does not match your funnel’s page. This would typically happen if you have a landing page on a different domain than the rest of your funnel or if you generate affiliate sales via Postback URL and there is no website URL.
Then, set up the Conversion type and the criteria you want to match.
The example below fires the event name “Lead” if the
utm_campaign value equals “freeguide”: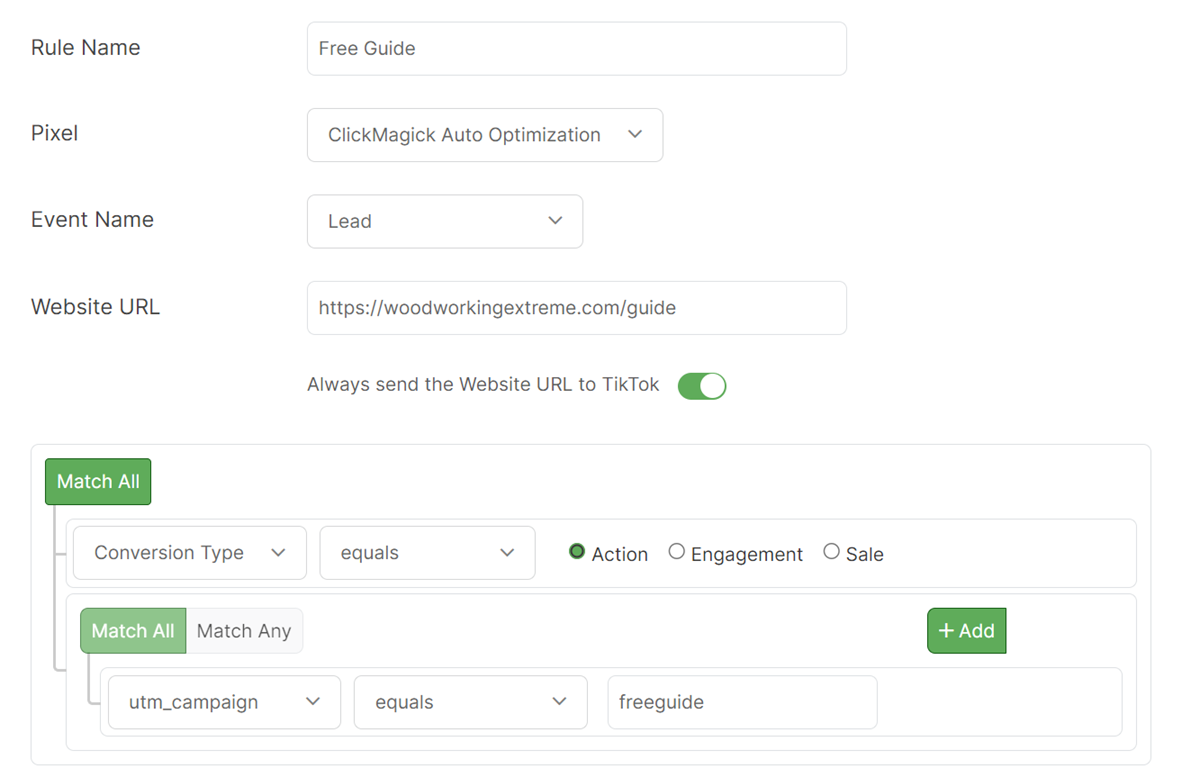
If a conversion doesn’t match the advanced rule you have set, it will use the default rule. For TikTok Ads, the default rule is what you initially set up for either Actions, Engagements, or Sales in the Audience Optimization setup.
Creating Multiple Advanced Rules
The first step is to create the rules you want to use and then put them in order of priority, with your most important rule at the top.
In the following example, if a sale came in that was $80 (based on the
cmc_amt value), the first rule would not be used because it is for sales of over $100. The second rule would be used because a sale was processed under $100. Then, the third rule would be ignored as it already matched the rule before it.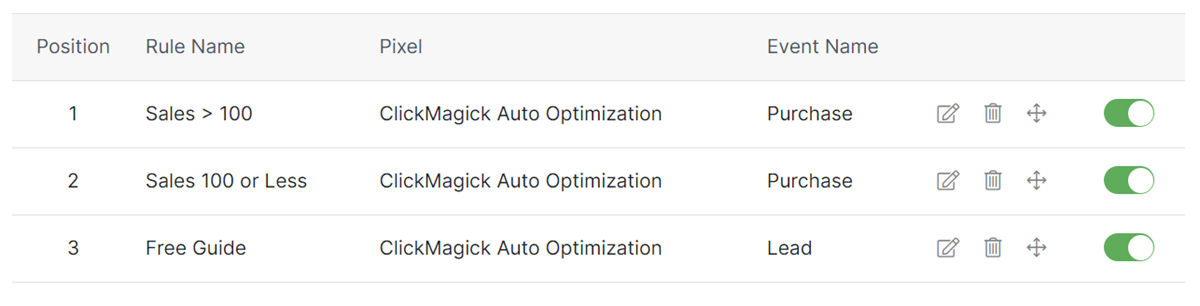
If a conversion doesn’t match the advanced rules listed, it will use the default rule.
To reorder a rule, click and hold the left mouse button over the cross button and drag the rule up or down.
To remove a rule, click the delete button .
And to edit a rule, click the edit button .
And that’s it. Now you know precisely how Advanced Rules for TikTok Ads work and how to set them up.
Article 834 Last updated: 11/14/2023 9:34:05 AM
https://www.clickmagick.com/kb/?article=834