|
How do I track my Cost of Goods Sold (COGS) in ClickMagick?
If you have known hard costs for the products you sell, you can tell ClickMagick about your Cost Of Goods Sold (COGS) for each sale if you want COGS factored in to your stats.
If you’re using the ClickMagick Shopify App, tracking COGS couldn’t be simpler.
In ClickMagick, on your Shopify App Configuration page, simply enable COGS and select the option you want to use.
If you already have a cost associated with the products in your Shopify store, just select “Store Cost” and ClickMagick will automatically use the product costs from your Shopify store.
If you don’t have costs associated with the products in your store, you can also select to enter either a flat COGS per sale, or you can set COGS to a percentage of the sale.
If you’re just selling a single product for a single price you can simply hard-code the COGS value in your website code.
But if you sell different products at different price points, you can also use a dynamic token e.g. ##PRODUCT_COST## provided by your ecommerce store or checkout platform, or you can set COGS to a percentage of the sale amount.
Step 1 – Set the COGS value in your Sales Tracking Code
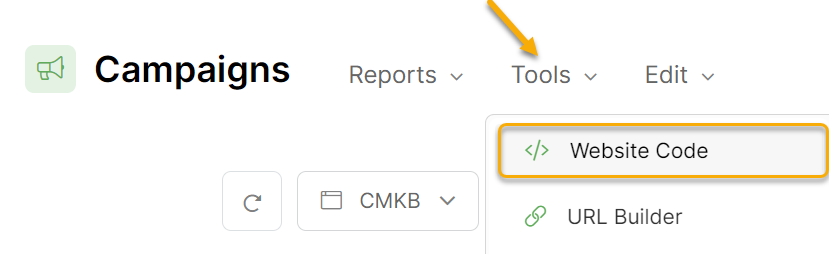
You can create the modified Sales Tracking Code you need using the Website Code tool. In Campaigns, click on the Tools menu and then select “Website Code”.
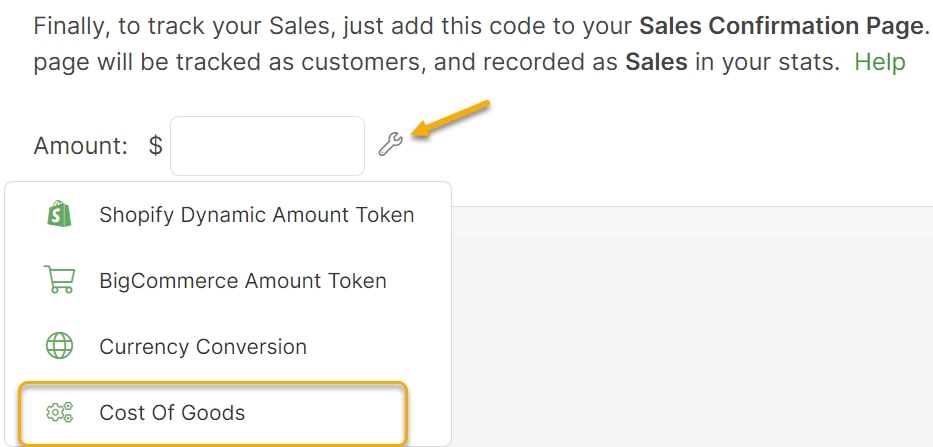
Next, select either the Website Code Wizard or the Custom Website Code tool. In either case, next to the Amount field for your Sales Tracking Code you’ll see a icon. Click on this icon and then select Cost Of Goods:
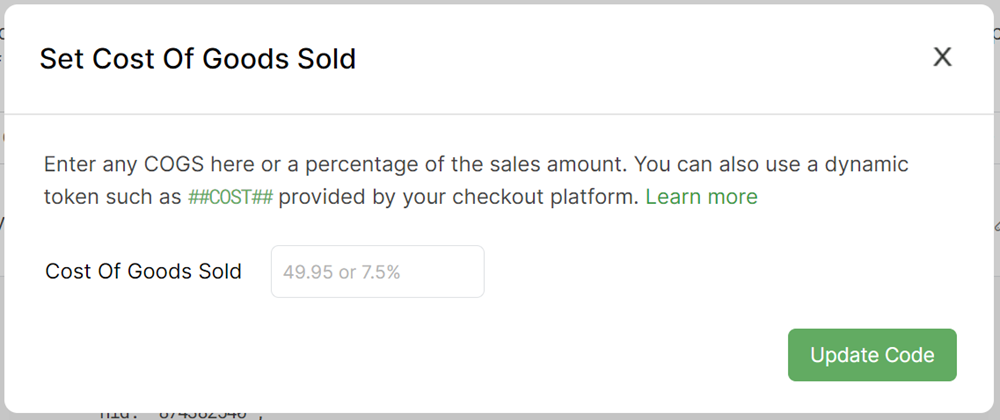
Add your COGS value or dynamic token, then click “Update Code” ...
For example, if the sale amount (
cmc_amt) is $100, and your COGS (cmc_cogs) is $40, your code would look like this: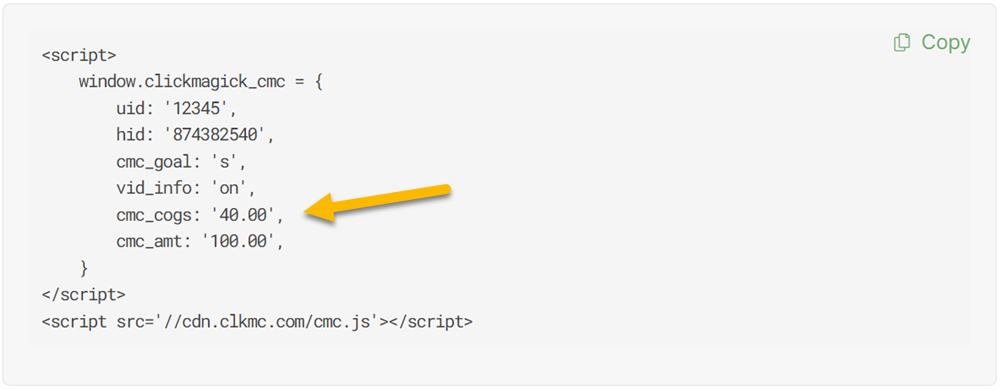
Copy the code, and then add it to your “thank you” page, or replace your current code with the newly updated code.
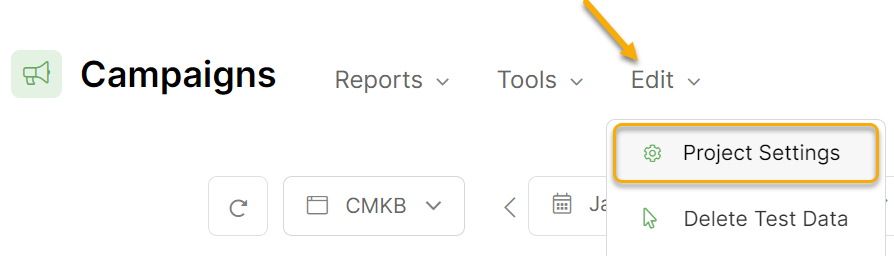
Step 2 – Update Your Campaigns Project Settings to Include COGS
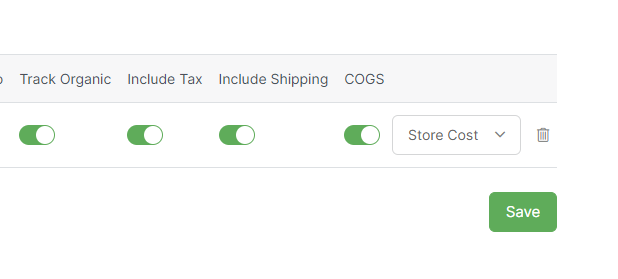
In order for COGS to be reflected in your stats, you need to enable it within your Project settings.
In Campaigns, click on the Edit menu and then choose “Project Settings”.
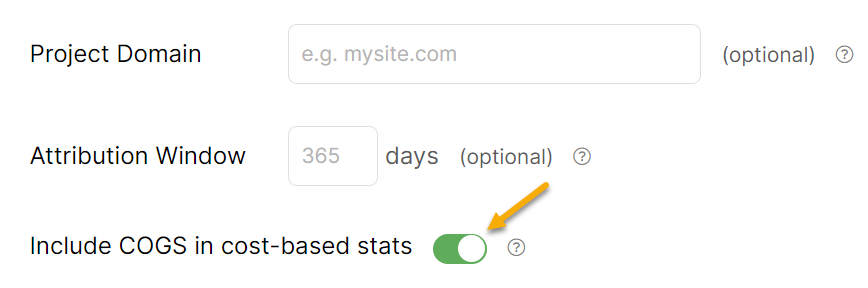
Then simply click the toggle to enable COGS tracking. Once you’ve implemented the code you can turn this on or off at any time as necessary depending on what you want to see in your stats ...
Depending on your setup, you may also want or need to pass a COGS value in your URLs as well.
To do this, go to Campaigns, click on the Tools menu and click on “URL Builder”.

Set up your URL as necessary, then select “Optional CMC Parameters” and update
cmc_amt and cmc_cogs to reflect the proper sale amount and Cost Of Goods Sold ...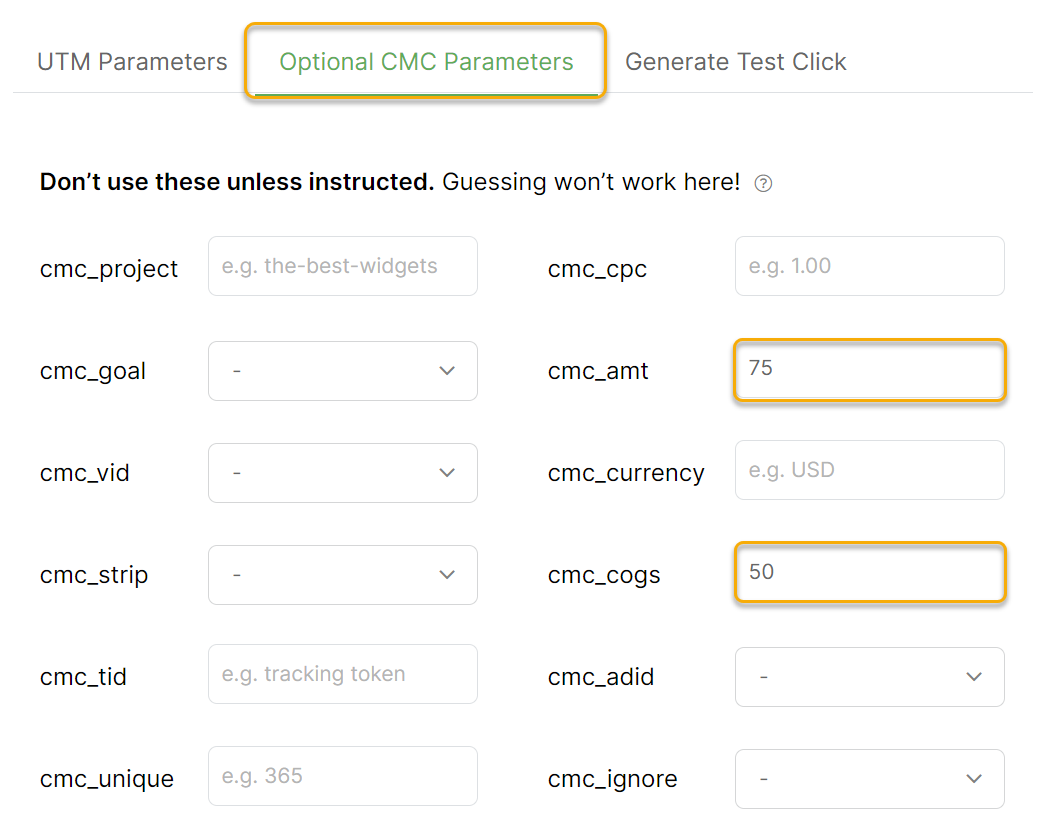
Then just copy the updated link and use it however you need to based on your setup.
Article 841 Last updated: 10/19/2023 1:50:24 PM
https://www.clickmagick.com/kb/?article=841