|
How do I manually upload conversions to Google Ads?
Note: Manually uploading conversions to Google Ads via their web interface requires a GCLID value for each conversion.
This value is normally generated by Google when users click your ads. But if a visitor is on iOS and has chosen not to be tracked, Google will generate a WBRAID value instead and there will be no GCLID.
This means conversions generated by iOS users who have chosen not to be tracked cannot be manually uploaded via Google’s web interface, and these conversions will not be included in your CSV file.
The hassle-free way to ensure all your conversions are uploaded to Google automatically is to use automated Audience Optimization which uses the Google Ads API and bypasses this limitation of the Google Ads web interface.
Manually uploading conversions is a “legacy” feature and there shouldn’t really be any need to use it.
In most cases you’ll want to have ClickMagick do this for you automatically via Audience Optimization, which you can learn about in the article below:
What is Audience Optimization and how do I use it?
But if you really want to upload conversions manually here’s how to do it ...
Step 1 – Ensure Auto-Tagging Is Turned On
Before you get started, make sure that you have auto-tagging turned on in your Google Ads account by going to Settings > Account Settings and checking the “auto-tagging” box:

Step 2 – Download your Google Ads Conversions CSV Report
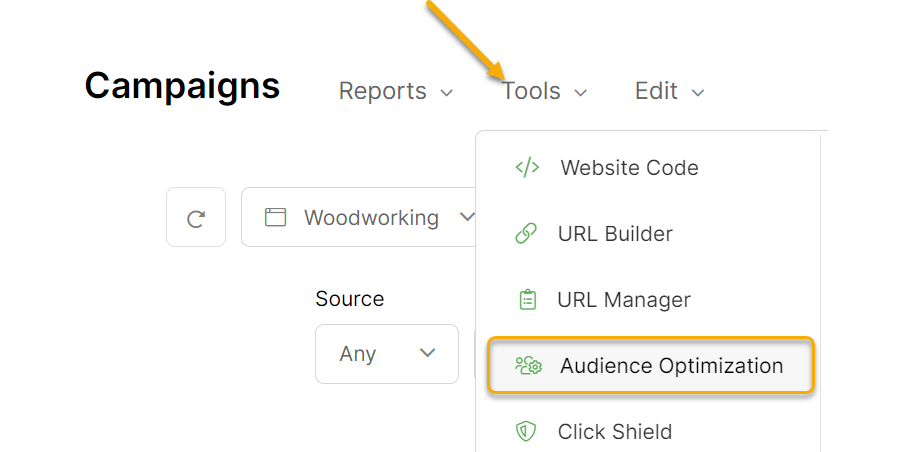
From the Campaigns Dashboard, select “Audience Optimization” from the Tools menu .
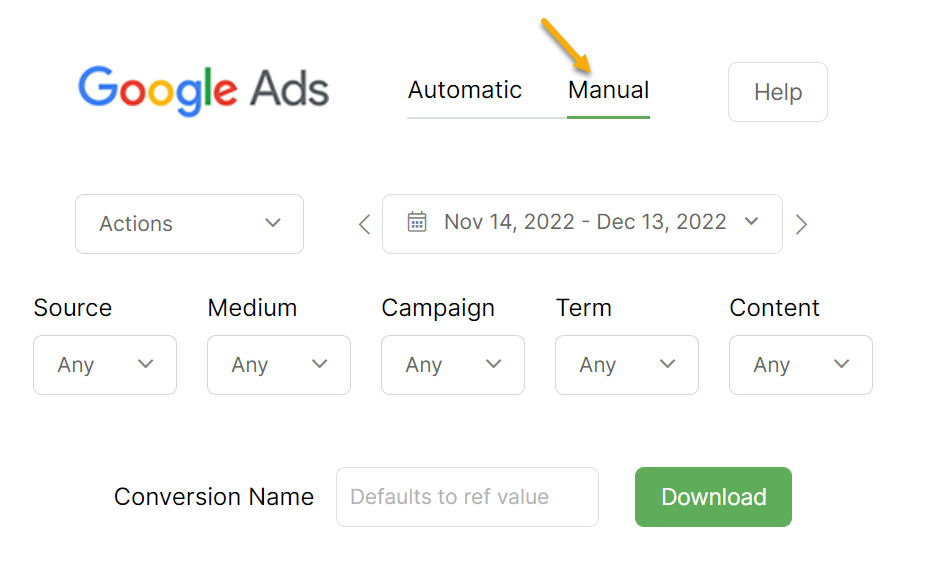
Under “Google Ads,” click the “Manual” tab. Then select the conversion type, daterange and UTMs you’re interested in.
If you’ve already created a Conversion Action for your uploads in your Google Ads account, enter the Conversion Action name. If you haven’t created this yet, you can continue and create it in the next step below.
Finally, click the “Download” button to download a CSV file of your conversions.
Step 3 – Create a New Google Ads Conversion Action (Optional)
If you still need to create a Conversion Action in Google Ads to upload your conversions, just head on over to your Google Ads account, click on “Tools & Settings”, and select “Conversions”:

In the Summary section, click on the "+ New Conversion Action" button:

Select “Import” from the conversion type, click on “Other data sources or CRMs”, select “Track conversions from clicks”, and then click on “Continue”:

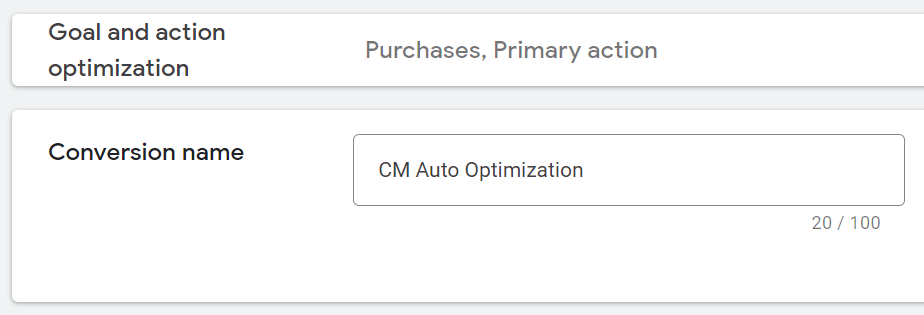
Fill in the details for your new conversion action. The most important thing to remember here is the name of this new conversion action.
After you fill in the rest of the details, click on “Create and Continue”.
Note: After you create this new conversion action, it can take up to 4 hours to “register” with Google. So you can wait a bit before proceeding to the last two steps or try them anyway. Remember that if the upload doesn’t work, you’ll have to wait a bit, and it’ll get resolved.
Step 4 – Change the Conversion Name in your CSV File (Optional)
If you just created your new Conversion Action in Step 3 above, open your CSV file and update all the values in the Conversion Name column to match the name of the new Conversion Action you just created:

Note: By default, the conversion names will be Action, Engagement or Sale, so you can make your Conversion Name in Google one of them, so you don’t have to change the name in the Excel Report.
Step 5 – Upload the CSV File to your Google Ads Account
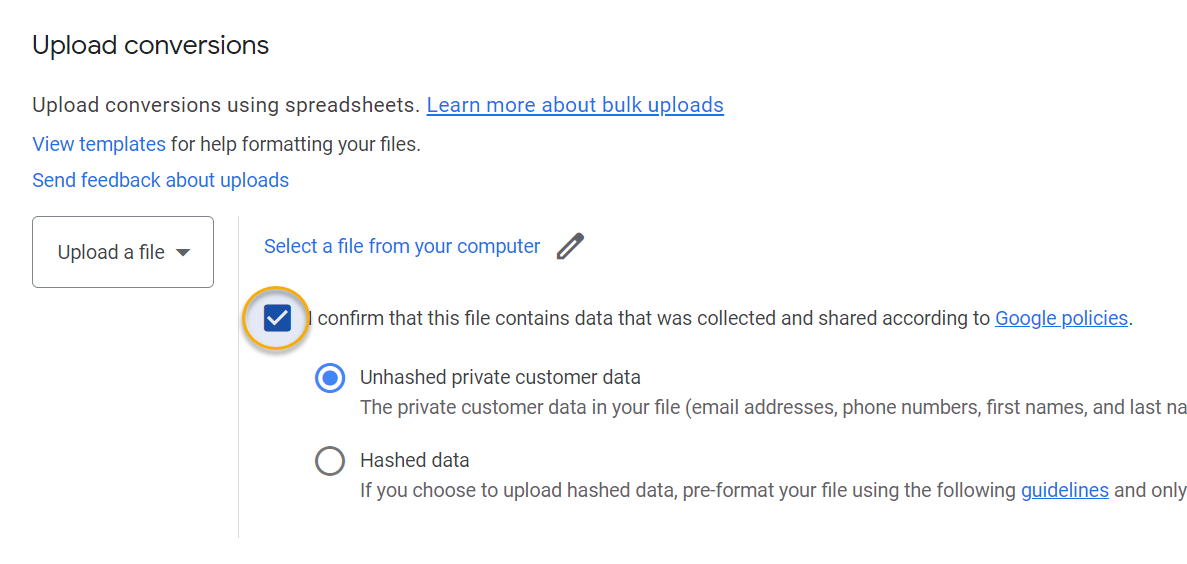
Now you’re ready to upload your conversions. From the Conversions section, click on “Uploads” from the tab on the left, and click on “Upload a file”. Select your CSV file to upload and that’s it!

If you see an option asking for unhashed or hashed data, you’ll want to uncheck the option shown below:
Article 871 Last updated: 07/13/2023 12:43:47 PM
https://www.clickmagick.com/kb/?article=871