|
How do I track affiliate sales using Postback URLs?
A “Postback” is simply an automated notification that your affiliate network (like ClickBank or MaxBounty) sends to your ClickMagick Postback URL whenever a transaction occurs. This allows ClickMagick to record the sale – along with any upsells, downsells, or refunds – and link it to both the visitor and the click that generated it.
There are a few special cases discussed in the article below, like ClickBank for example ...
How do I track affiliate sales with ClickBank?
But for any other affiliate network that uses standard Postback URLs you’ll simply follow the steps below ...
Step 1 – Include the
cmc.js Code on Any Page That Uses Affiliate LinksIf you already have the Click Tracking Code or the Conversion Tracking Code on all the pages where you use affiliate links, there’s nothing else to do.
Otherwise, add the line below to any pages where you need to use the
[cmc_vid] token which doesn’t already have the Click Tracking Code or Conversion Tracking Code, preferably in the <head> section:<script src='//cdn.clkmc.com/cmc.js'></script>
With the code in place, whenever the page is loaded, all of the
[cmc_vid] tokens you used in your affiliate links will automatically be replaced with a unique visitor ID for tracking purposes.Note: Usually, adding that one line to your page is all you’ll need to do. However, two cases may arise for web developers who create their pages using advanced programming techniques. Learn more
Step 2 – Add a Visitor ID to Your Affiliate Link
The first step is to pass a visitor ID generated by ClickMagick to your affiliate network via your affiliate link.
The same process works for any affiliate network, but we’ll use MaxBounty for this example.
| 1. | In Campaigns, click on the Tools menu, expand the Affiliate Tools menu, and click “Affiliate Link Builder” |

| 2. | Select your network from the menu, paste in your affiliate link, and click the “Update My Affiliate Link” button. |
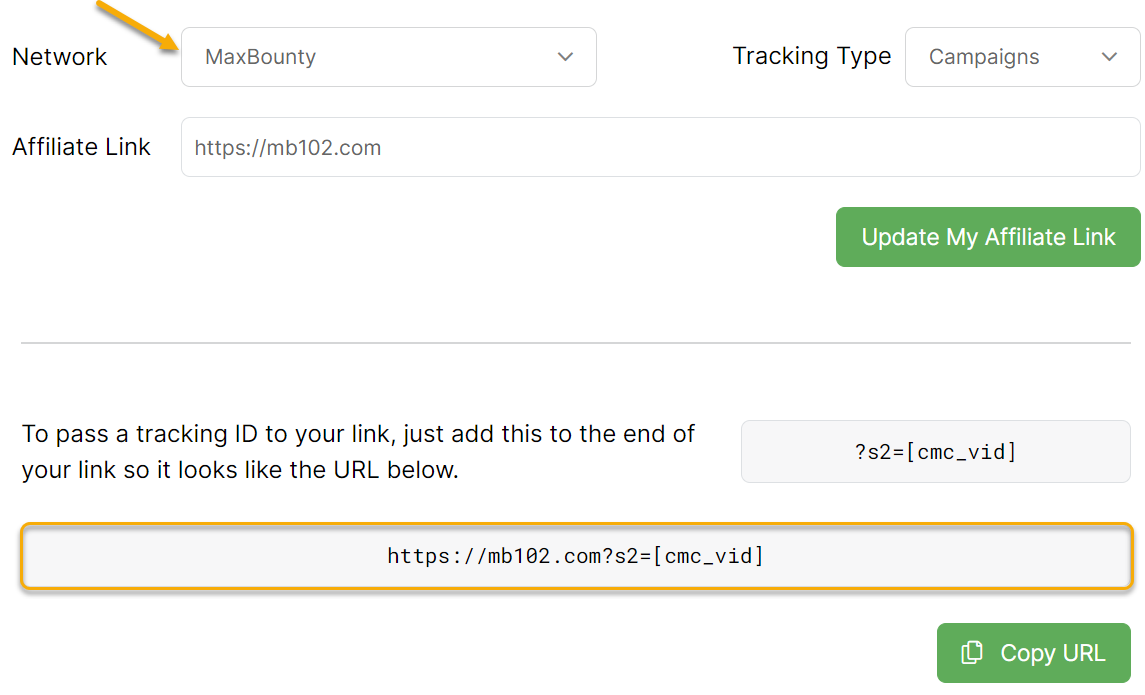
| 3. | Copy and use the modified affiliate link everywhere you would normally use your standard affiliate link. This modification won’t change how your affiliate link works — it simply sends some additional information to your affiliate network that allows ClickMagick to track your Campaigns sales. |
Step 3 – Add Your Postback URL to Your Affiliate Account
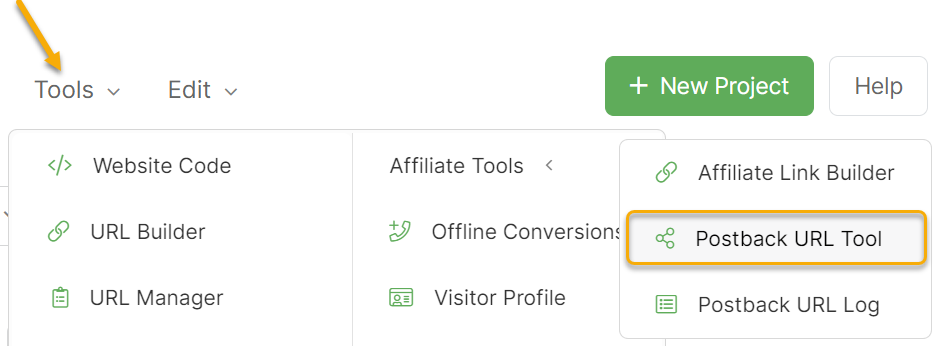
The next step is to generate your Postback URL using the Postback URL Tool. You can reach it from the Affiliate Link Builder, or you can always just click the Campaigns Tools menu, go to Affiliate Tools, and select Postback URL Tool.
Just type in the name of the network you’re using, and your custom Postback URL will be displayed ...
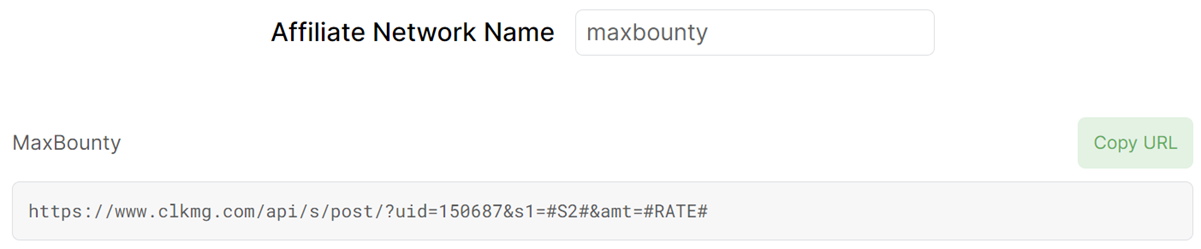
Important! Your custom Postback URLs will differ from what you see in examples here in the Knowledge Base, so always be sure to use the tool and copy the Postback URLs generated in your account.
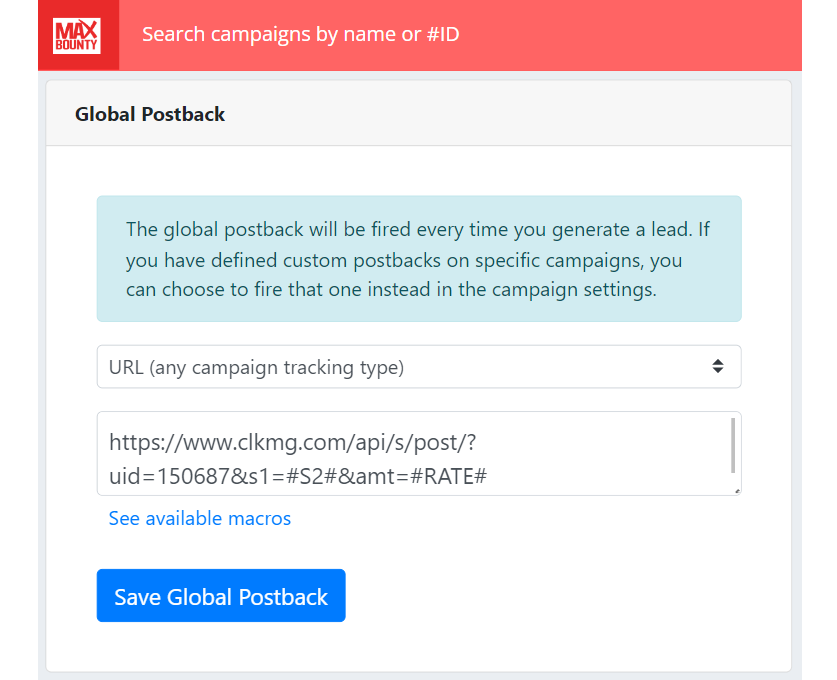
Each affiliate network is a bit different in terms of how you add your Postback URL. With MaxBounty for example you would add it one time by clicking the User icon, then selecting Global Postback, and it will be used for all your offers.
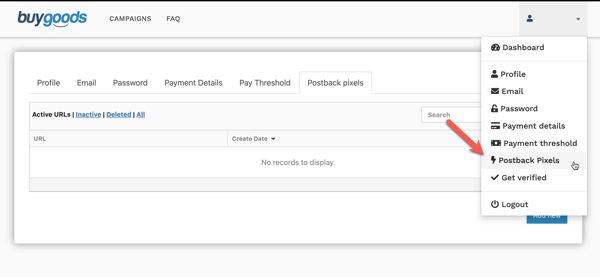
With BuyGoods you would also just add it once to your Profile > Postback Pixels:
If you can add your Postback URL once in a global setting, that’s obviously preferred because it’s “set and forget.”
But with some other networks, you may need to add your Postback URL individually to each offer you promote. It just depends on the network.
Also, when you add your Postback URL, you may need to select a “type” to go with it (as shown in the MaxBounty example). Each affiliate network is a bit different, but always choose the option that says something like URL, Postback URL, etc., and never select pixel, iframe, HTML, JavaScript, etc.
If you can’t figure out where to add your Postback URL in your affiliate account to track your sales, ask your affiliate manager or contact their customer support and they can tell you.
Setting up a Postback URL when using Tracking Links is just as simple as with Campaigns, the main difference being the token used for the visitor ID. Follow the steps below to learn how to set up a Postback URL for your Tracking Links.
Step 1 – Add a Click ID to Your Affiliate Link
The first step is to pass a unique click ID generated by ClickMagick to your affiliate network via your affiliate link. It’s the same for all networks, but we’ll use MaxBounty for this example.
| 1. | When creating your Tracking Link, add your affiliate link as the Primary URL, then click on the menu and choose the option to add the Click ID. This will automatically add the correct tracking code to the end of your affiliate link: |
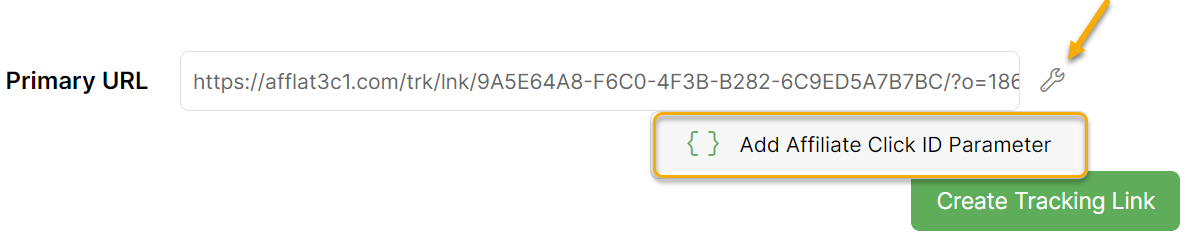
This modification won’t change how your affiliate link works — it simply sends some additional information to your affiliate network that allows ClickMagick to track your Campaigns sales.
Step 2 – Add Your Postback URL to your Affiliate Account
The next step is to generate your Postback URL using the Postback URL Tool. In Tracking Links, click on the Tools menu, go to the Affiliate Tools menu, and then select Postback URL Tool.
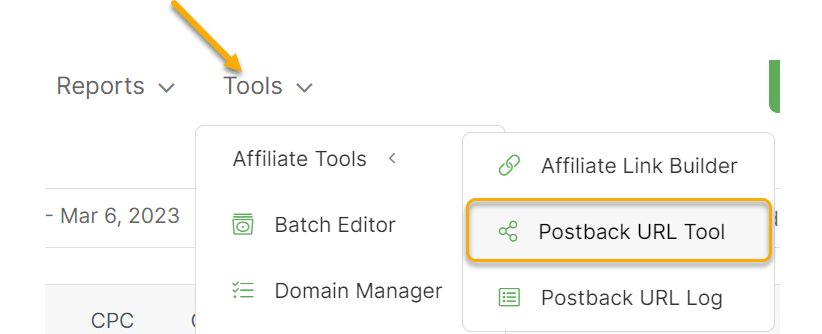
Just type in the name of the network you’re using, and your custom Postback URL will be displayed ...
Important! Your custom Postback URLs will differ from what you see in examples here in the Knowledge Base, so always be sure to use the tool and copy the Postback URLs generated in your account.
Each affiliate network is a bit different in terms of how you add your Postback URL. With MaxBounty for example you would add it one time by clicking the User icon, then selecting Global Postback, and it will be used for all your offers.
With BuyGoods you would also just add it once to your Profile > Postback Pixels:

If you can add your Postback URL once in a global setting, that’s obviously preferred because it’s “set and forget.”
But with some other networks, you may need to add your Postback URL individually to each offer you promote. It just depends on the network.
Also, when you add your Postback URL, you may need to select a “type” to go with it (as shown in the MaxBounty example). Each affiliate network is a bit different, but always choose the option that says something like URL, Postback URL, etc., and never select pixel, iframe, HTML, JavaScript, etc.
If you can’t figure out where to add your Postback URL in your affiliate account to track your sales, ask your affiliate manager or contact their customer support and they can tell you.
Troubleshooting Your Postback URL
If your Postback URL doesn’t seem to be working, here are some common reasons ...
What if my Postback URL isn’t working?
If you have any questions, please submit a ticket at our Helpdesk with all the relevant details, and we’ll be happy to take a look. Be sure to explain exactly what you’ve done based on the steps of this tutorial (with screenshots if possible) and what’s not working as expected.
Remember – the more details you provide, the better we’ll be able to help you!
Note: The CJ Affiliate network needs to manually “approve” you to use Postback URLs, so you’ll need to contact them first. Just let them know you need to set up a Postback URL and provide them with your custom CJ Affiliate Postback URL from the Postback URL Tool and you should be all set.
Article 119 Last updated: 05/18/2023 8:04:51 AM
https://www.clickmagick.com/kb/?article=119