|
What are all these additional settings for my tracking links?
This article explains each of the Advanced Settings tabs when you’re creating or editing a tracking link. These tabs are optional and not necessary for you to start promoting with your tracking link.
Click on each tab below to learn more about what each of them do:
Here you can add tracking pixels to your Tracking Link so that whenever the link is clicked on, the pixel will fire. You can also add a dynamic affiliate link which is discussed below.
Please note that in 2023, third-party tracking pixels are no longer viable for tracking. Due to industry changes and privacy restrictions in all major browsers, the only pixels that will work reliably here are ClickMagick Tracking Pixels.
How Do I Set Up a Dynamic Affiliate Link?
Normally when you promote an affiliate offer, when users click your affiliate link they land on whatever page the advertiser wants them to land on.
This is usually the advertiser’s opt-in or sales page, which of course you have no control over.
But with ClickMagick you can set up what we call a “Dynamic Affiliate Link” and send the user to any page you want, and still get credit when they make a purchase.
For example, maybe the advertiser’s sales page isn’t that great and you want to create your own and then link directly to the advertiser’s order form.
That’s the type of thing you can do with a Dynamic Affiliate Link, and it’s super easy to do.
Here’s all you have to do …
| 1. | Create a new ClickMagick tracking link and call it whatever you want. |
| 2. | For the Primary URL, enter the URL you want the visitor to end up at. In the example above, that would be the URL of the order form for this particular product. |
| 3. | Click on the Pixels tab then click the button that says “Create Dynamic Affiliate Link.” Enter your affiliate link in the new field that appears, then click the “Add Code” button which will generate and add your custom code to the Pixels settings. |
| 4. | Save your new link, and that’s really all there is to it! |
What this will do is load your actual affiliate link “behind the scenes” so the user is cookied with your affiliate ID to ensure you get credit when they make a purchase.
In the example above you would simply have a “buy now” or other similar button on the sales page you created, and link it to the ClickMagick Dynamic Affiliate Link that you created via the steps above.
When someone is ready to buy and they click that button it’ll take them directly to the advertiser’s order form, but of course you’ll still get credit for the sale.
As long as you follow the steps above to make sure the user is cookied with your affiliate ID, you can pretty much send them to any URL you want and control the entire sales process yourself.
Important: Technically this may be against the “terms of service” of the affiliate program you’re promoting.
As long as you’re using this feature ethically you shouldn’t have a problem, but we’re not responsible for anything you do so if you’re uncertain you might want to ask the advertiser if they’re OK with your doing this.
Caution: This feature has the potential to be abused, for example by “cookie stuffing”, which is illegal in some countries, including the United States.
We don’t condone anyone using ClickMagick to scam or rip people off, so don’t do anything like this or we’ll have no choice but to cancel your account. Thanks!
Here you can add the cost for your advertising so that ClickMagick can calculate your net profit, cost, ROI, and so on for you (basically all stats that require cost data).
Can I Pass In a Cost Value With Each Click?
Absolutely. You can specify set costs (one-time, CPC, CPA, etc.) for any link.
Just edit the link and click over to the Cost tab. Then enter a value for Traffic Cost and select the type of cost that ClickMagick should be using in your stats.
If you choose “One-Time Cost”, the cost value you enter will be averaged over the number of clicks the link receives.
What If My Cost-Per-Click Varies for Each Click?
If your CPC varies from click to click, you’ll probably want to use the following method for the most accurate stats.
To include a cost value for each click, you can simply add it to the end of any tracking link, after any sub-IDs you might have for the link:
For example, here’s a regular tracking link:
https://link-domain.com/mylinkIf you want to include a CPC amount of 0.50 for this click, just add it to the end like this:
https://link-domain.com/mylink/0.50If your ad network has a “cost token” or “placeholder” (such as
{CPC}), then you can use it, which will cause their system to pass a dynamic numerical value for the CPC to your link.For example, your affiliate network may tell you to use the token
{CPC} in your link:https://link-domain.com/mylink/{CPC}Their system will then replace the
{CPC} token with the actual cost-per-click value before it redirects to your link.Different networks will use different tokens, so consult their documentation.
Two Important Things to Remember …
First, if you want to pass in cost data through your tracking links, you MUST leave the cost data blank in your advanced link settings. Any cost data that you specify in your link settings will override what’s passed in using the method above.
Second, if you include cost data using the method above, it MUST come AFTER any optional sub-ID parameters.
So if you want to include a sub-ID and cost data, the example above showing a CPC of 0.50 would need to look like this:
https://link-domain.com/mylink/subid/0.50Basically, the cost data must always be at the very end …
For more information on sub-IDs, read this article:
How do I use Sub-IDs?
This tab allows you to add a backup URL and a separate URL for mobile devices and repeat clicks.
Backup URL
This is the URL that “extra” clicks will be routed to, for example for clicks that exceed your “Max Clicks” limit from the Misc tab or for clicks that don’t match your geotargeting settings in the Geo tab.
Mobile URL and iOS URL
You can easily identify mobile clicks by setting the optional Mobile and iOS URLs on the URLs tab for any link.
When ClickMagick receives a mobile click, it first checks to see if the click is from an Apple iOS device like an iPhone, and if so, the click is re-routed to the URL specified in the iOS URL setting if there is one.
If the iOS URL is not set, or the click is from any other mobile device, the click is re-routed to the Mobile URL, again if there is one, otherwise, the click is processed normally.
Note: By default, visitors using tablets like an iPad will be treated as if they’re on a desktop PC. This is usually what you’ll want because their screens are usually large enough to be treated as a “regular” visitor. If you’d rather have tablets be treated as mobile devices, you can change this setting in the Traffic settings of your Account Settings.
Repeat URL
Once the Geotargeting, Mobile/iOS, and Max Clicks checks have been made, ClickMagick will do one final check to see if the click coming in has visited this tracking link before. If so, the click will be re-routed to the Repeat URL, if set.
There is a special setting if you want to use the Repeat URL if this visitor has ever gone through ANY tracking link in your account that has the same Primary URL as the current link. If you need this special functionality, choose Yes for this setting:

Note: When clicks are processed for tracking links, the advanced settings are applied in the following order, from top to bottom:
Password Protect
iOS devices
Mobile devices
Geotargeting
Max Clicks
Repeat Clicks
Primary URL and Split Test URLs (Pixels settings are fired here)
Using this information, you can see that added Pixels won’t be fired if something earlier in the table sends the click somewhere else, such as geotargeting sending the click to the Backup URL or Max Clicks topping out. That’s how you would use the information in this table.
Here you can set specific Geo-targeting options for your tracking link – countries that you can include or exclude from your targeting.
How Does the Geotargeting Work?
Many times an offer you want to promote only accepts traffic from certain countries – and any other traffic you send through your referral link is just wasted.
Or maybe you’ve just figured out that a particular offer converts best for users in certain countries and you’d rather send users in other countries to a different offer rather than just “wasting” that traffic.
Or perhaps you sell solo ads and your clients only want clicks from certain countries …
“Geotargeting” is the solution in all these scenarios.
Just open the link or rotator name you want to set up geotargeting for and click the “Geo” tab.
Here you have two choices: You can specify only the countries you want clicks from, or only the countries that you don’t want clicks from (often called “geoblocking”). Any clicks that come in that don’t match your settings will automatically be re-routed to your “Backup URL.”
This will maximize the value of your traffic by sending each user to the offer most likely to result in a positive outcome—whether that’s an opt-in, a lead or a sale.
Note: If a country you want to geotarget isn’t listed, let us know and we can add it in literally 5 seconds.
Only the most popular countries that users target are listed, because no one geotargets Botswana, and a list of 246 countries is just a pain to work with.
Only the most popular countries that users target are listed, because no one geotargets Botswana, and a list of 246 countries is just a pain to work with.
Tip: If you’re interested in learning more about geoblocking, see this article on the topic:
This tab allows you to set the rules for the 6 types of “suspicious” or potentially bad clicks you might want processed differently as compared to regular clicks from real people surfing the web normally.
And for each of them, you can tell ClickMagick to “flag” the clicks, block the clicks, or do nothing special with the clicks and process them normally.
To learn more, please see the article below:
How do Tracking Links & Rotators combat bots and click fraud?
This is the last “miscellaneous” tab for your tracking link, which includes everything else that can help you with your marketing, such as:
- Setting the maximum number of clicks your link can receive
- Blanking referrers
- Creating a password for your links to limit access
- Skipping URL verification
Max Clicks
Setting “Max Clicks” allows you to specify how many clicks will be redirected through the link before all additional clicks are re-routed to the Backup URL.

For this feature to work, you must set a Backup URL.
Note that while “flagged” clicks are redirected through the link like any other click, they are not considered in the click count for Max Clicks because they are not “real” clicks. Also, when normal clicks start redirecting through the Backup URL, flagged clicks will be redirected there as well.
Blank Referrers
If you want to hide or “blank” your referrers so the sites you’re sending traffic to can’t tell where it’s coming from, you would just toggle on “Yes” for this option.
When your clicks are redirected, your referrers will be blanked.
The referrers will NOT be blanked in your own stats pages. This is intentional so that you’ll always know where your traffic is coming from.
Note: Blanking your referrers requires an extra redirect which technically increases the time it takes for the user to see the page you’re sending them to. Users should never notice this, be we thought we’d mention it.
Caution: Please do NOT enable this feature unless you understand the purpose for it, and you have a good reason for using it.
Note: Firefox versions 67 and 68 have a bug that broke the ability to blank the referrer for visitors using those two versions of that browser. Firefox browsers released before version 67 work fine and versions of Firefox 69 and newer appear to have this problem fixed. Unfortunately, there is nothing we—or any other tracker—can do to workaround the Firefox 67 and 68 bug.
Password
If you enter a password for a tracking link, the user will first see a generic “login” page, like this:
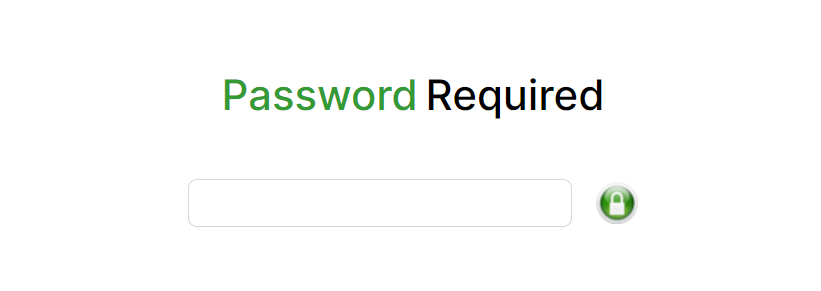
Your visitors will need to enter the correct password to continue.
Important: If you use password management software or have your browser configured to auto-fill forms, these MAY attempt to auto-fill the password field.
This will cause it to look like you have a password on all of your tracking links when you really don’t.
If this happens to you, simply tweak the settings in your password management tool or browser to NOT auto-fill form fields on the
This will cause it to look like you have a password on all of your tracking links when you really don’t.
If this happens to you, simply tweak the settings in your password management tool or browser to NOT auto-fill form fields on the
clickmagick.com domain.Skip URL Check
Toggling this option “On” will skip the URL check for all the URLs when you try to save a tracking link or add a URL to a rotator.
To give you a little more information about what the URL check is about, whenever you set up a tracking link or add a URL to a rotator, ClickMagick will check to make sure that the URL is valid and working properly.
This is to prevent you from entering URLs with typos, or URLs that just aren’t working properly due to a technical problem – both of which would waste your clicks.
Keep in mind that sometimes a link may stop working for just a minute or two. So unless you get an error code that starts with a 4 – codes 401, 403 or 404, which indicate a serious problem that’s not going to fix itself – the first thing to do is just wait a sec and try adding it again.
Obviously, you’ll also want to check the URL for typos, missing “
www”, or any other obvious problems.Also, please understand that just because a link works for you, it does NOT mean that it works for everyone.
Many problems result in some people being able to access a link, with lots of others who can’t.
Here’s a list of the most common errors you’ll see, and a brief description of what they mean.
401 Authorization Required / Unauthorized
This URL requires authentication i.e. a username and password, so our monitoring system is unable to access it.
403 Forbidden
The server hosting the URL you’re promoting is operational but it refused our request. This could be due to a configuration error.
404 Not Found
The requested URL does not exist.
500 Timeout / Timed Out
The URL took longer than 20 seconds to load (and might as well be down!)
500 Bad Hostname
Generally means the URL/domain is not configured properly, usually due to a DNS problem.
500 Connection Refused
The server refused the connection. This is usually due to some type of configuration problem.
500 No Route To Host
This is a configuration problem with the server hosting the URL you’re promoting.
500 Internal Error / Server Error
The server hosting the requested URL responded with a generic error message.
Article 494 Last updated: 07/30/2023 8:28:38 AM
https://www.clickmagick.com/kb/?article=494