|
How do I track Google Ads?
ClickMagick lets you quickly and easily track all your ads on any ad network. More importantly, ClickMagick will provide you with truly accurate data and actionable stats to help you optimize and scale like a pro.
You just can’t rely on the stats you see in your ad network. To learn more, see the article below:
Why can’t I rely on the stats in my ad network account?
Select your ad network and we’ll show you how to upgrade your tracking in just a few minutes ...
Before completing the steps below, make sure you've completed your ClickMagick Campaigns set up by adding click and conversion tracking codes to your website or online store.
If you're new to using UTM parameters you’ll also want to review the article below before getting started:
What are some best practices when using UTM Parameters?
Step 1 – Build a UTM-Powered Ad URL
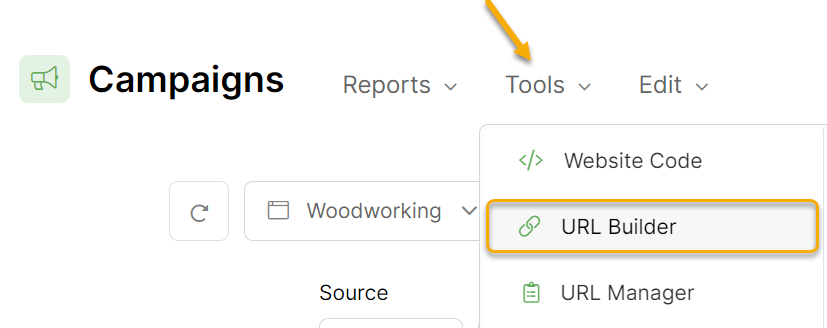
Click the Campaigns link at the top of any page, then click on the Tools menu and select URL Builder.

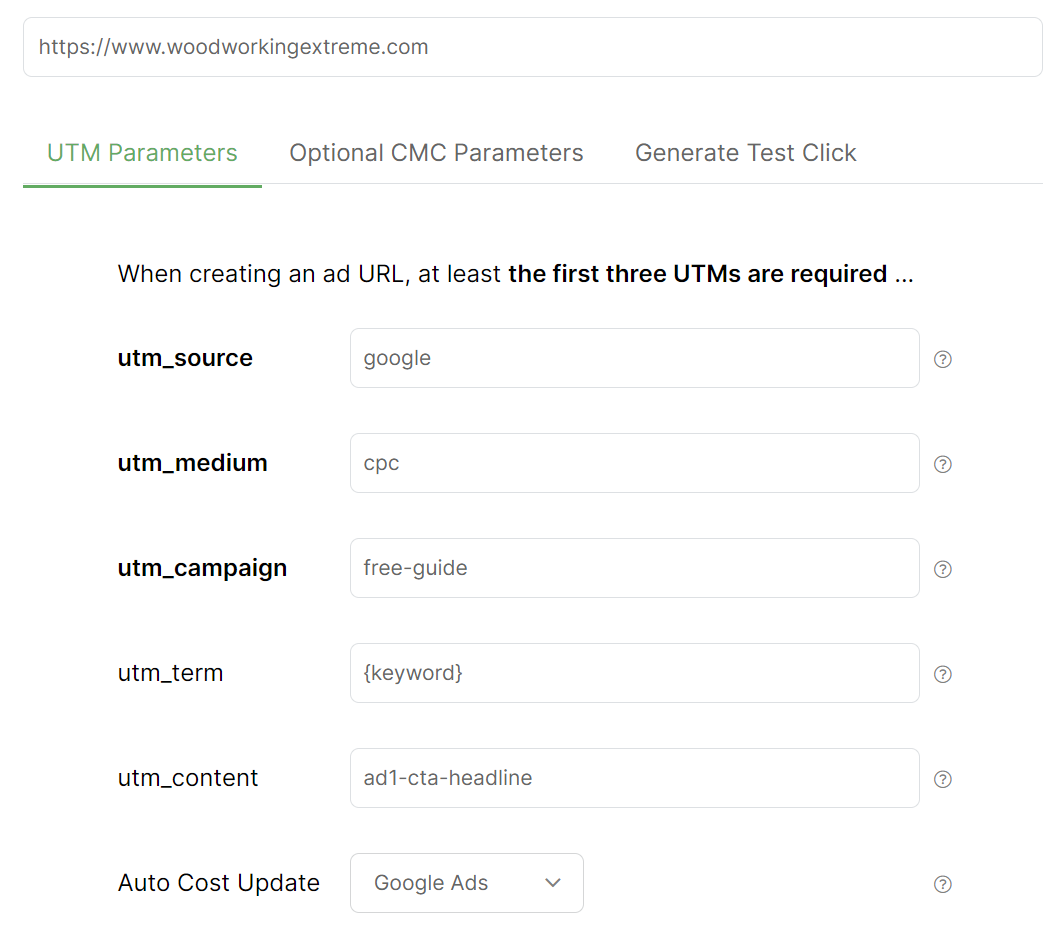
Enter the URL of your landing page, and then simply enter the UTM values you want to use to track this ad. You must always enter values for at least
utm_source, utm_medium, and utm_campaign.The
utm_term and utm_content parameters are optional, although you'll generally want to use all five UTMs.For Google Ads you’ll generally want to set
utm_term={keyword} and utm_content to the name of your ad.{keyword} is a dynamic “token” that will be replaced with the actual keyword that triggered your ad, and you can learn more about tokens at the end of this article.And if you plan on integrating ClickMagick with Google, you should go ahead and select Google Ads under Auto Cost Update as well. Once you’ve done the integration, this will automatically pull in your exact ad costs from Google.
Note: Remember, you can use UTMs in whichever way makes the most sense for your business. Any examples we give are just examples.
Whatever you do, the main thing is that you maintain consistency e.g. always use utm_campaign for the name of the campaign. If you don’t, you will face challenges when it comes to slicing and dicing your data and analyzing your results.
Whatever you do, the main thing is that you maintain consistency e.g. always use utm_campaign for the name of the campaign. If you don’t, you will face challenges when it comes to slicing and dicing your data and analyzing your results.
Step 2 - Use your UTM-Powered URL in your Google Ad
Click on the “Save & Copy URL” button to copy your UTM-powered link to your clipboard.
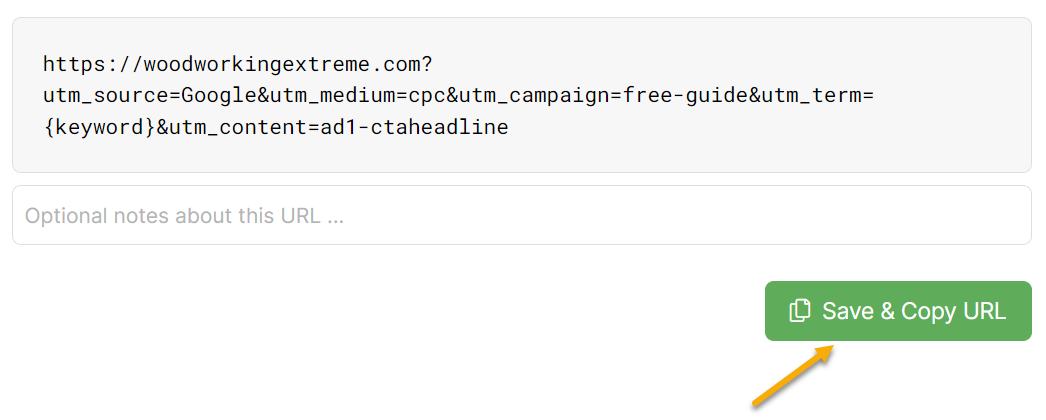
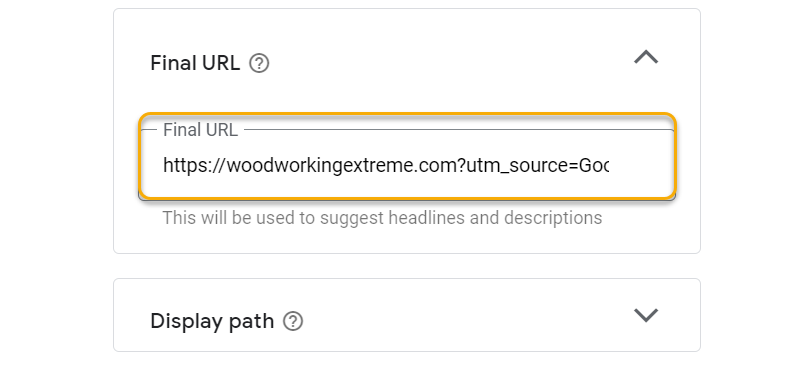
Finally, paste this modified link into the "Final URL" field for your Google ad:
Before completing the steps below, make sure you've completed your ClickMagick Campaigns set up by adding click and conversion tracking codes to your website or online store.
If you're new to using UTM parameters you’ll also want to review the article below before getting started:
What are some best practices when using UTM Parameters?
Step 1 – Build a UTM-Powered Ad URL
Click the Campaigns link at the top of any page, then click on the Tools menu and select URL Builder.
Enter the URL of your landing page, and then simply enter the UTM values you want to use to track this ad. You must always enter values for at least
utm_source, utm_medium, and utm_campaign.The
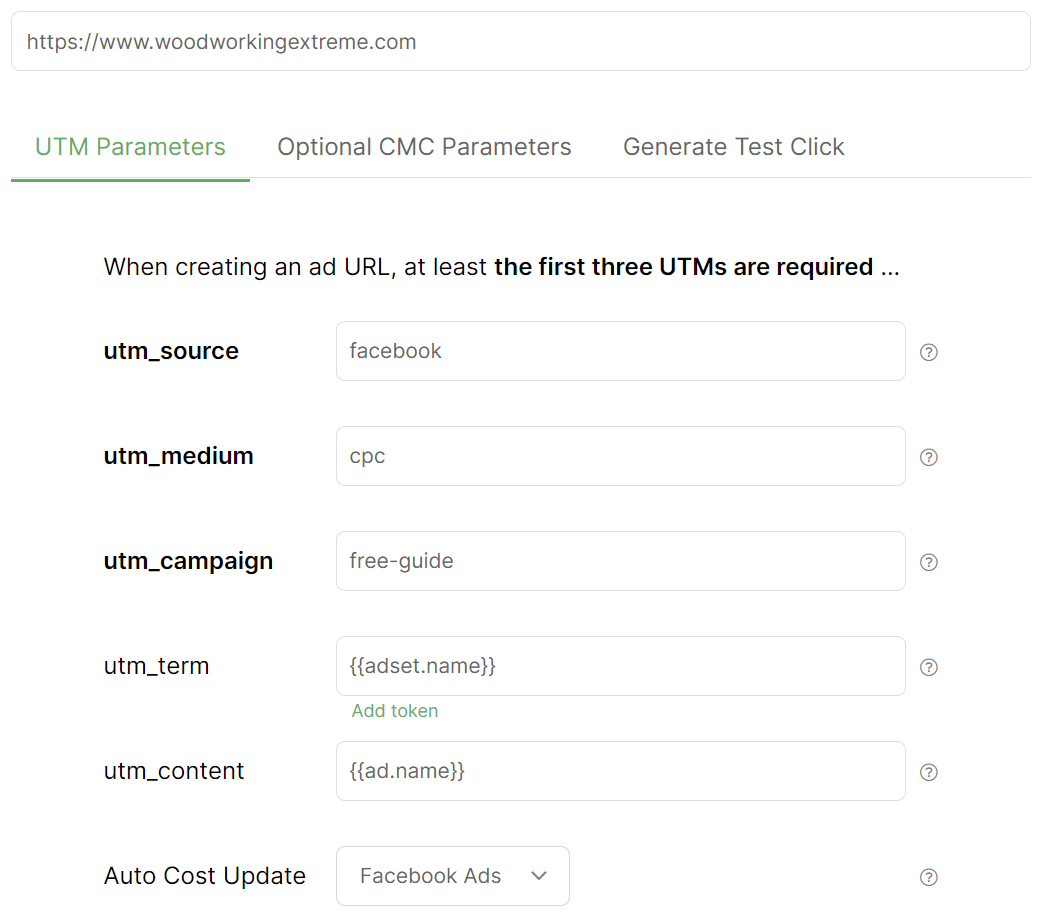
utm_term and utm_content parameters are optional, although you'll generally want to use all five UTMs.For Facebook Ads you may want to set
utm_term={{adset.name}} and utm_content={{ad.name}}{{adset.name}} and {{ad.name}} are dynamic “tokens” that will be replaced with the actual names of your ad set and ad when someone clicks on it, and you can learn more about tokens at the end of this article.And if you plan on integrating ClickMagick with Facebook, you should go ahead and select Facebook Ads under Auto Cost Update as well. Once you’ve done the integration, this will automatically pull in your exact ad costs from Facebook.
Note: Remember, you can use UTMs in whichever way makes the most sense for your business. Any examples we give are just examples.
Whatever you do, the main thing is that you maintain consistency e.g. always use utm_campaign for the name of the campaign. If you don’t, you will face challenges when it comes to slicing and dicing your data and analyzing your results.
Whatever you do, the main thing is that you maintain consistency e.g. always use utm_campaign for the name of the campaign. If you don’t, you will face challenges when it comes to slicing and dicing your data and analyzing your results.
Step 2 - Use your UTM-Powered URL in your Facebook Ad
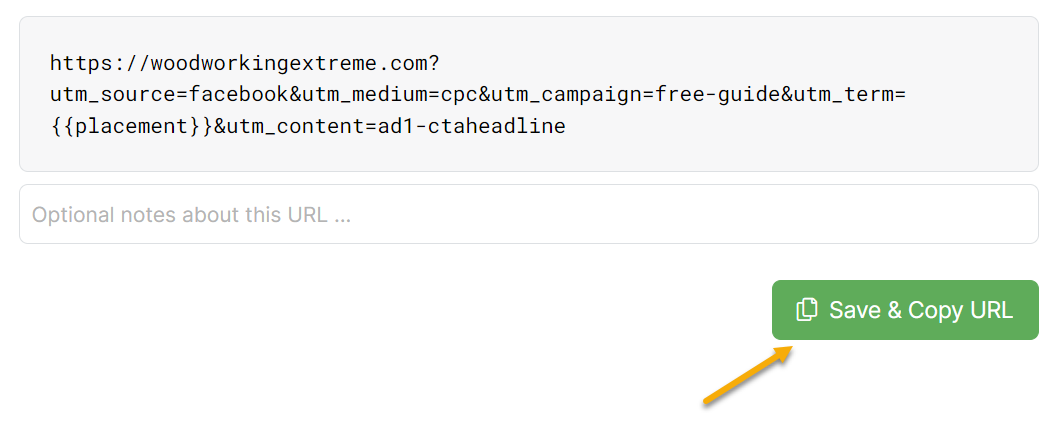
Click on the “Save & Copy URL” button to copy your UTM-powered link to your clipboard.
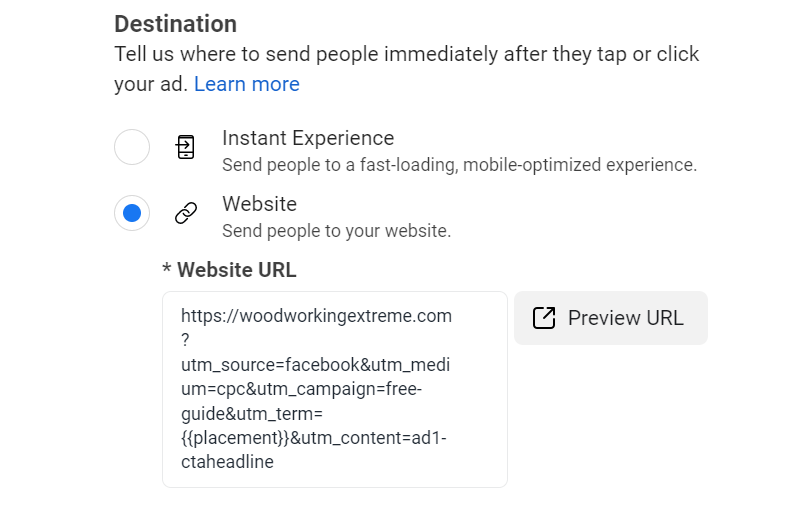
Finally, paste this modified link into the "Website URL" field of your Facebook ad:
Before completing the steps below, make sure you've completed your ClickMagick Campaigns set up by adding click and conversion tracking codes to your website or online store.
If you're new to using UTM parameters you’ll also want to review the article below before getting started:
What are some best practices when using UTM Parameters?
Step 1 – Build a UTM-Powered Ad URL
Click the Campaigns link at the top of any page, then click on the Tools menu and select URL Builder.

Enter the URL of your landing page, and then simply enter the UTM values you want to use to track this ad. You must always enter values for at least
utm_source, utm_medium, and utm_campaign.The
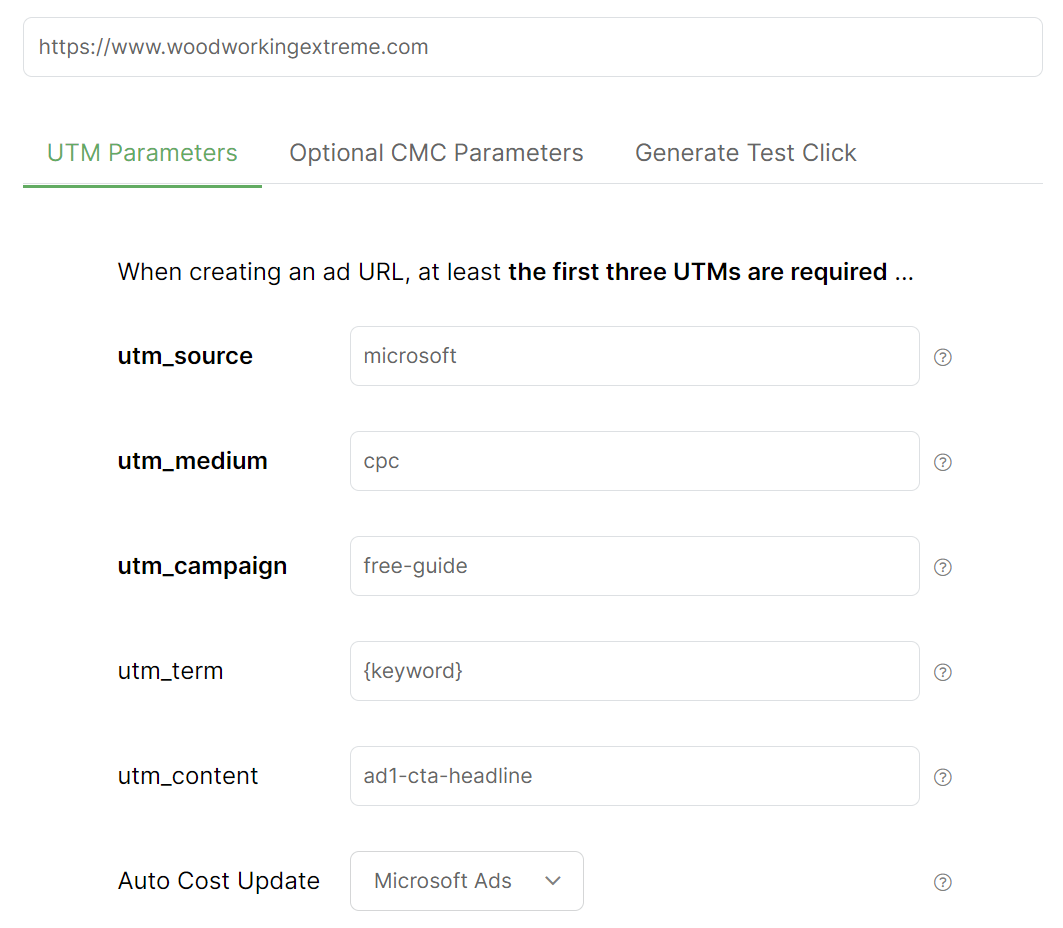
utm_term and utm_content parameters are optional, although you'll generally want to use all five UTMs.For Microsoft Ads you’ll generally want to set
utm_term={keyword} and utm_content to the name of your ad.{keyword} is a dynamic “token” that will be replaced with the actual keyword that triggered your ad, and you can learn more about tokens at the end of this article.And if you plan on integrating ClickMagick with Microsoft, you should go ahead and select Microsoft Ads under Auto Cost Update as well. Once you’ve done the integration, this will automatically pull in your exact ad costs from Microsoft.
Note: Remember, you can use UTMs in whichever way makes the most sense for your business. Any examples we give are just examples.
Whatever you do, the main thing is that you maintain consistency e.g. always use utm_campaign for the name of the campaign. If you don’t, you will face challenges when it comes to slicing and dicing your data and analyzing your results.
Whatever you do, the main thing is that you maintain consistency e.g. always use utm_campaign for the name of the campaign. If you don’t, you will face challenges when it comes to slicing and dicing your data and analyzing your results.
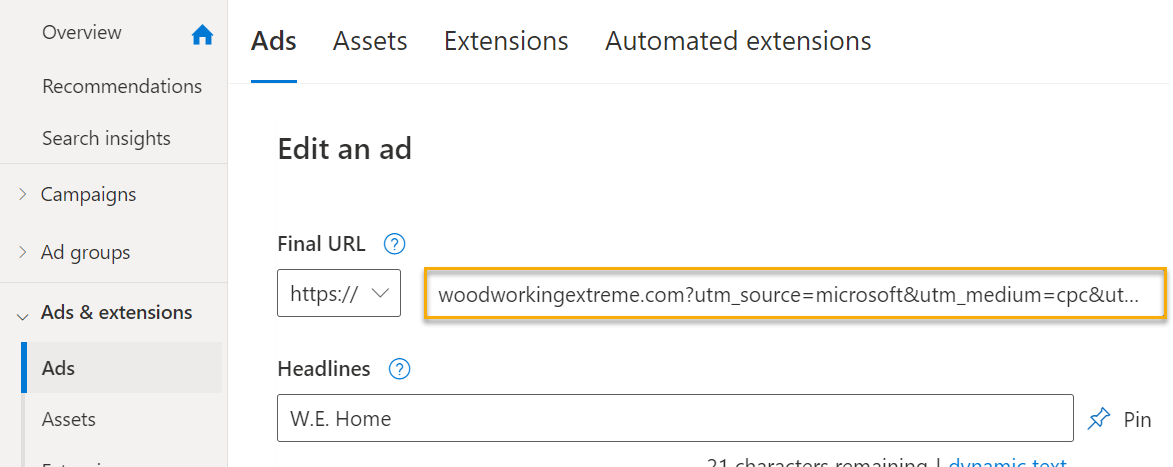
Step 2 – Use your UTM-Powered URL in your Microsoft Ad
Click on the “Save & Copy URL” button to copy your UTM-powered link to your clipboard.
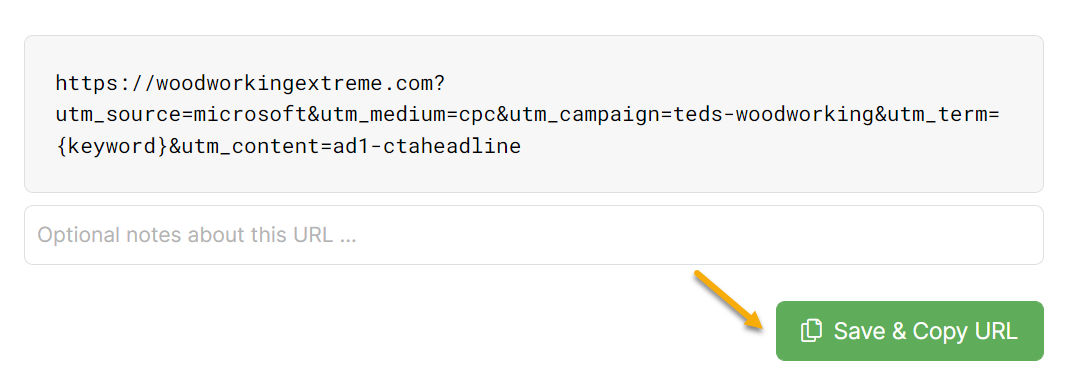
Finally, paste this modified link into the "Final URL" field for your Microsoft ad:
Before completing the steps below, make sure you've completed your ClickMagick Campaigns set up by adding click and conversion tracking codes to your website or online store.
If you're new to using UTM parameters you’ll also want to review the article below before getting started:
What are some best practices when using UTM Parameters?
Step 1 – Build a UTM-Powered Ad URL
Click the Campaigns link at the top of any page, then click on the Tools menu and select URL Builder.

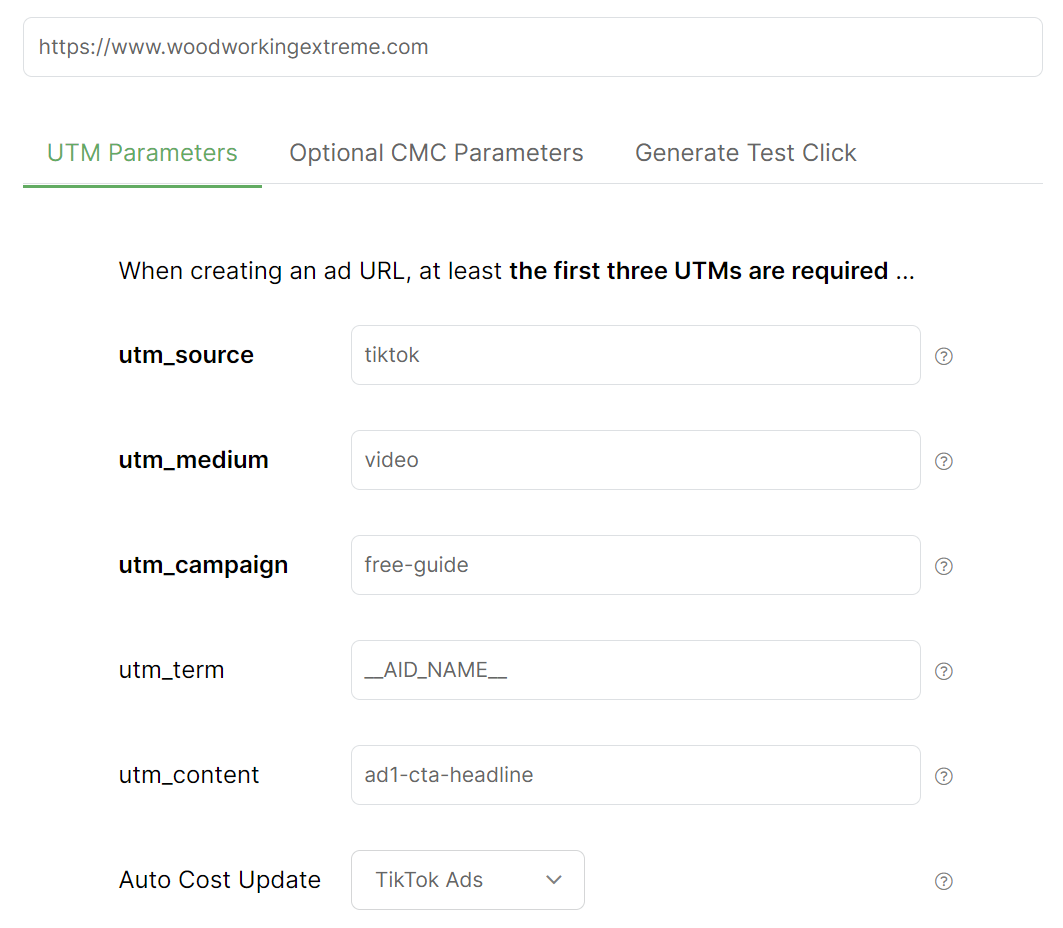
Enter the URL of your landing page, and then simply enter the UTM values you want to use to track this ad. You must always enter values for at least
utm_source, utm_medium, and utm_campaign.The
utm_term and utm_content parameters are optional, although you'll generally want to use all five UTMs.For TikTok Ads you may want to set
utm_term=__AID_NAME__ and utm_content to the name of your ad.__AID_NAME__ is a dynamic “token” that will be replaced with the name of the ad group that generated the click, and you can learn more about tokens at the end of this article.And if you plan on integrating ClickMagick with TikTok, you should go ahead and select TikTok Ads under Auto Cost Update as well. Once you’ve done the integration, this will automatically pull in your exact ad costs from TikTok.
Note: Remember, you can use UTMs in whichever way makes the most sense for your business. Any examples we give are just examples.
Whatever you do, the main thing is that you maintain consistency e.g. always use utm_campaign for the name of the campaign. If you don’t, you will face challenges when it comes to slicing and dicing your data and analyzing your results.
Whatever you do, the main thing is that you maintain consistency e.g. always use utm_campaign for the name of the campaign. If you don’t, you will face challenges when it comes to slicing and dicing your data and analyzing your results.
Step 2 - Use your UTM-Powered URL in your TikTok Ad
Click on the “Save & Copy URL” button to copy your UTM-powered link to your clipboard.
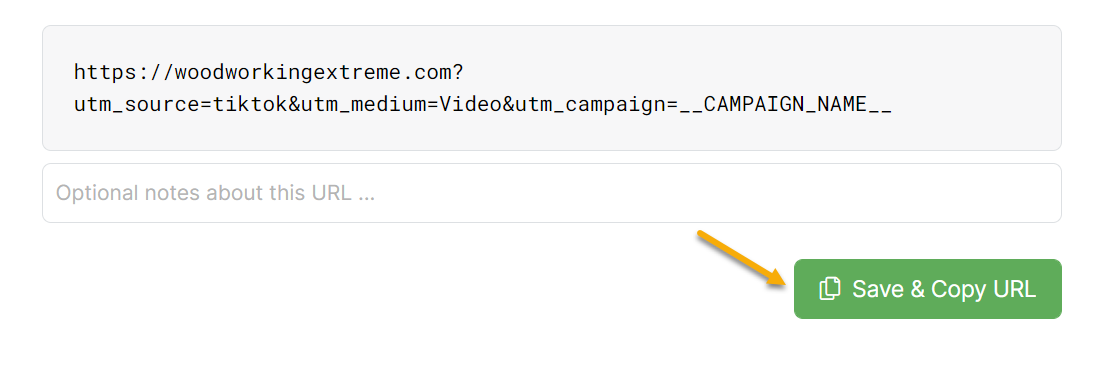
Finally, paste this modified link into your TikTok ad:
Before completing the steps below, make sure you've completed your ClickMagick Campaigns set up by adding click and conversion tracking codes to your website or online store.
If you're new to using UTM parameters you’ll also want to review the article below before getting started:
What are some best practices when using UTM Parameters?
Step 1 – Build a UTM-Powered Ad URL
Click the Campaigns link at the top of any page, then click on the Tools menu and select URL Builder.

Enter the URL of your landing page, and then simply enter the UTM values you want to use to track this ad. You must always enter values for at least
utm_source, utm_medium, and utm_campaign.The
utm_term and utm_content parameters are optional, although you'll generally want to use all five UTMs.For Pinterest Ads you may want to set
utm_term={keyword} and utm_content to the name of your ad.{keyword} is a dynamic “token” that will be replaced with the actual keyword that triggered your ad, and you can learn more about tokens at the end of this article.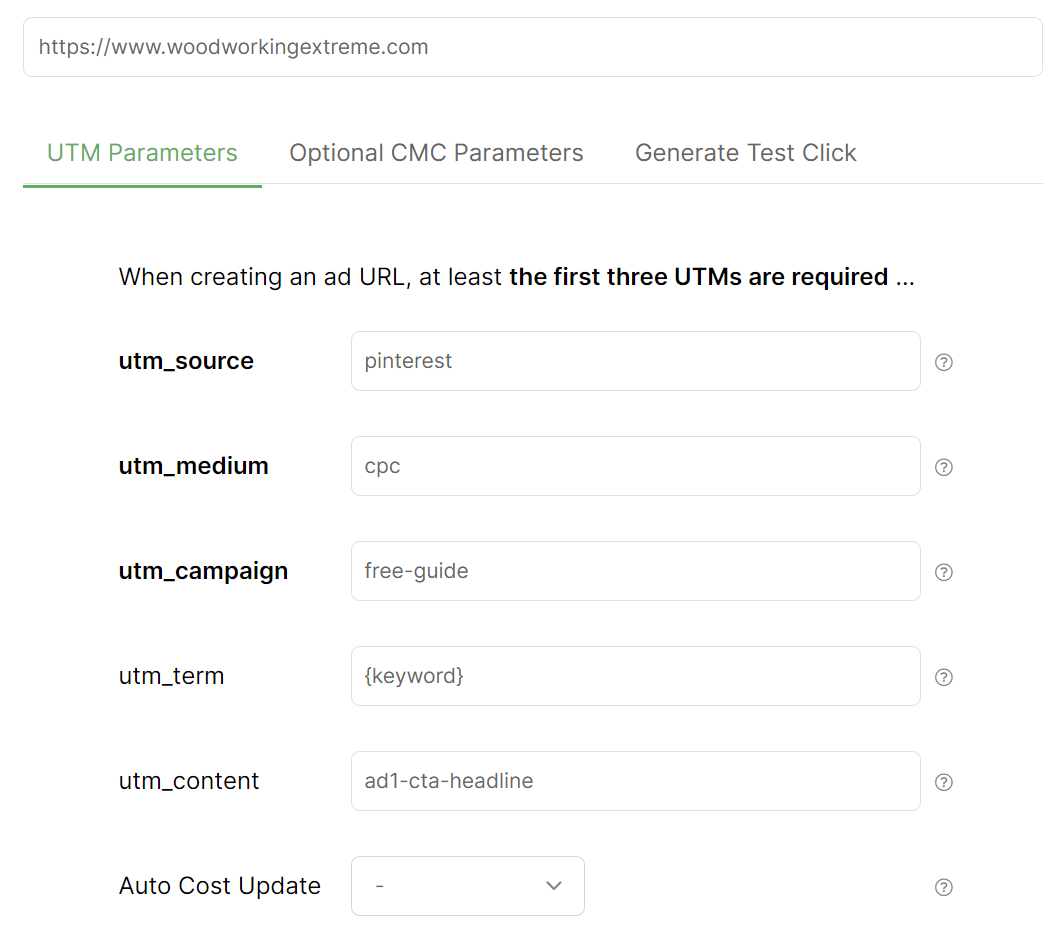
Note: Remember, you can use UTMs in whichever way makes the most sense for your business. Any examples we give are just examples.
Whatever you do, the main thing is that you maintain consistency e.g. always use utm_campaign for the name of the campaign. If you don’t, you will face challenges when it comes to slicing and dicing your data and analyzing your results.
Whatever you do, the main thing is that you maintain consistency e.g. always use utm_campaign for the name of the campaign. If you don’t, you will face challenges when it comes to slicing and dicing your data and analyzing your results.
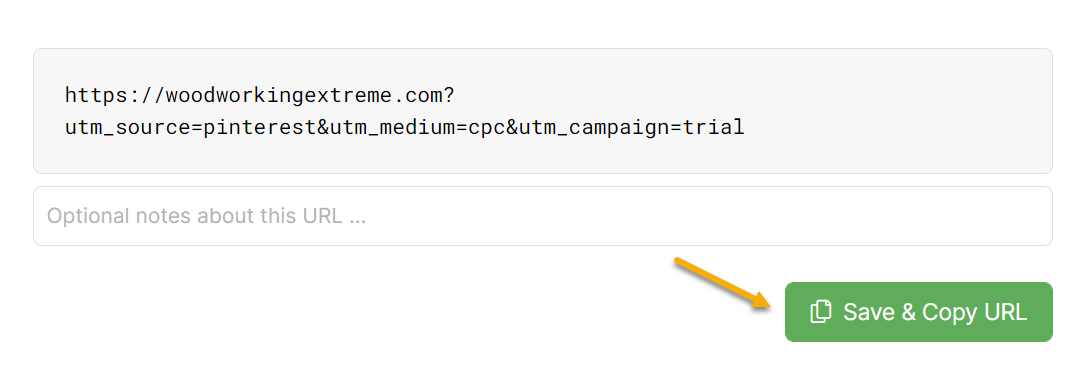
Step 2 – Use your UTM-Powered URL in your Pinterest Ad
Click on the “Save & Copy URL” button to copy your UTM-powered link to your clipboard.
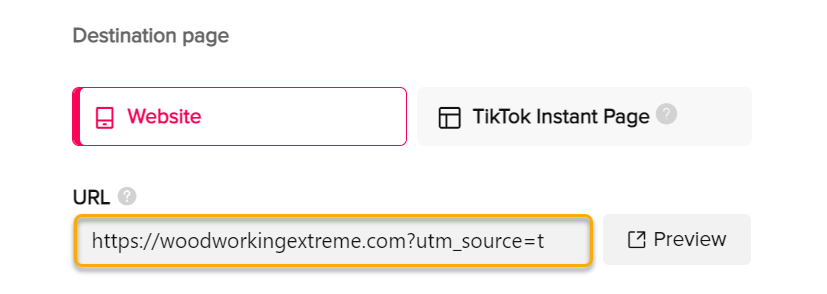
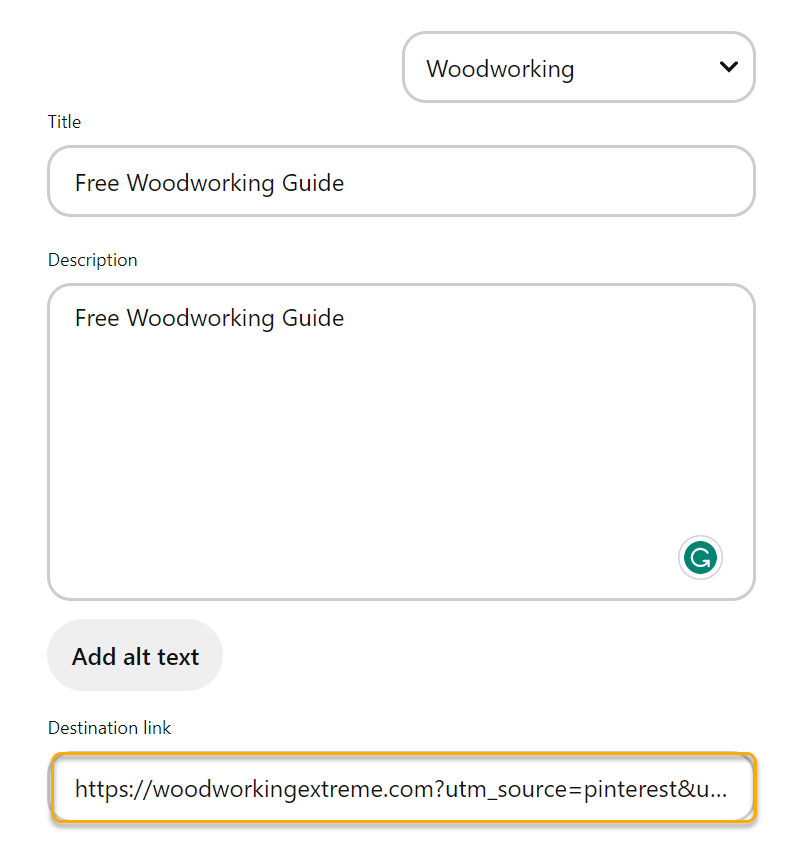
Finally, paste this modified link into the "Destination Link" field for your Pinterest ad:
If you're new to using UTM parameters you’ll also want to review the article below before getting started:
What are some best practices when using UTM Parameters?
Step 1 – Build a UTM-Powered Ad URL
Click the Campaigns link at the top of any page, then click on the Tools menu and select URL Builder.

Enter the URL of your landing page, and then simply enter the UTM values you want to use to track this ad. You must always enter values for at least
utm_source, utm_medium, and utm_campaign.The
utm_term and utm_content parameters are optional, although you'll generally want to use all five UTMs.For Snapchat Ads you may want to set
utm_term={{adSet.name}} and utm_content to the name of your ad.{{adSet.name}} is a dynamic “token” that will be replaced with the name of the ad set that triggered your ad, and you can learn more about tokens at the end of this article.
Note: Remember, you can use UTMs in whichever way makes the most sense for your business. Any examples we give are just examples.
Whatever you do, the main thing is that you maintain consistency e.g. always use utm_campaign for the name of the campaign. If you don’t, you will face challenges when it comes to slicing and dicing your data and analyzing your results.
Whatever you do, the main thing is that you maintain consistency e.g. always use utm_campaign for the name of the campaign. If you don’t, you will face challenges when it comes to slicing and dicing your data and analyzing your results.
Step 2 – Use your UTM-Powered URL in your Snapchat Ad
Click on the “Save & Copy URL” button to copy your UTM-powered link to your clipboard.
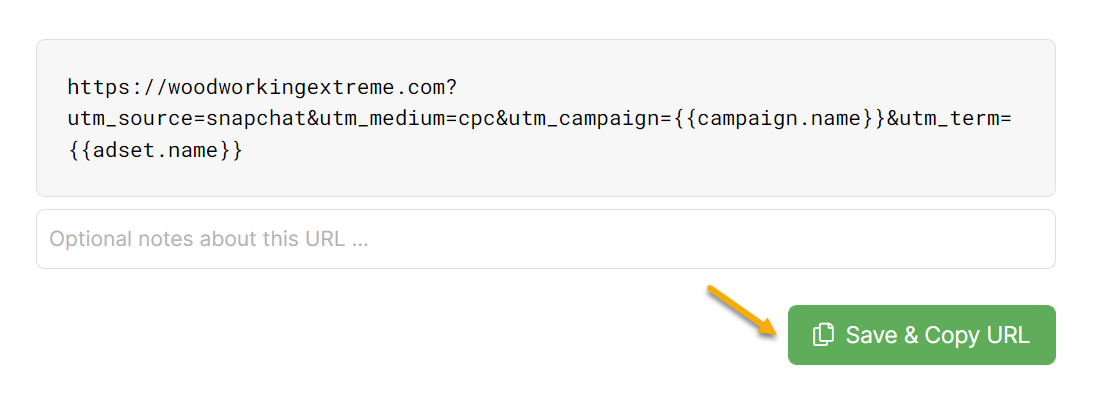
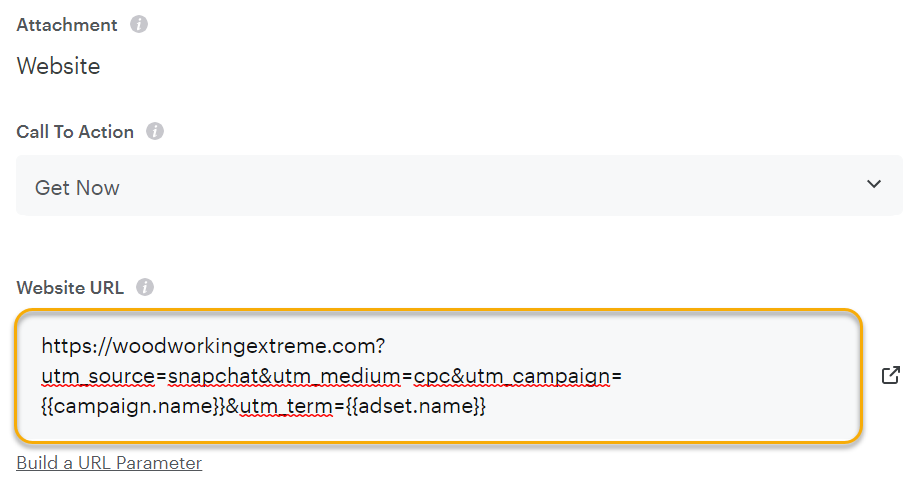
Finally, paste this modified link into the "Website URL" field for your Snapchat ad:
Before completing the steps below, make sure you've completed your ClickMagick Campaigns set up by adding click and conversion tracking codes to your website or online store.
If you're new to using UTM parameters you’ll also want to review the article below before getting started:
What are some best practices when using UTM Parameters?
Step 1 – Build a UTM-Powered Ad URL
Click the Campaigns link at the top of any page, then click on the Tools menu and select URL Builder.

Enter the URL of your landing page, and then simply enter the UTM values you want to use to track this ad. You must always enter values for at least
utm_source, utm_medium, and utm_campaign.The
utm_term and utm_content parameters are optional, although you'll generally use at least four or all five UTMs.For Twitter Ads you’ll generally leave
utm_term blank and set utm_content to the name of your ad.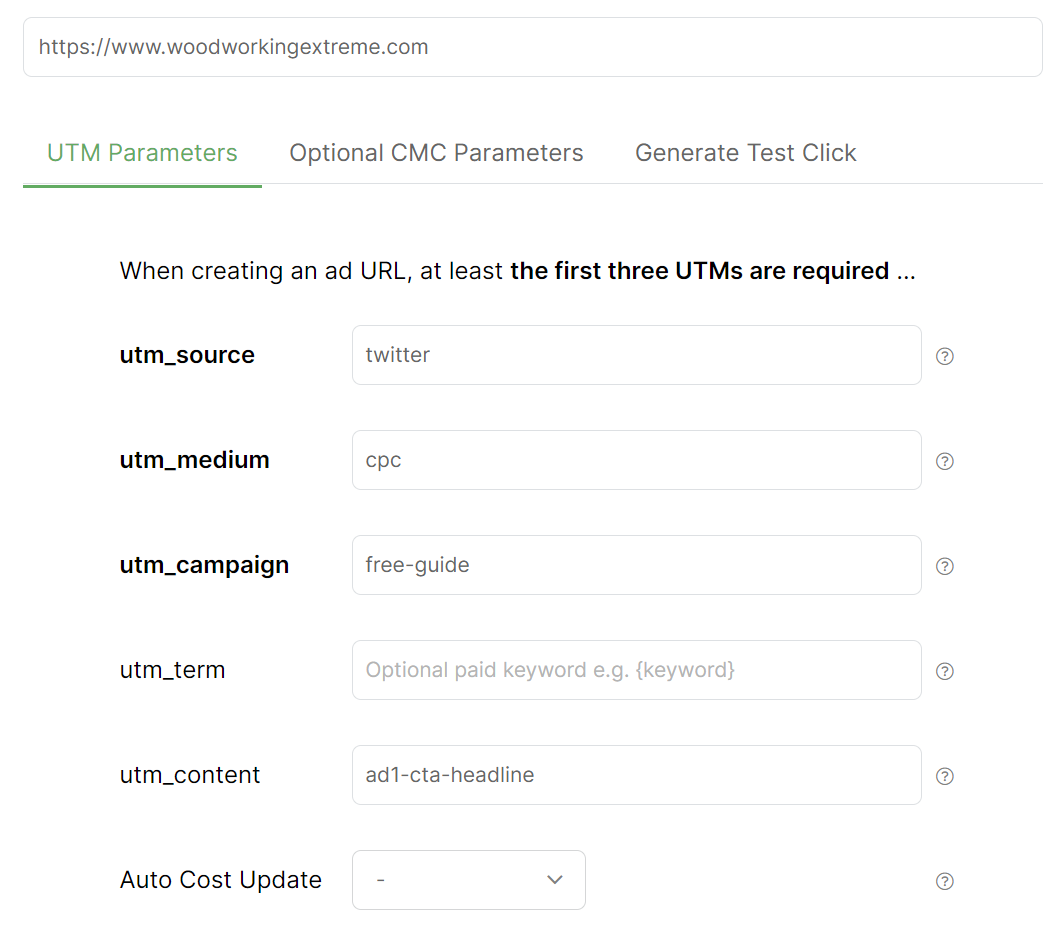
Note: Remember, you can use UTMs in whichever way makes the most sense for your business. Any examples we give are just examples.
Whatever you do, the main thing is that you maintain consistency e.g. always use utm_campaign for the name of the campaign. If you don’t, you will face challenges when it comes to slicing and dicing your data and analyzing your results.
Whatever you do, the main thing is that you maintain consistency e.g. always use utm_campaign for the name of the campaign. If you don’t, you will face challenges when it comes to slicing and dicing your data and analyzing your results.
Step 2 – (Optional) Create a Shortened Tracking Link for Your Campaign URL
Unlike other ad networks, Twitter doesn’t have the concept of a “Display URL” and “Final URL”. You provide them just a single URL that is displayed in your ad and this is the exact URL visitors are sent to.
Because of this, you'll probably want to create a “short link” for your UTM-powered URL using a Tracking Link.
This way you can create a nice looking URL that’ll be displayed in your ad, and when users click your ad they’ll be redirected to your actual “tracking URL” with your UTM parameters.
You'll also probably want to make sure to set up and use a custom domain for your Tracking Links as well, which you can learn about at the link below:
How do I set up a secure custom domain in ClickMagick?
With all of that being said, here’s how to create a short “pretty link” using a Tracking Link …
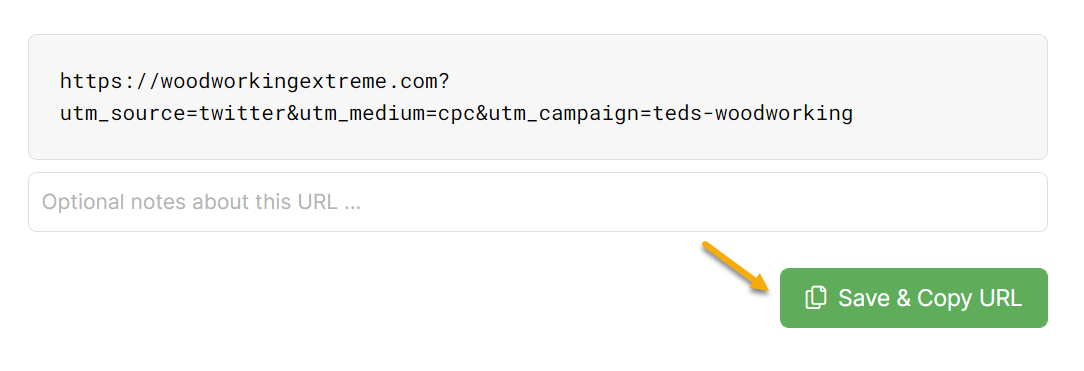
Click on the “Save & Copy URL” button to save your UTM-powered URL to the URL Manager.
Next you’ll want to navigate to the URL Manager ...

Then click the link icon to the right of the UTM-powered URL you want to create a short link for.

Add a Link Name (for your reference only), select your custom tracking domain, and add the Link Slug (the part after
link-domain.com) and then click on “Create Tracking Link”.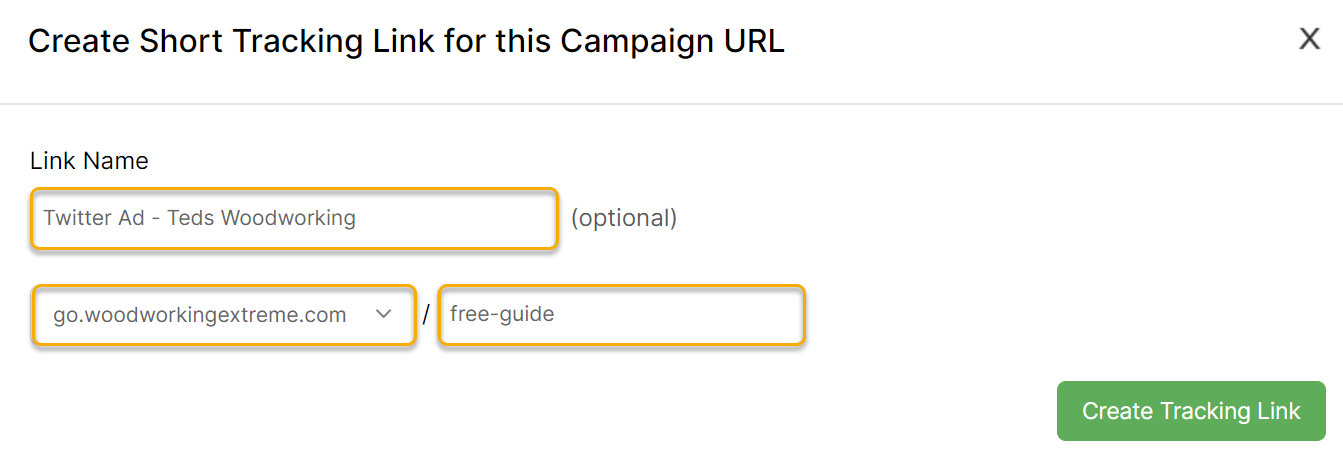
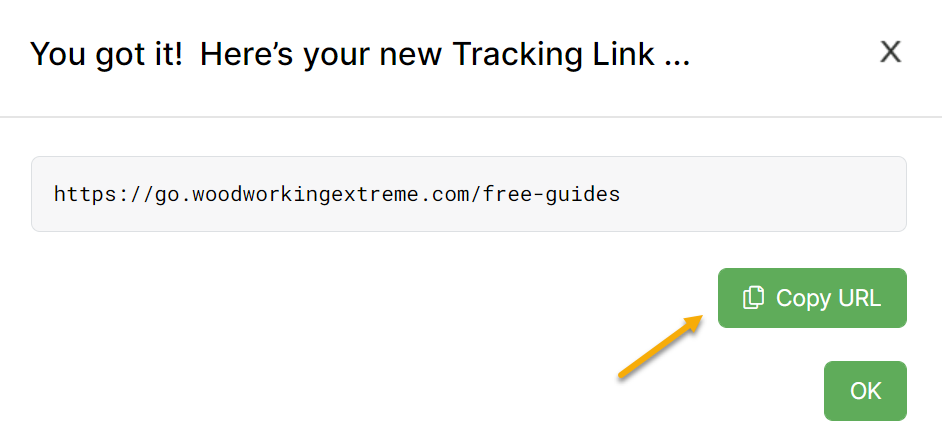
Now, click on “Copy URL” to copy this new short link.
Note: If you ever need to find this Tracking Link again, just go to Tracking Links and navigate to your “Campaign Short Links” link group.

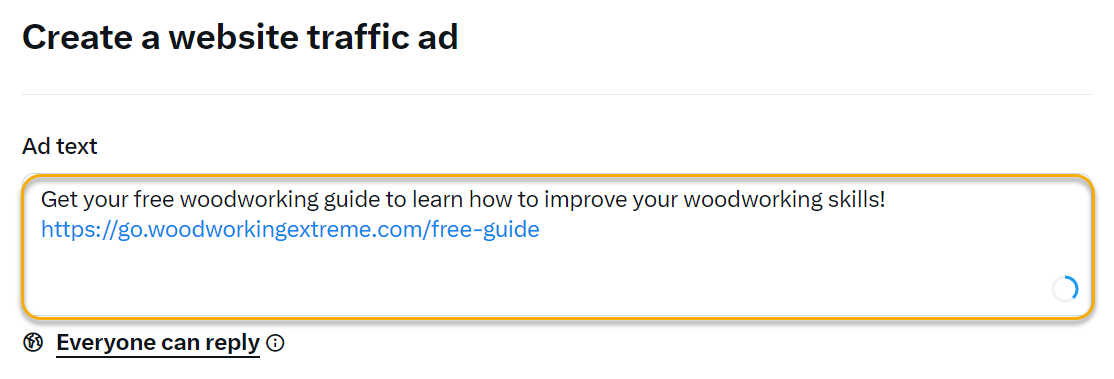
Step 3 – Use your UTM-Powered URL or short link in your Twitter Ad
Finally, paste your UTM-powered URL or your “pretty” short link URL into your Twitter ad.
Before completing the steps below, make sure you've completed your ClickMagick Campaigns set up by adding click and conversion tracking codes to your website or online store.
If you're new to using UTM parameters you’ll also want to review the article below before getting started:
What are some best practices when using UTM Parameters?
You have two options when it comes to advertising on Instagram ...
You can either “boost” your posts in the Instagram app, or you can use the Facebook Ads Manager.
Method 1 – Boosting Posts within the Instagram App
Boosting an Instagram post is simple – just add your post with the UTM-powered URL you want to promote and click the “Boost post" button. The only way to do this is on your phone from within the app.
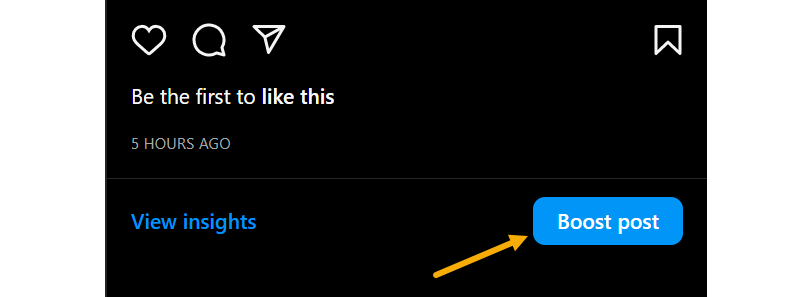
If you don’t see the “Boost post” button, you probably still need to convert your Instagram account to a Business account.
To do that, just follow the steps in this article here:
How to Switch Your Account to Instagram for Business
Method 2 – Manage your ads in Facebook Ads Manager
To manage your Instagram ads in Facebook Ads Manager, you would need to create a Facebook Ads account.
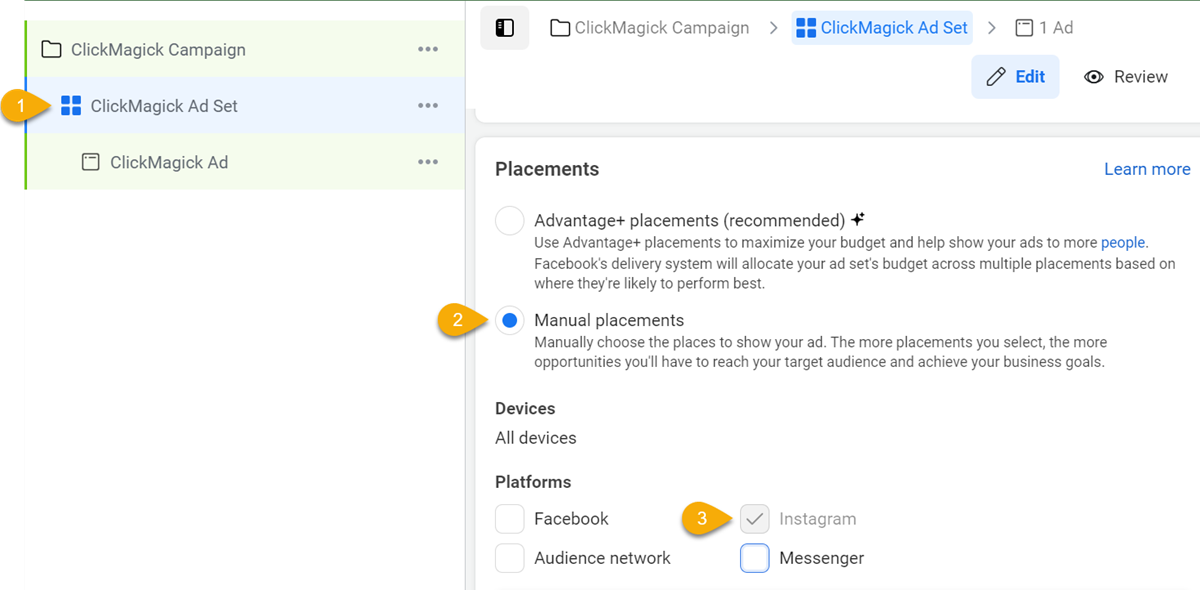
As you are creating your campaign, you would need to head over to your campaign ad set level and select the specific Instagram placement you want to target from there.
If you want to ONLY promote on Instagram for example, you would go to the ad set level, select “Manual Placements”, and deselect every option except for Instagram.
When you scroll down, you would then be able to edit your specific Instagram placements – Instagram Feed, Instagram Explore, and Instagram Stories:
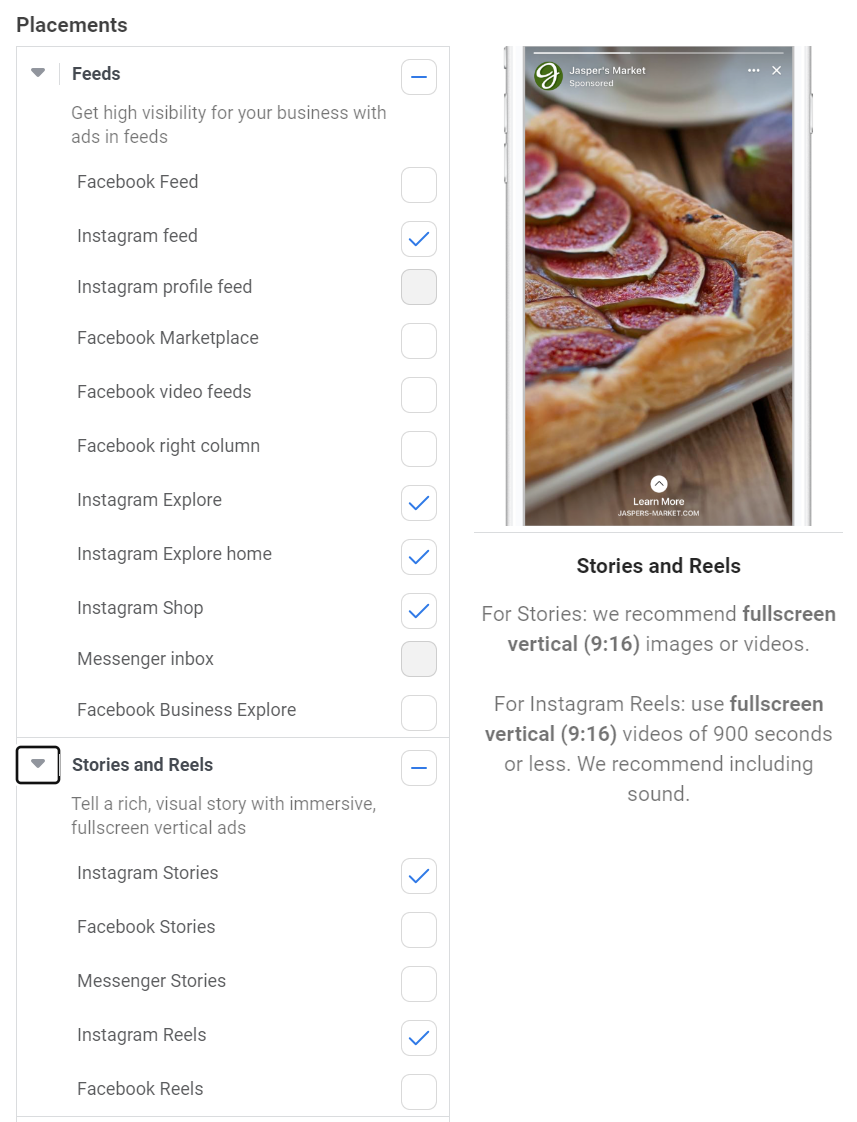
After you determine exactly where you want to show your ads, you would then just follow the rest of the steps in the Facebook Ads section of this article.
Using Dynamic Ad Network Tokens
Ad network “tokens” are dynamic placeholders that can be used as UTM values, in place of a static value. These tokens are then replaced with real values by your ad network each time your ad is clicked. Learn more in the article below:
What are dynamic ad network tokens and how do I use them?
Tracking Lots of Ads
The process above describes creating a UTM-powered URL for each of your ads. If you just have a handful of ads, this is generally the simplest way to go as it only takes a minute to update each ad.
If you have lots of ads, you may be able to use “Tracking Templates” to add dynamic tracking information at the Campaign level, so you don’t have to update the URL of each ad individually. Learn more in the article below:
What is the best way to track lots of ads?
Tracking your Ad Spend
There are three different ways to track your ad spend. You can learn more about that here:
How do I track my Ad Spend when using Campaigns?
Article 608 Last updated: 02/10/2024 1:30:49 PM
https://www.clickmagick.com/kb/?article=608