|
How do I track my opt-in rate in Campaigns?
ClickMagick provides you with two ways to start tracking your opt-in rate. This article explains how to get started with tracking a basic list building funnel.
To get started with tracking your opt-in rate when using Campaigns you are going to need to follow a few steps.
1. Add your Click Tracking Code to your Opt-In Page:
How to Add JavaScript and Image Tracking Pixels to Your Pages
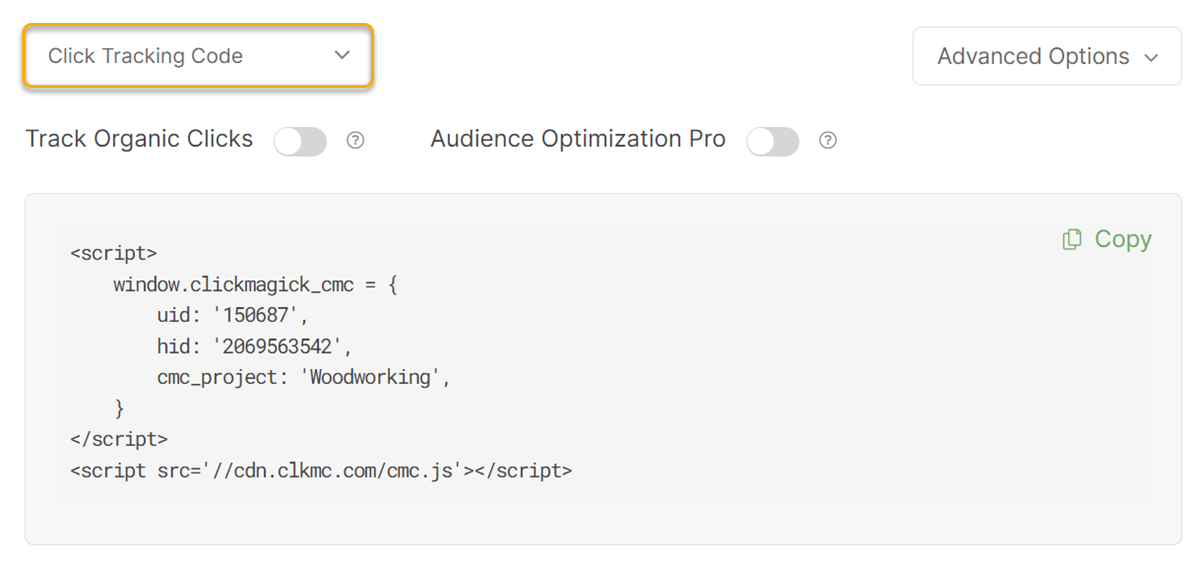
You can get your Click Tracking Code by going to the Tools menu in the Campaigns Dashboard, clicking on Website Code, and then choosing “Custom Website Code”.
Once in the Custom Website Code window, make sure you choose “Click Tracking Code”.
Copy the code and add it to your landing page of your funnel.
2. Add your Action Conversion Code to your Thank You Page:
You can get your Action Conversion Code by going to the Tools menu in the Campaigns Dashboard, clicking on Website Code, and then choosing “Custom Website Code”.
Once in the Custom Website Code window, make sure you choose “Conversion Tracking Code”. It is also recommended to add “optin” for the cmc_ref value so you can track these as optins.
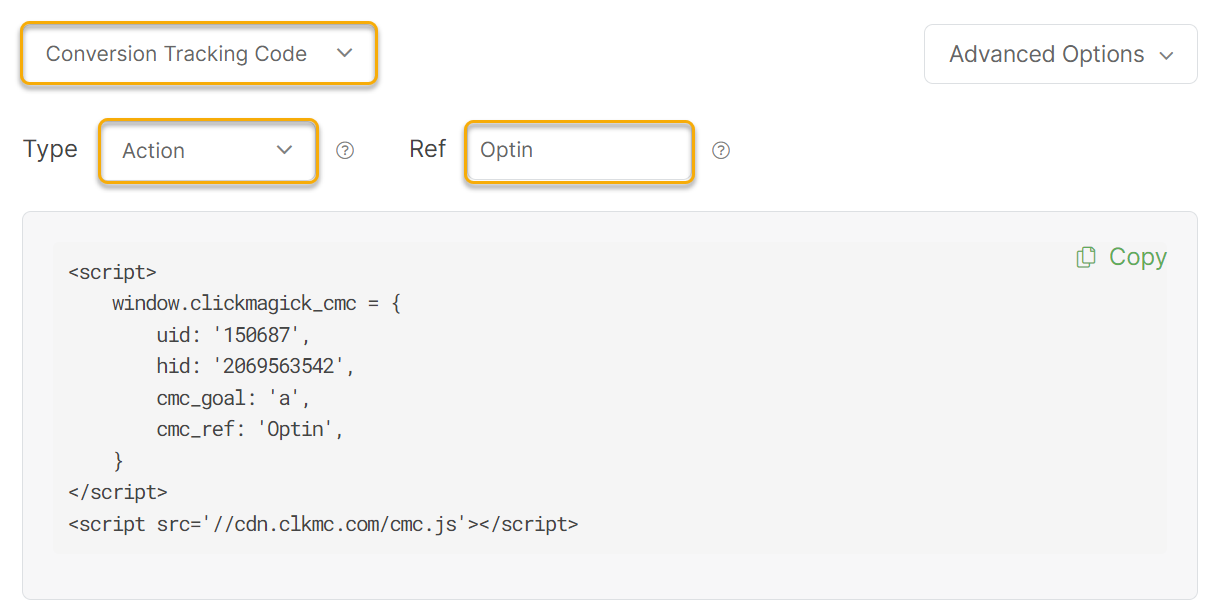
You would take this code and add it to your thank you page.
If you don’t have a thank you page but still want to track your opt-in rate, you’ll want to follow the steps in the article below:
How do I track link or button clicks?
Note: When tracking your opt-in rate, you’ll want to make sure that your opt-in page and thank you page are on the same domain name. If they are not, you’ll want to follow the steps provided in the article below.
What if parts of my funnel are on different domains?
What if parts of my funnel are on different domains?
3. Create a UTM-Powered Link for your opt-in page using the URL Builder:

All you would do now is start to send traffic to your UTM link and you'll be able to see your opt-in rate on the Campaigns Dashboard.
Note: You do have the option to create a short link. It is optional and is not required in order to track your opt-in rate inside of Campaigns.
To get started with tracking your opt-in rate when using tracking links, you will need to follow a few steps.
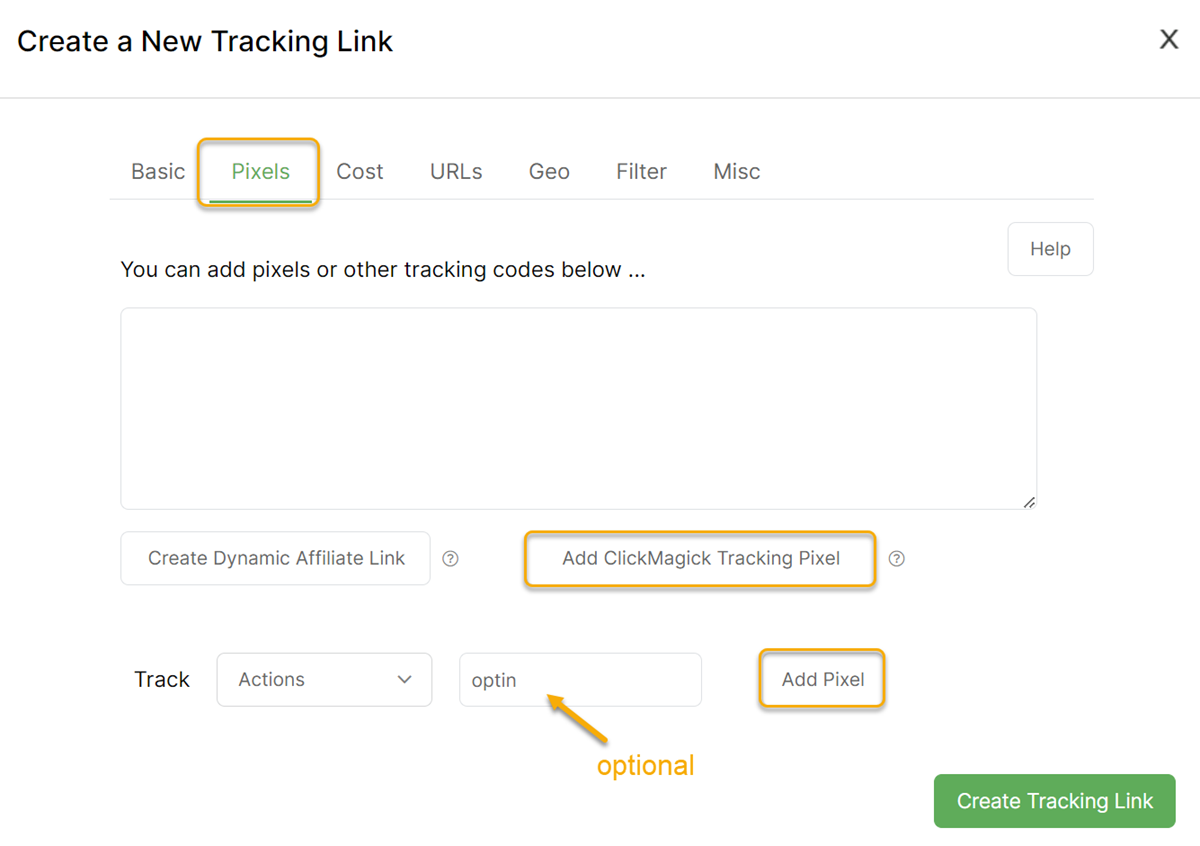
Step 1 – Create an Action Pixel to use on your Thank You Page.
You can get your Action Pixel by going to the Tracking Links dashboard, click on the Tools Menu, hover over Tracking Pixels and then click Pixel Builder
It’s a good idea to use the optional “Reference” value so you can track these as opt-ins.
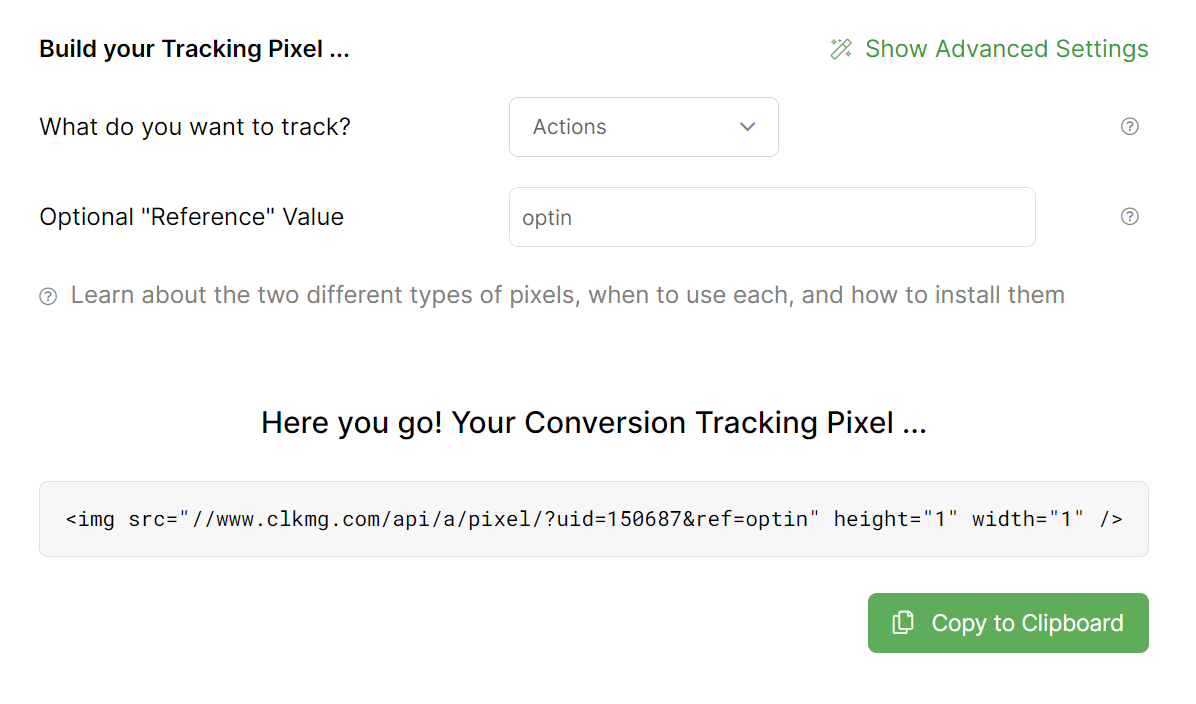
Option 1 – If you are using a Thank You page after your opt-in page, then you would add this tracking pixel to the Thank You page of your funnel and every time someone loads this pixel, it will capture the conversion.
If you are unsure how to add this tracking pixel to your page, here are some resources that may help you:
How to Add JavaScript and Image Tracking Pixels to Your Pages
Option 2 – If you send someone directly to your affiliate link after they opt-in instead of a thank you page, then you will track all of this through Tracking Links.
1. Create a new tracking link that redirects to your affiliate link:
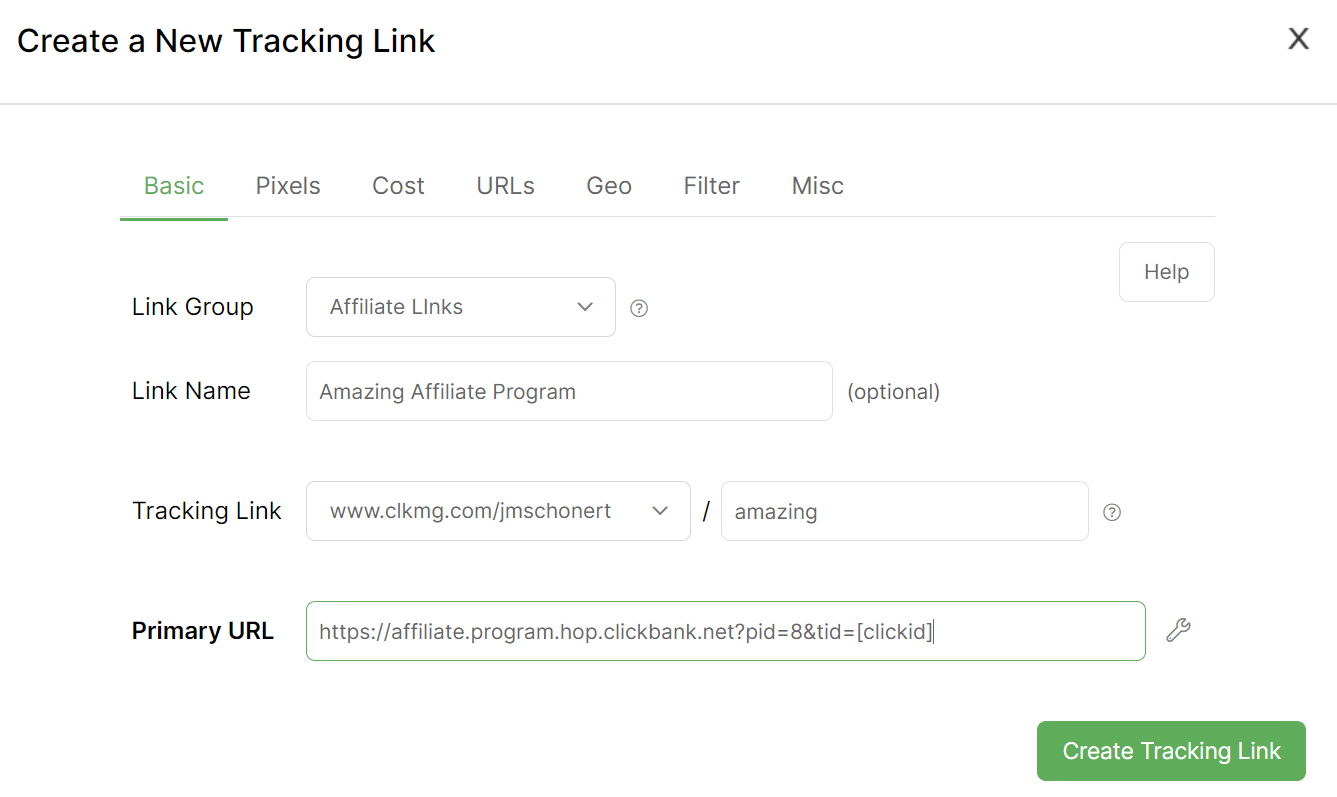
You also will want to add a ClickMagick Action Pixel to the new tracking link:
Once that is done you will need to edit your opt-in page so when someone subscribes they are sent to your new tracking link. That way you are capturing the opt-ins properly and your stats will be correct.
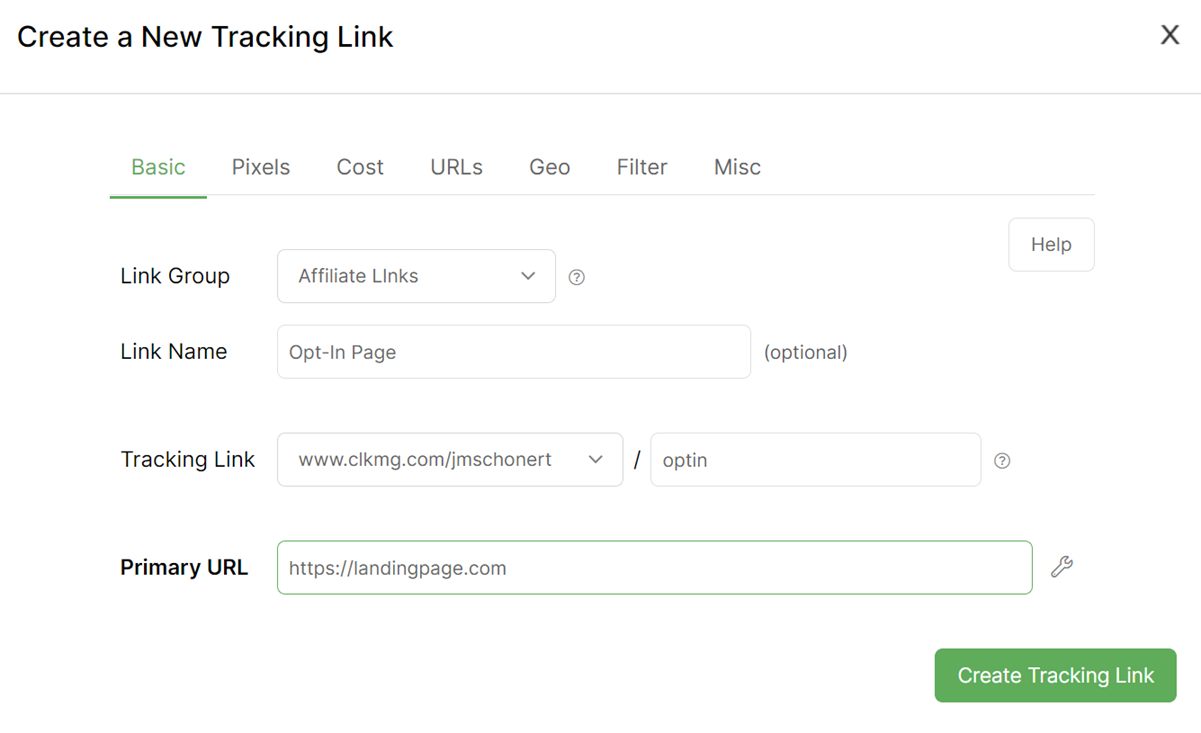
2. Create a Tracking Link for your Opt-In Page
3. Start using it in your advertising or social media profiles to start tracking your email opt-in rate.
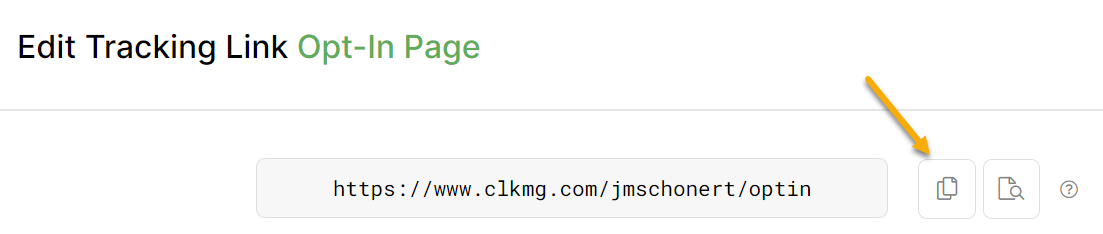
Now when someone clicks on the tracking link for your opt-in page and subscribes, you will be able to see your Action populate in ClickMagick.

Article 662 Last updated: 07/29/2023 3:50:08 PM
https://www.clickmagick.com/kb/?article=662