|
How do I track WooCommerce sales in ClickMagick?
Here’s how to set up tracking with WooCommerce …
Step 1 – Install your Click Tracking Code
If you haven’t already, install your Click Tracking Code on any WordPress page(s) you’re currently sending traffic to. You can learn how to do that here:
How do I add tracking pixels or JavaScript code to WordPress?
Step 2 – Add your Engagement Tracking Code
Add the following code to your checkout page. You can use the link above to learn how to add code to your site.
<script>

    window.clickmagick_cmc = {

        uid: '[USERID]',

        hid: '[HID]',

        cmc_goal: 'e',

        cmc_ref: 'checkout',

        vid_info: 'on',

    }

</script>

<script src='//cdn.clkmc.com/cmc.js'></script>
This will track people who reach your checkout page as an Engagement in ClickMagick. It also collects their email address and other personal information to add to their Visitor Profile.
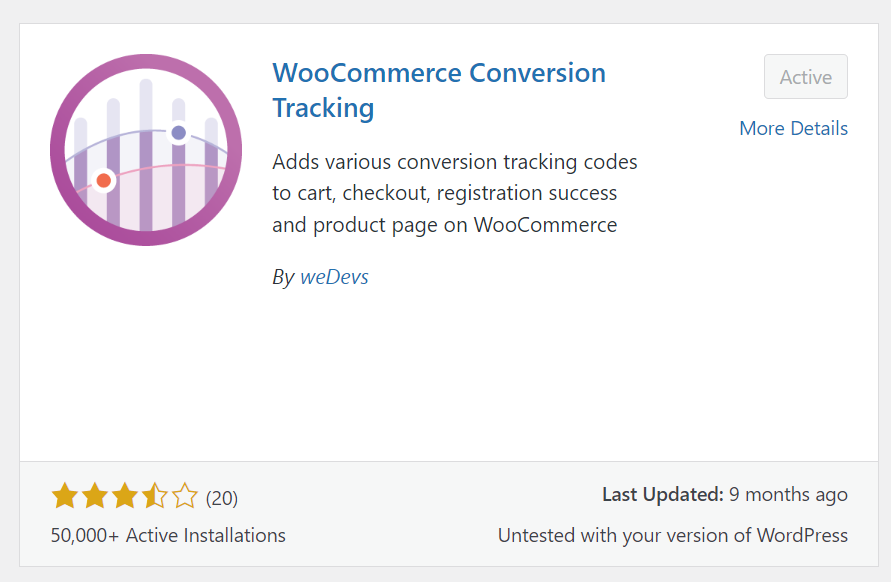
Step 3 – Install Sales Tracking Plugin
Download a free WordPress plugin called “WooCommerce Conversion Tracking” and activate the plugin:
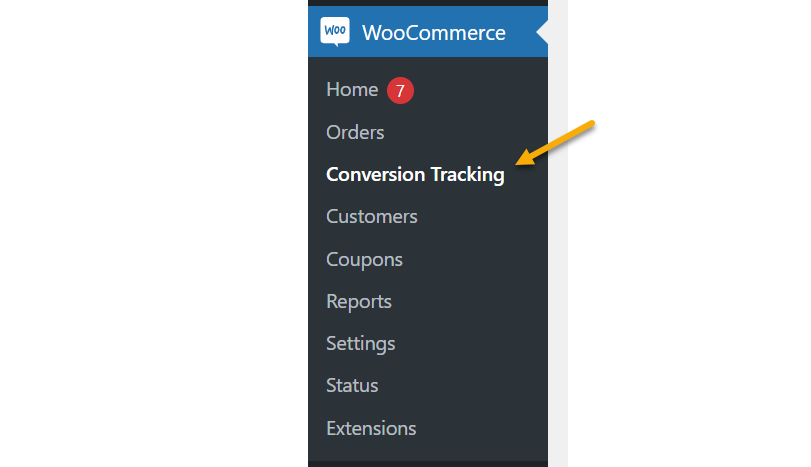
Step 4 – Add your Sales Tracking Code
Once you have the plugin installed you’ll see a “Conversion Tracking” option in your WooCommerce menu:
Click “Conversion Tracking” and activate the “Custom” section:
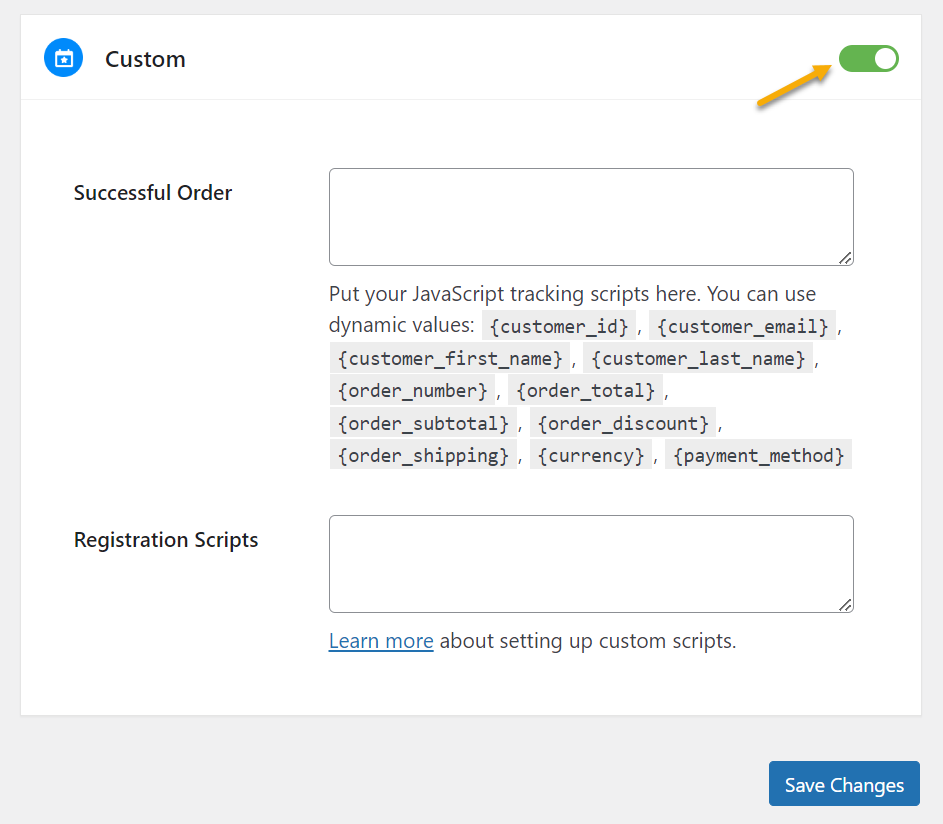
Add the Sales Tracking Code below to the “Successful Order” box, then save your changes:
<script>

    window.clickmagick_cmc = {

        uid: '[USERID]',

        hid: '[HID]',

        cmc_goal: 's',

        cmc_ref: 'purchase',

        cmc_amt: '{order_total}',

        cmc_currency: '{currency}',

    }

</script>

<script src='//cdn.clkmc.com/cmc.js'></script>
Step 5 – Set Up the optional WooCommerce Webhook
As WooCommerce isn’t always 100% reliable in loading your thank you page, we recommend setting up a WooCommerce webhook following the instructions below to make sure no sales are missed.
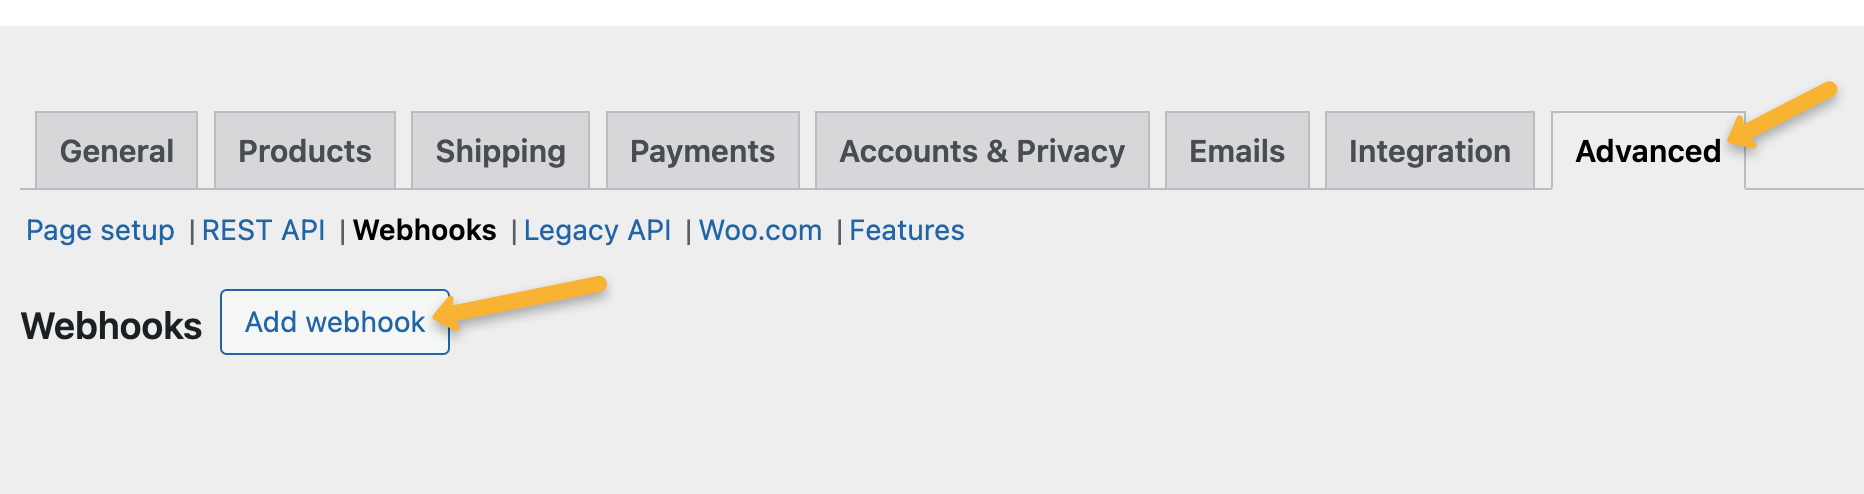
In Wordpress, go to WooCommerce and click on Settings.
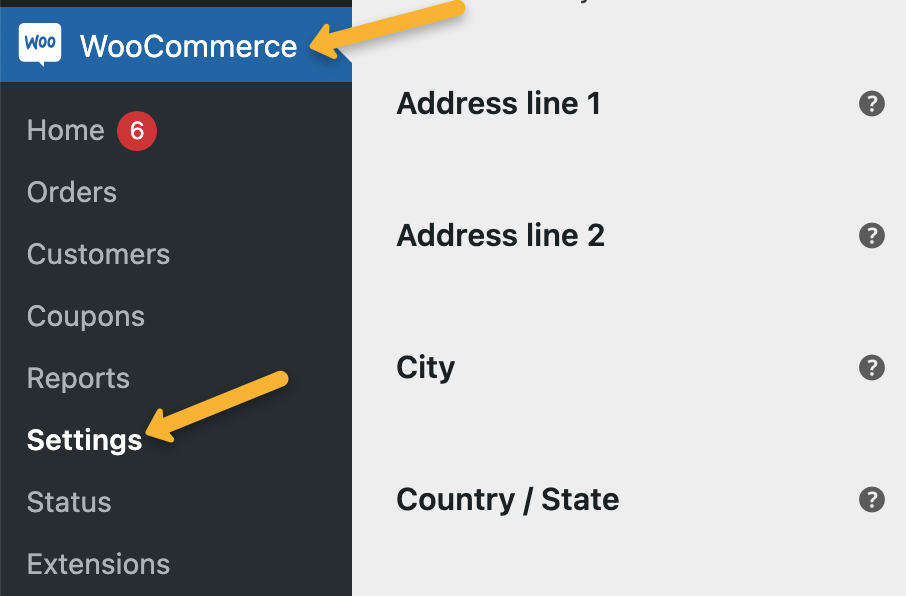
Then go to Advanced and click on “Add webhook”.
Enter the following details:
Name – ClickMagick Sales Webhook
Status – Active
Topic – Order updated
Delivery URL –
https://www.clickmagick.com/user/account/integrations/woocommerce/?uid=[USERID]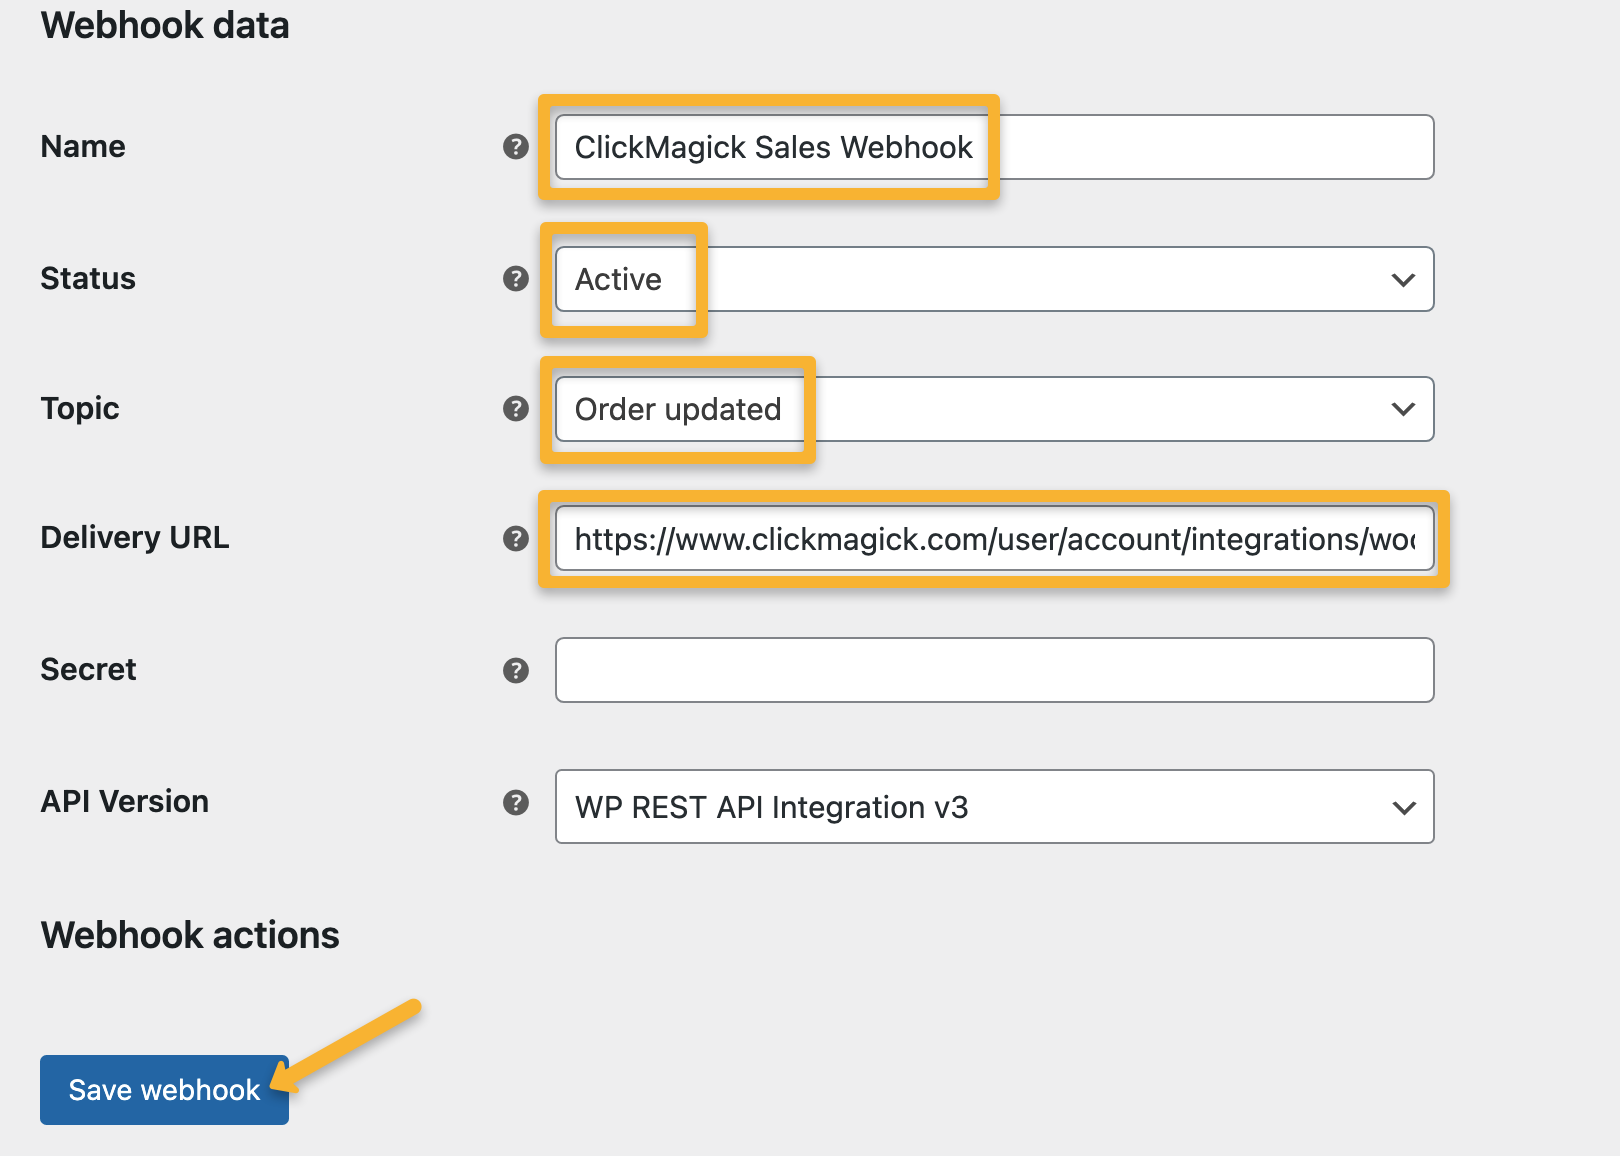
Just hit “Save webhook” and that's it!
Webhook notes:
1. If a customer doesn’t reach your thank you page for any reason, the sale will be properly tracked by the webhook, but it can take up to 3-5 minutes for the sale to appear in ClickMagick.
2. Any “missed” sales tracked via the webhook will have a default “ref” value of “purchase”. If you’d prefer, you can set these ref values to the actual order number by adding
&ref=number to the end of your Delivery URL like this:https://www.clickmagick.com/user/account/integrations/woocommerce/?uid=[USERID]&ref=number3. If you use a plugin like FunnelKit or any other plugin that modifies the status of your WooCommerce orders, you’ll need to use a slightly different Delivery URL. Just add
&process_status=completed like so:https://www.clickmagick.com/user/account/integrations/woocommerce/?uid=[USERID]&process_status=completedOptional Dynamic Tracking Tokens
In almost all cases, the sales tracking code we provided in step 4 is recommended. However, if you’d like to track other values such as the order number or order subtotal, you can use these tokens in your sales tracking code:
{customer_id} |
ID of your customer |
{customer_email} |
Email address of your customer |
{customer_first_name} |
First name of your customer |
{customer_last_name} |
Last name of your customer |
{order_number} |
Order number |
{order_total} |
Total amount of the order (after discounts) |
{order_subtotal} |
Subtotal of the order (before discounts) |
{order_discount} |
Discount amount of the order |
{order_shipping} |
Shipping amount of the order |
{currency} |
Currency type of the order |
{payment_method} |
Payment method of the order |
In the example below, we’re tracking the order number as the “ref” value and order subtotal as the amount:
<script>

    window.clickmagick_cmc = {

        uid: '[USERID]',

        hid: '[HID]',

        cmc_goal: 's',

        cmc_ref: '{order_number}',

        cmc_amt: '{order_subtotal}',

        cmc_currency: '{currency}',

    }

</script>

<script src='//cdn.clkmc.com/cmc.js'></script>
Note that email address, first name and last name are already collected automatically in the code on your checkout page.
For more information on how to set up conversion tracking with WooCommerce see their article here.
Article 685 Last updated: 03/29/2024 5:51:45 PM
https://www.clickmagick.com/kb/?article=685