|
How do I create a custom form in Mailchimp?
Cross-device tracking is an excellent way to keep track of potential customers that sign up to your list on one device, but then make the purchase another time on another browser or device.
If you rely on email follow-ups to drive your sales cycle, cross-device tracking is critical to getting the most accurate stats possible to scale your traffic and optimize your business.
This article will show you how to create a custom form in Mailchimp that will work with cross-device tracking.
If you have not created your
cmc_vid field yet, please review the article below related to cross-device tracking and make sure your custom field is created in Mailchimp before continuing this process. How do I set up cross-device tracking using Campaigns?
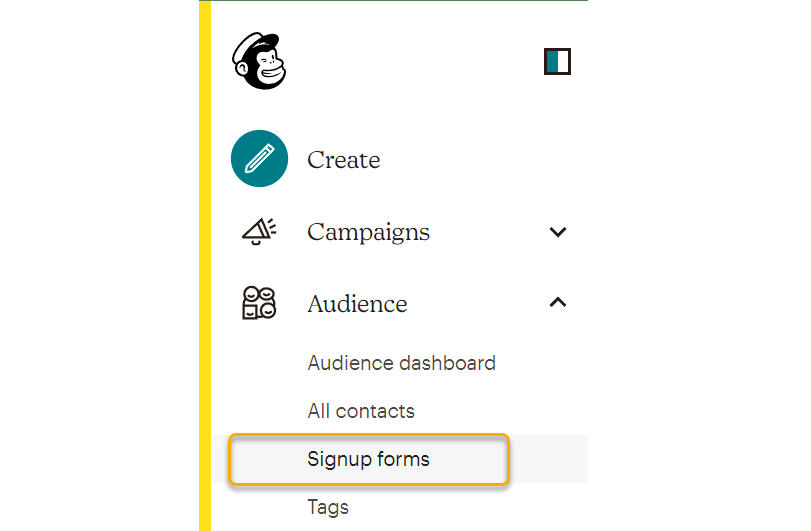
1. In Mailchimp, expand the Audience menu and click on “Signup Forms.”
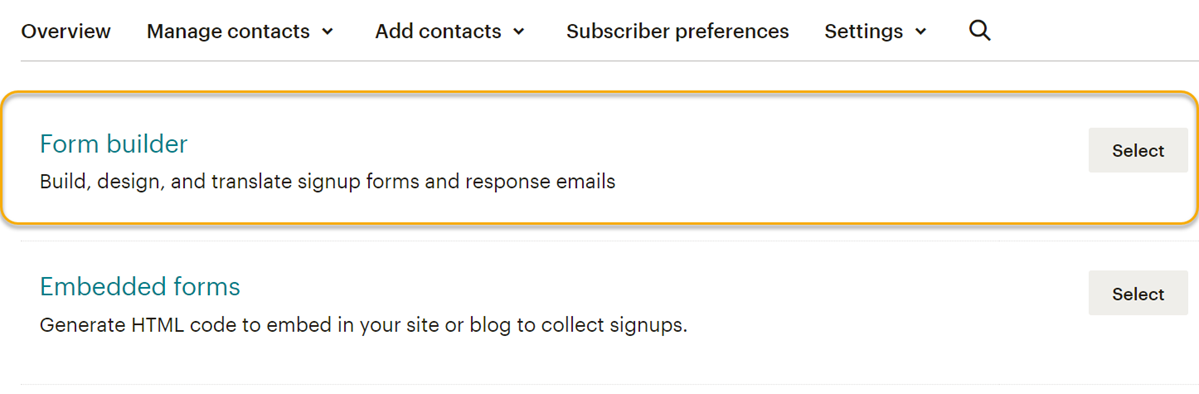
2. Click on Form Builder first to update the form builder information.
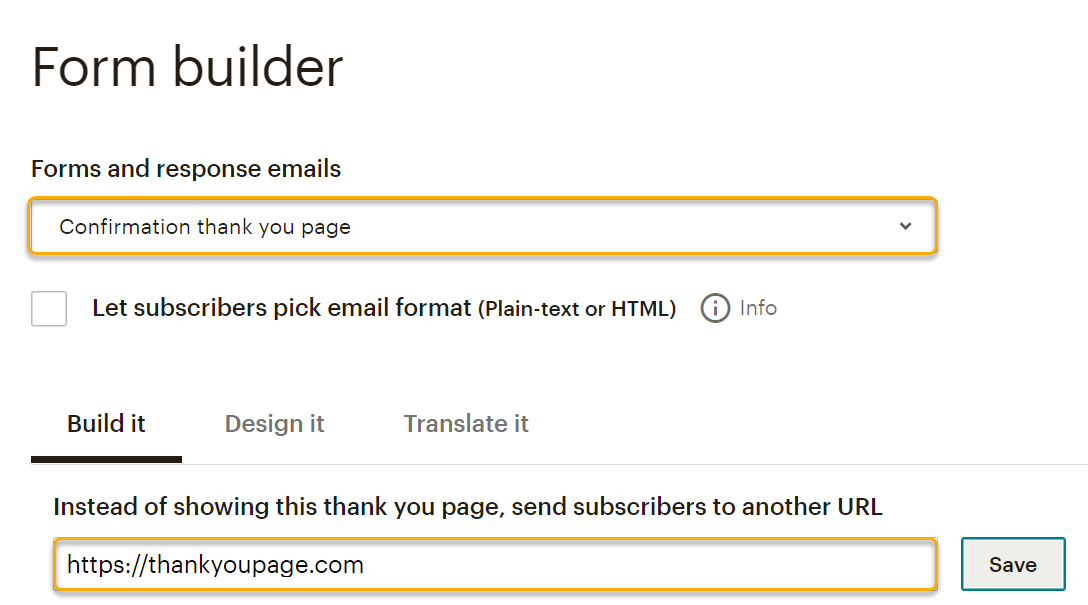
3. Inside Form Builder, Update the “Forms and response emails” dropdown to say “Confirmation thank you page”. Leave the checkbox underneath this value blank, and then update the URL to be your thank you page.
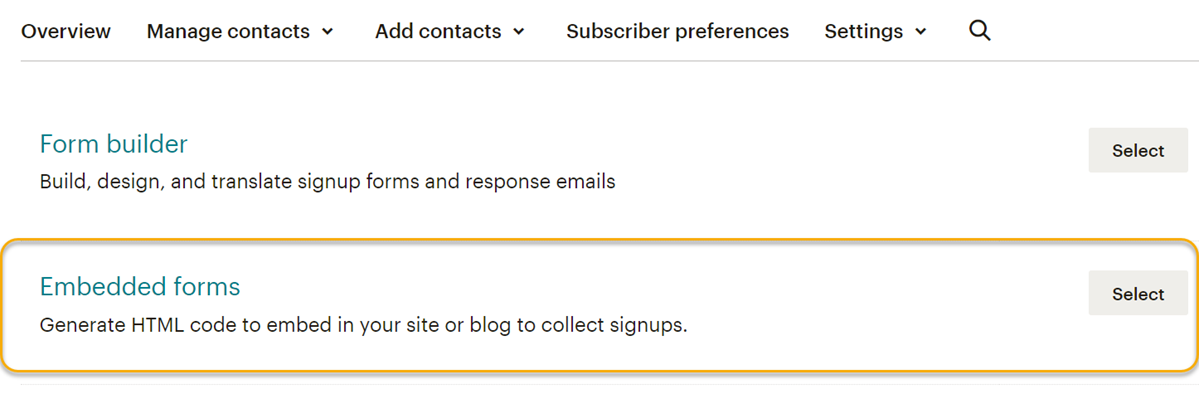
4. Go back to the Signup Forms page, and click on “Embedded Forms” to build your form.
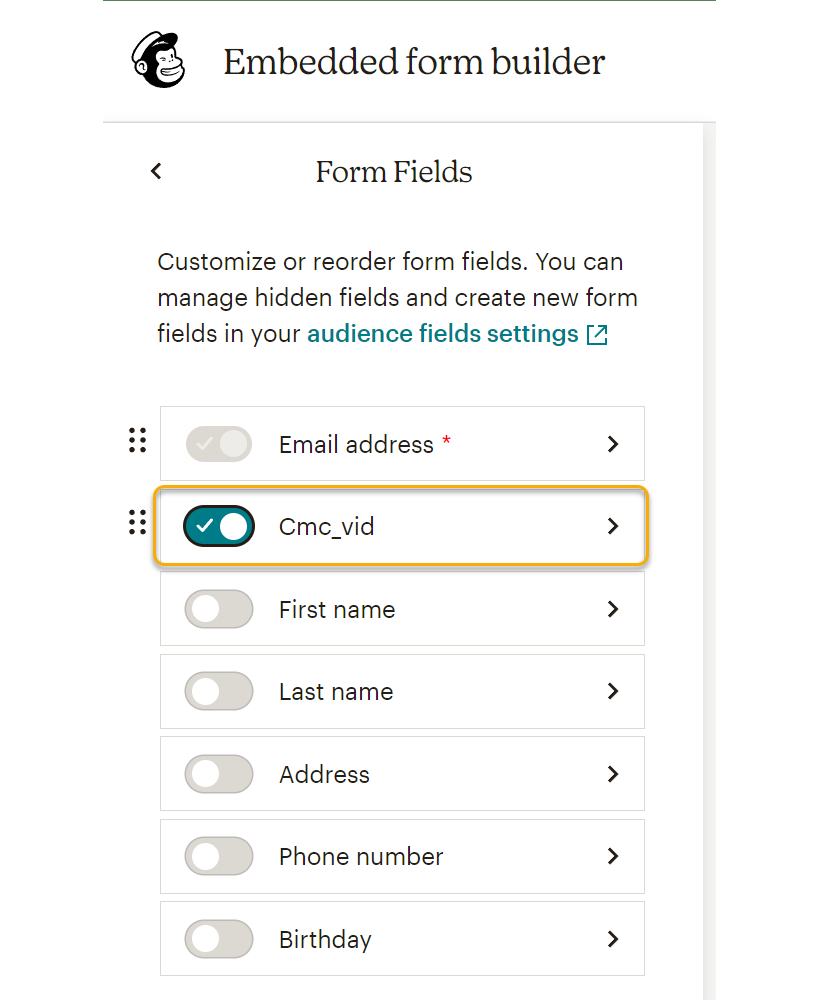
5. Once you’re on the Embedded Forms page, you must first add the custom field you created. Click on the Form Fields menu and enable the “cmc_vid” field.
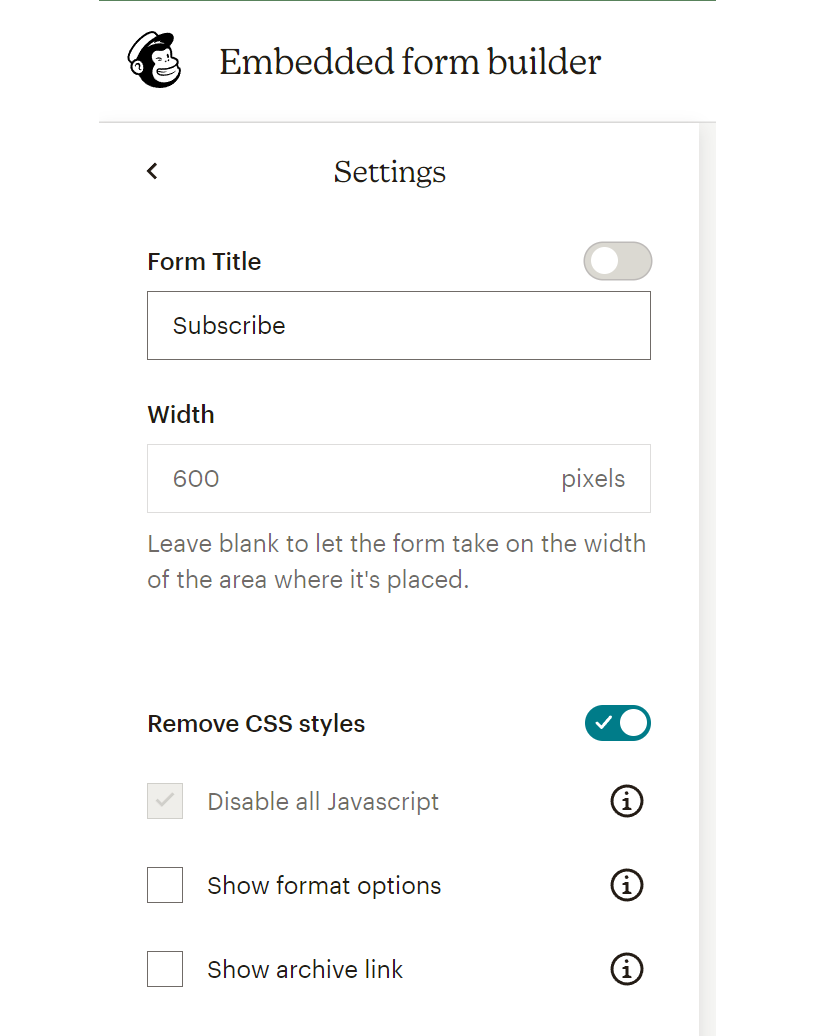
6. Then, go into the Settings menu, turn off the “Form Title" and enable the option that says “Remove CSS Styles”.
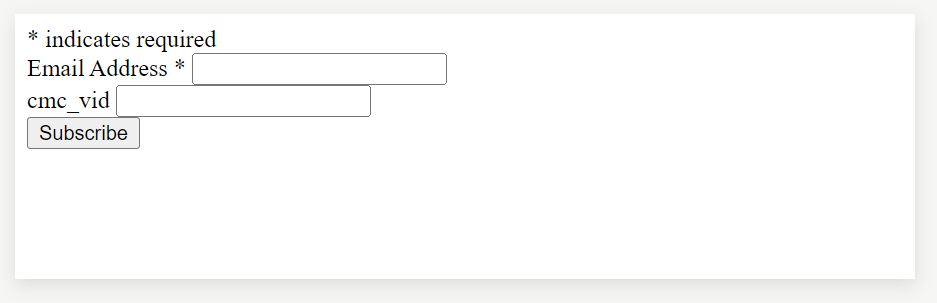
7. With all of this done, your form should look like this:
8. Click the Continue button up on the top right of the page, which will take you to the page where you’ll get your embed code.
9. Copy the code from the page and paste it into a text editor app, like Notepad.
10. Once you have the code copied in the text editor, look for the information where your custom field is referenced, like below:
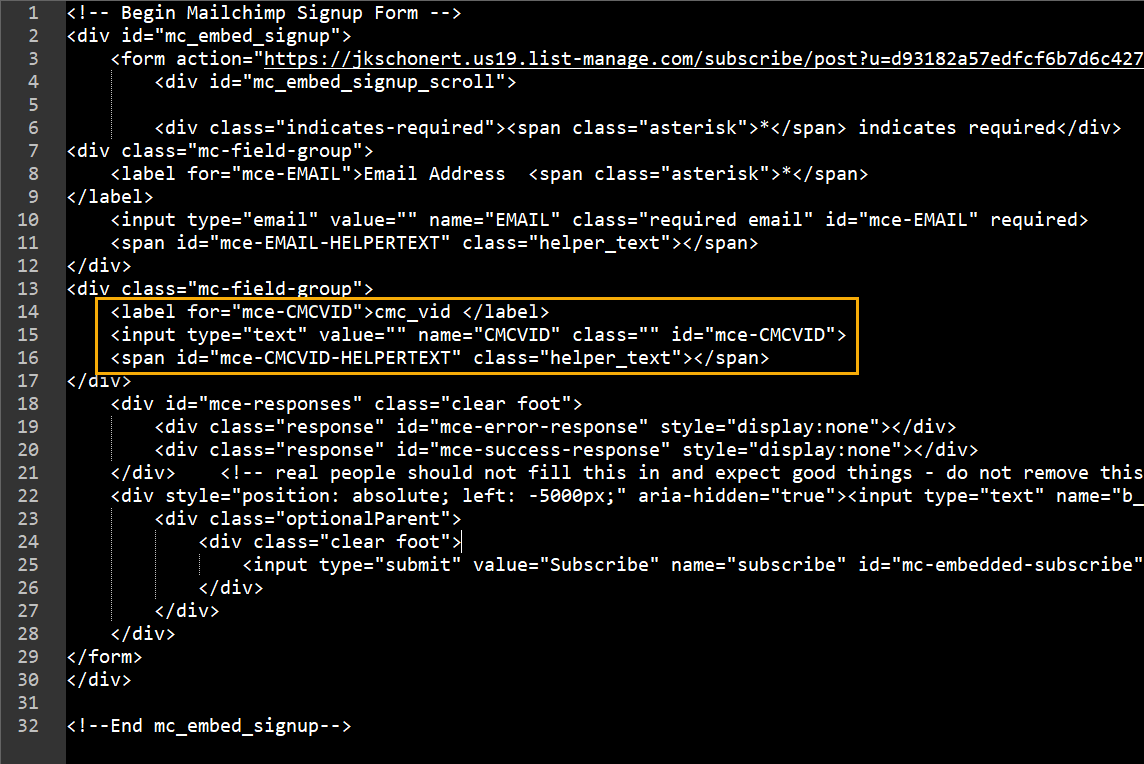
11. Update the second line in that group (where it says “
input type=”) to show hidden instead of text, and then add [cmc_vid] to the “value=” portion. Once completed, it should look like this: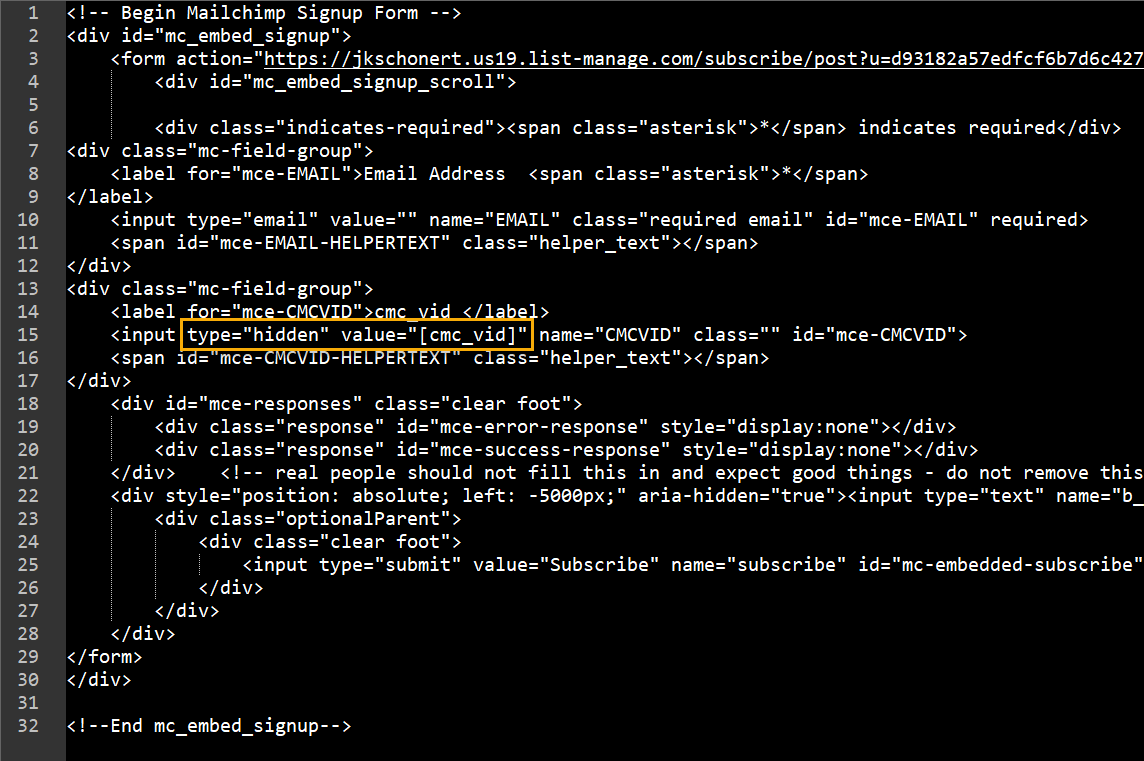
12. Lastly, check on the ‘
<form action=’ line at the top and see what the target is listed as. If you see target=_self , you should be able to leave it, and it will open your thank you page in the same window. If you see target=_blank, then you will need to change it to target=_self so it opens your thank you page in the same window, or remove it completely (which defaults to the same window anyway). This is the portion we’re referencing: 
And that’s it! You’ve now created a custom form in Mailchimp that will work with cross-device tracking.
Article 825 Last updated: 03/13/2023 11:11:00 AM
https://www.clickmagick.com/kb/?article=825