|
How do I create a custom form in ActiveCampaign?
Cross-device tracking is an excellent way to keep track of potential customers that sign up to your list on one device, but then make the purchase another time on another browser or device.
If you rely on email follow-ups to drive your sales cycle, cross-device tracking is critical to getting the most accurate stats possible to scale your traffic and optimize your business.
This article will show you how to create a custom form in ActiveCampaign that will work with cross-device tracking.
If you have not created your
cmc_vid field yet, please review the article below related to cross-device tracking and make sure your custom field is created in ActiveCampaign before continuing this process. How do I set up cross-device tracking using Campaigns?
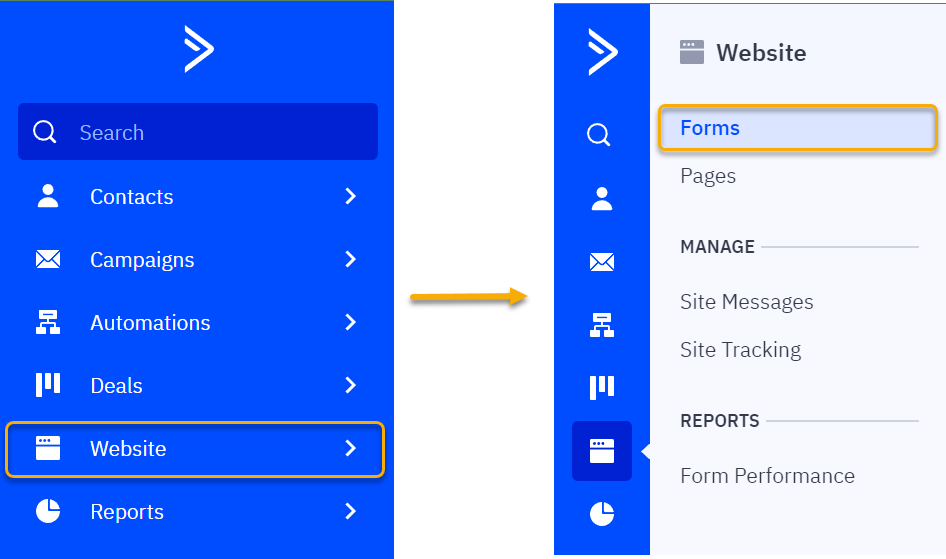
1. In ActiveCampaign, click on the Websites menu and then click on “Forms”
2. Click “Create a Form” at the top right to open the form creation window.
3. Once the form creation window pops up, give your form a name, choose the inline form, and select the correct list in the “Options” dropdown.
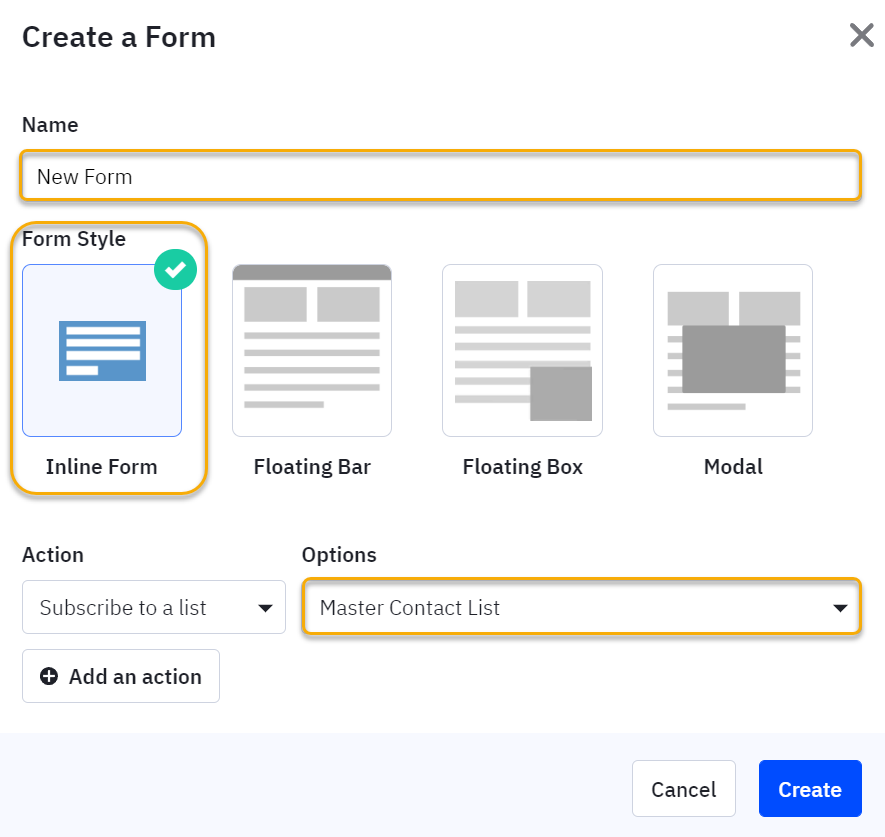
4. Click “Create” to create the form.
5. Once on the form settings page, the first thing you will need to do is add the custom field that you created.
On the right side, you’ll see a “Custom Fields” section. Find the “cmc_vid” field and drag it over to your form.
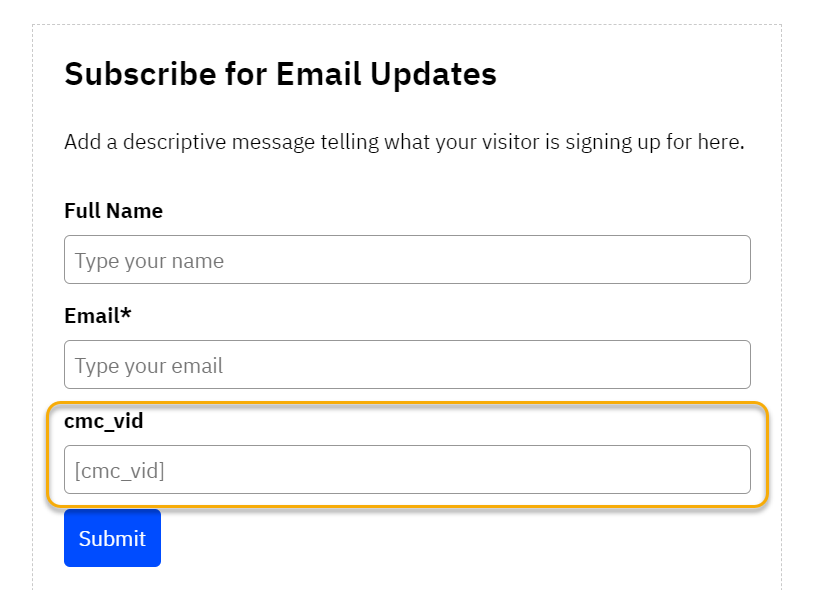
6. Once the field is added, click on the field to open up the field settings on the right side.
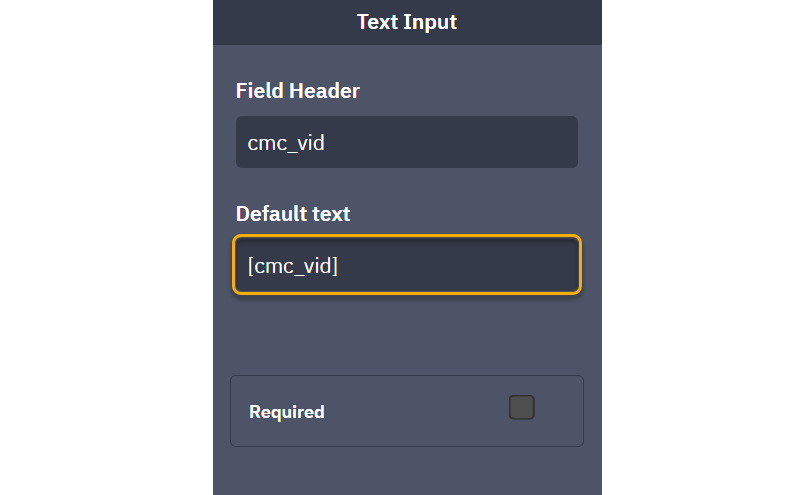
7. In the field settings, also labeled “Text Input,” you may need to add a piece of default text. If that box is blank, add
[cmc_vid] to that box.Then, make sure the “Required” box is unchecked. Once you are finished, it should look like this:
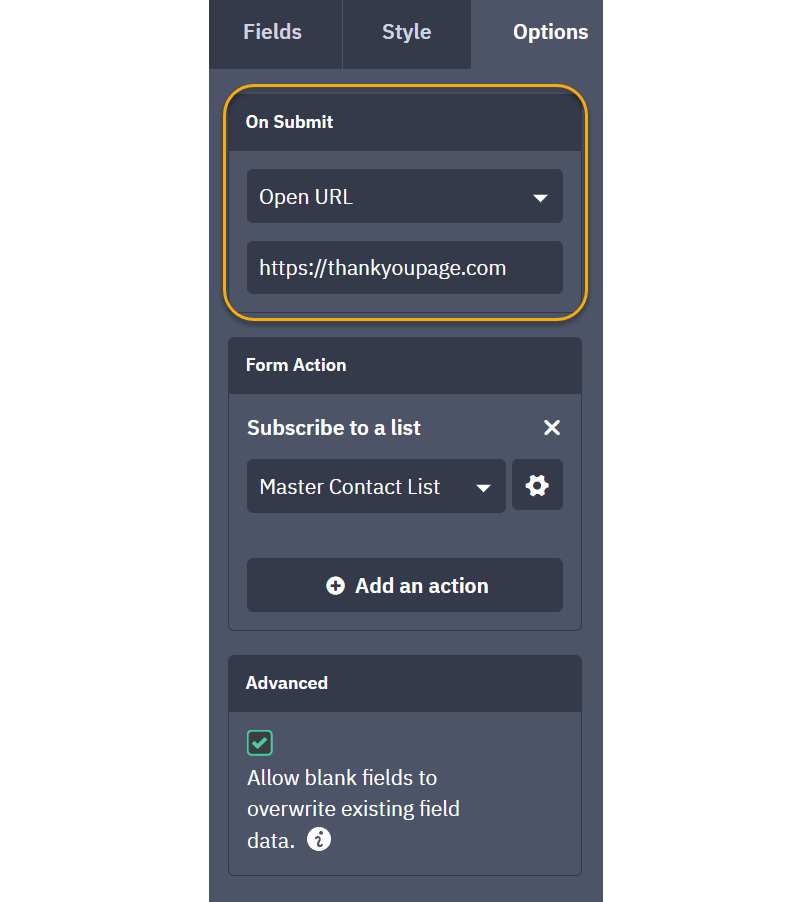
8. Click off the page and then go back to the right side. Click on the “Options” tab, and then update the “On Submit” values to “Open URL” and put your thank you page in the box for the URL.
9. Now that you’ve set up your form, click “Integrate” in the top right corner to get to the embed code.
10. Copy the embed code and paste it into a text editor, like Notepad.
11. Once it is copied into a text editor, you must remove the “style” and the “script” portions of the code.
12. First, we will remove the “style”, as it’s at the top. Use the find command (Ctrl+F on Windows, Cmd+F on Mac) and search for “/style”. When you find it, remove everything from there to the TOP of the code, including
</style>. 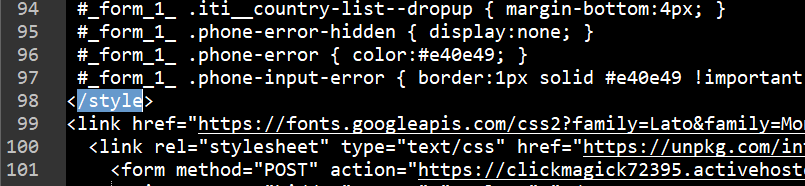
13. You’ll need to find the “script” portion to remove. Bring up the find command again and search for “/form”. When you find it, then you will need to remove everything AFTER
</form>. 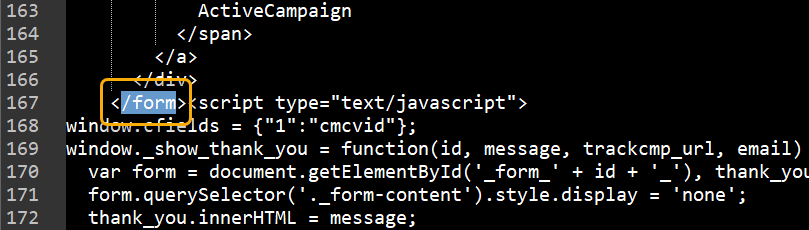
And that’s it! You’ve now created a custom form in Mailchimp that will work with cross-device tracking!
Article 826 Last updated: 03/13/2023 11:11:15 AM
https://www.clickmagick.com/kb/?article=826