|
How do I add a custom form from my autoresponder to Stealth Seminar?
Cross-device tracking is an excellent way to keep track of potential customers that sign up to your list on one device, but then make the purchase another time on another browser or device.
If you rely on email follow-ups to drive your sales cycle, cross-device tracking is critical to getting the most accurate stats possible to scale your traffic and optimize your business.
This article will show you how to add a custom form to Stealth Seminar so you can use cross-device tracking.
If you have not created your
cmc_vid field or the custom form in the autoresponder you are using, please review the article below related to cross-device tracking. and make sure your custom field and form are created before adding anything to Stealth Seminar.How do I set up cross-device tracking using Campaigns?
How to Add Your Custom Form From Your Autoresponder to Stealth Seminar:
For StealthSeminar, the same steps work for any autoresponders connected to StealthSeminar as a plugin. This includes all of the autoresponders we have used as part of the cross-device tracking setup.
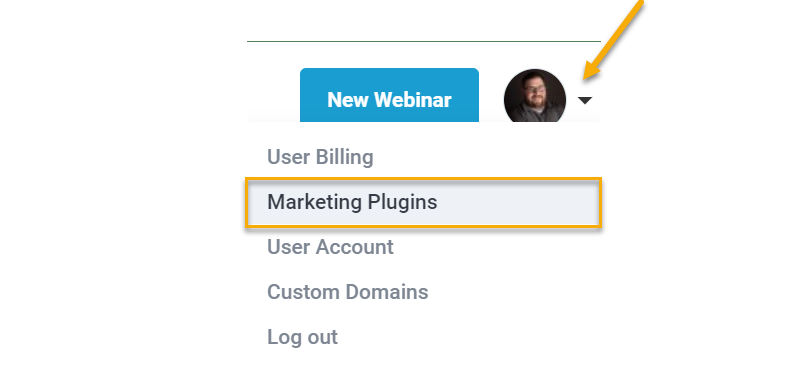
Before going through the steps, you need at least one autoresponder connected to StealthSeminar. The steps below can help you through that if needed.
How to connect an autoresponder to StealthSeminar
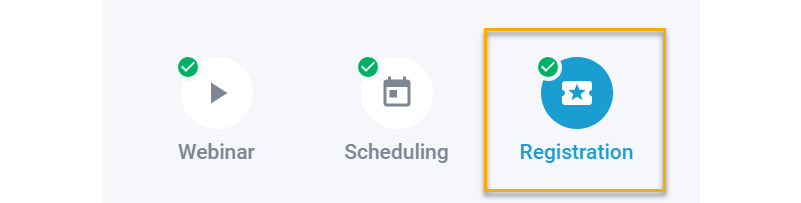
1. Edit the webinar inside of StealthSeminar that you want to set up this custom form.
2. Click on “Registration” to view the registration settings.
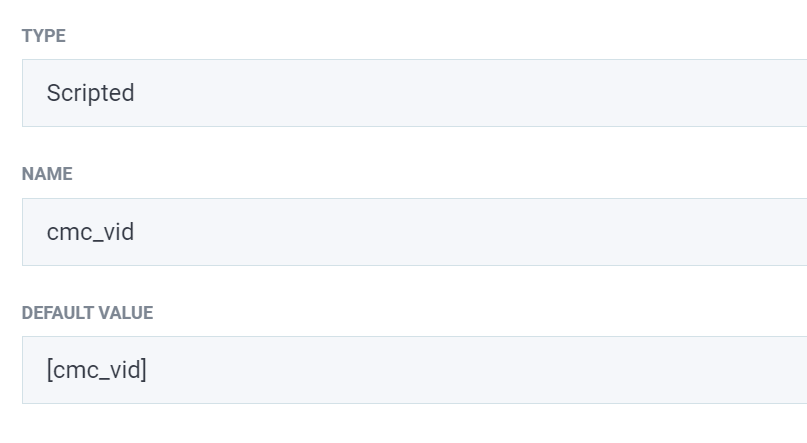
3. Scroll down until you find “Registration Fields” and click edit.

4. Add a new field and choose “Scripted” as the type, use “cmc_vid” as the name, and then “[cmc_vid]” as the default value.
5. Click “Add Field" underneath this form, and then click “Save” at the top right of the “Registration Fields” window.
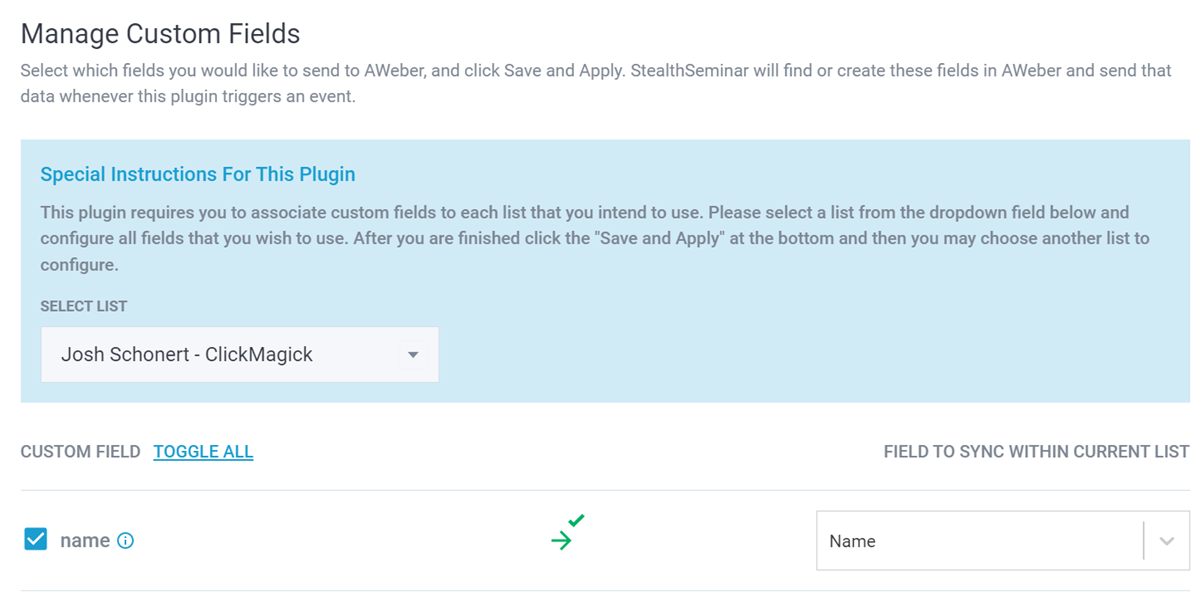
Note: A window should pop up automatically once you hit save to map your custom field. If this does not happen, go to the Plugins menu and then click “View” next to your connected autoresponder
6. Select the appropriate list for the leads to go into, then check the box next to the custom field you just created and sync it with the
cmc_vid field you already have created in your autoresponder.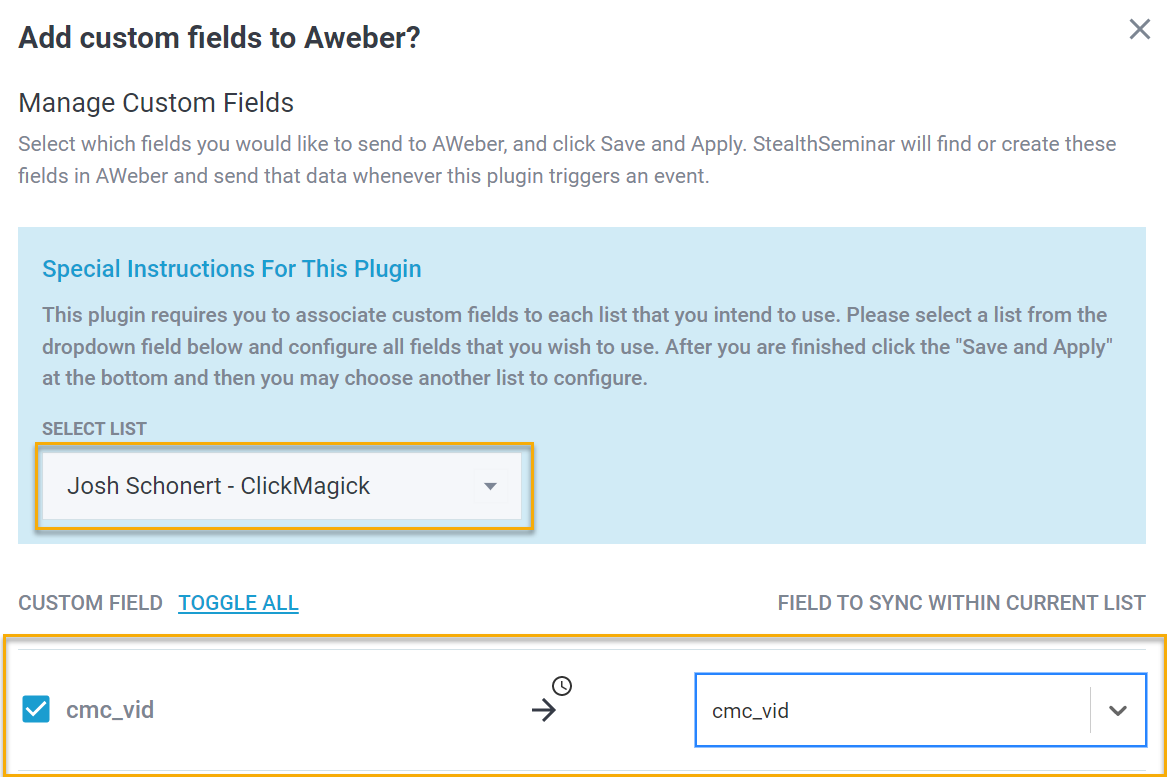
7. Click “Save and Apply”
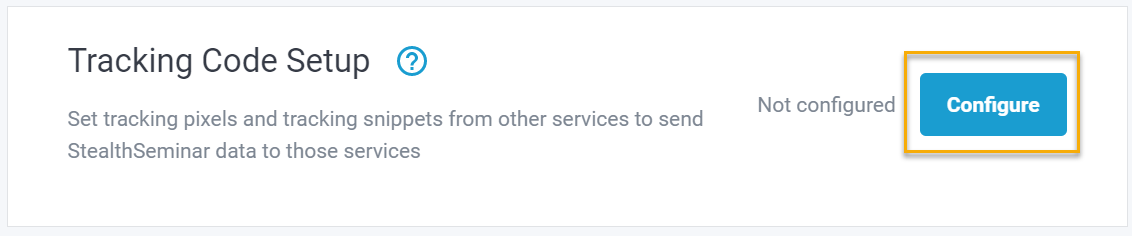
Now we need to set up the custom codes
8. On the webinar's main editor page, click “Miscellaneous” on the right.

9. Find the “Tracking Code Setup” section and click Configure.
10. Copy the following code and paste it into the “Inside Head” box of the Registration Page section.
<script>

    window.clickmagick_cmc = {

        uid: '[USERID]',

        hid: '[HID]',

        vid: '',

    }

</script>

<script src='//cdn.clkmc.com/cmc.js'></script>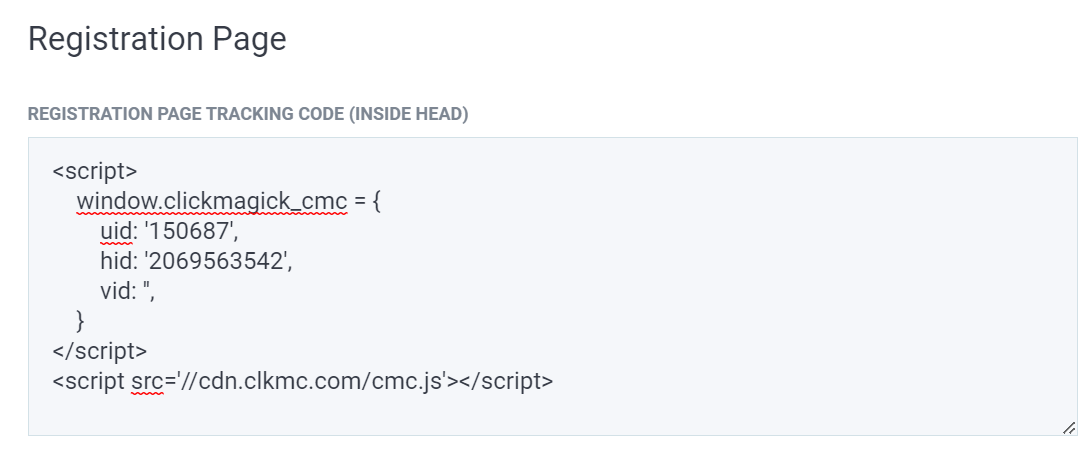
11. Copy this next code below and paste it inside the “Bottom of Page” box in the Registration Page section.
<script>document.querySelector("input[name='customFields.cmc_vid']").value = clickmagick_cmc.vid; </script>
12. Save the tracking code settings.
And that’s it! You’ve now connected your autoresponder to StealthSeminar to track visitor IDs for Cross-Device Tracking!
If you use a Custom Registration Page, you’ll want to follow the steps in the article below:
How do I set up cross-device tracking using Stealth Seminar Custom Pages?
Article 838 Last updated: 03/13/2023 12:23:18 PM
https://www.clickmagick.com/kb/?article=838